Easy Apple Slices Recipe: Sweet Treats Ready in Minutes
Crisp apple slices craft ordinary snacks into delightful culinary experiences that spark joy and creativity in kitchens everywhere.
Perfectly cut pieces burst with natural sweetness and vibrant flavor, promising a refreshing treat for hungry souls.
Selecting the right apple variety matters tremendously for achieving that ideal balance between tartness and sugary delight.
Knife skills play a crucial role in creating uniform, elegant segments that look as amazing as they taste.
Texture and presentation elevate these simple fruit pieces from mundane to magnificent, making them irresistible to both children and adults.
Minimal ingredients and quick preparation guarantee a hassle-free snacking adventure that connects you with wholesome, fresh goodness.
Minimal effort yields maximum satisfaction in this straightforward yet elegant approach to enjoying nature’s sweet bounty.
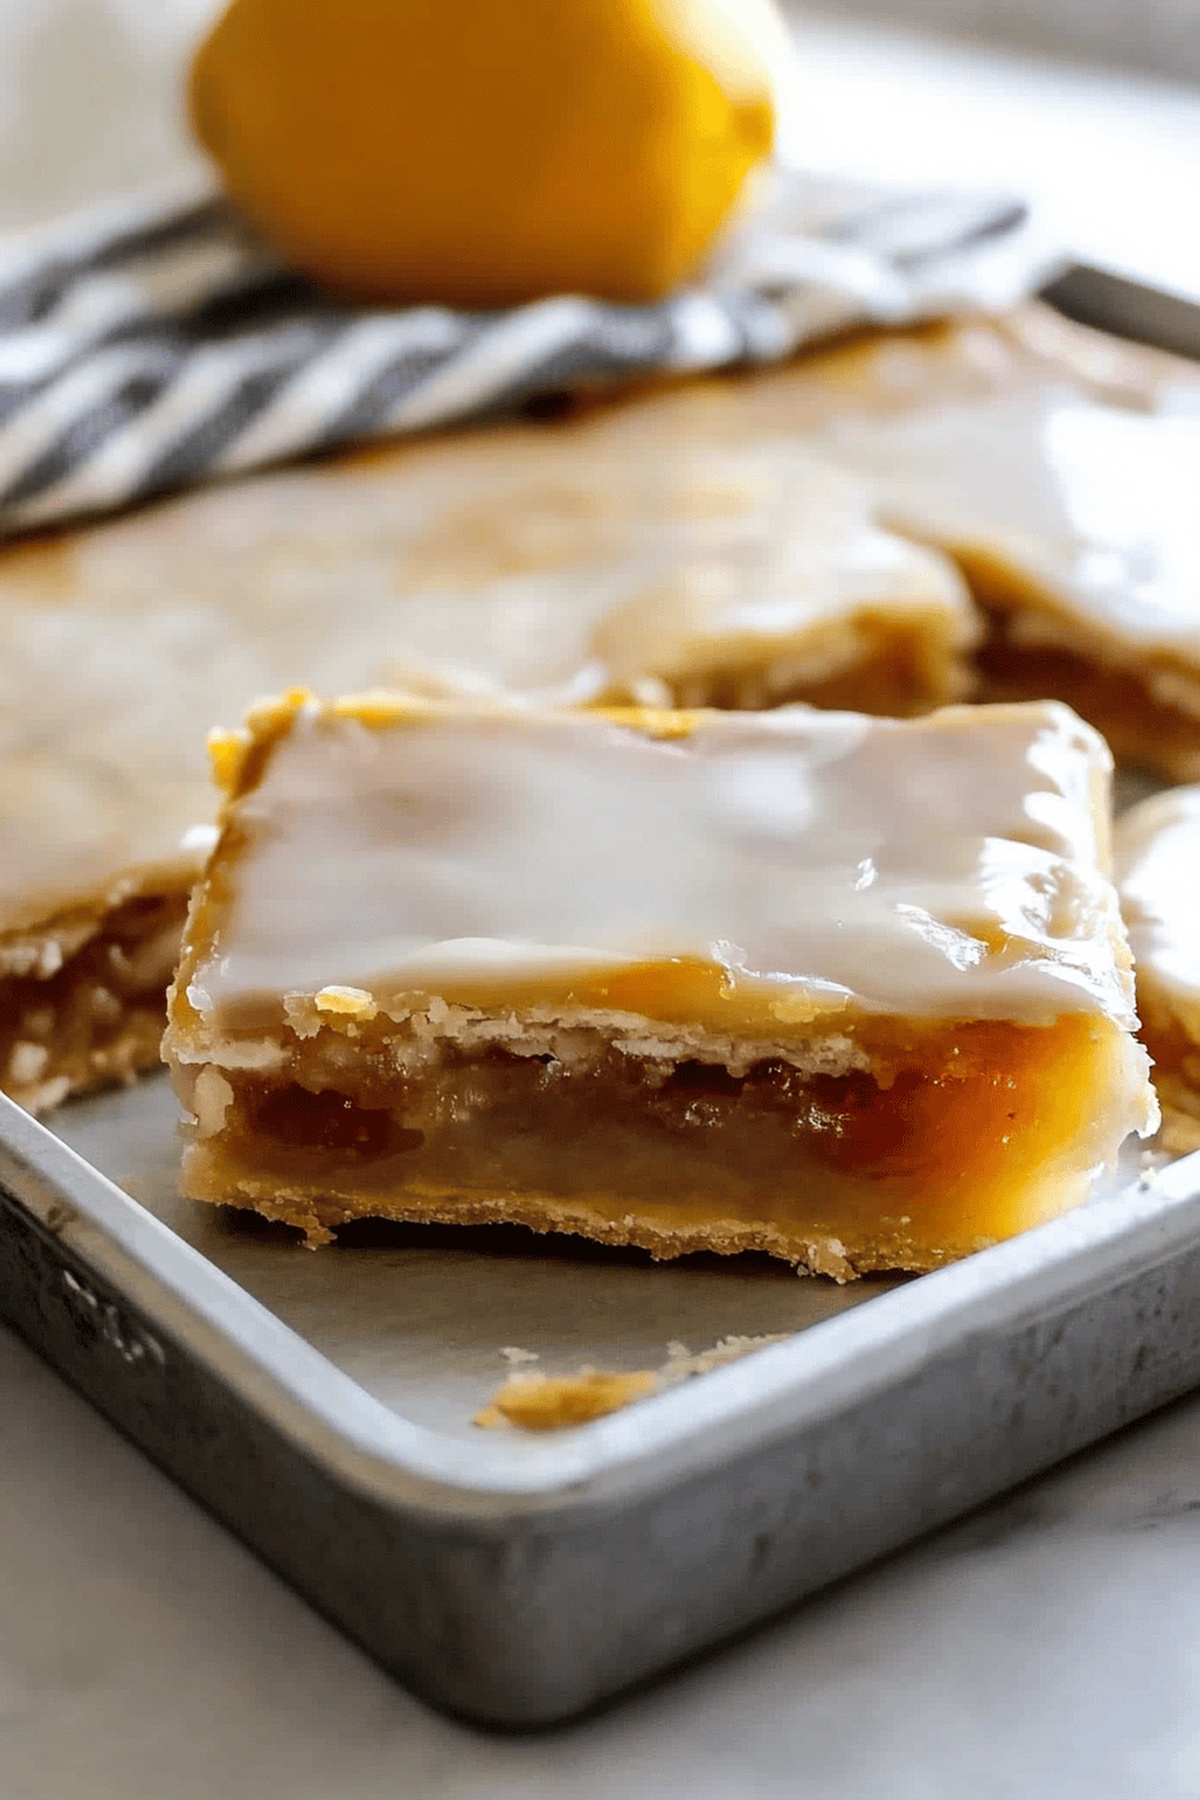
Apple Slices That Make the Perfect Snack
Everything You Need for Apple Slices
Pastry Base Ingredients:Liquid Ingredients:Filling and Topping Ingredients:Steps to Prepare Simple Apple Slices
Step 1: Prepare Oven and Ingredients
Warm the oven to 400°F. Gather these ingredients:Step 2: Create Dry Mix
Sift flour, baking powder, and salt into a spacious mixing bowl. The goal is creating a light, airy foundation.
Step 3: Incorporate Lard
Add lard to the flour blend. Use fingertips or pastry cutter to break down lard until mixture resembles rough, sandy crumbs.
Step 4: Make Liquid Blend
In a measuring cup, combine:Gently pour this liquid mixture over flour blend. Softly mix with fork until dough forms a moist, cohesive texture.
Step 5: Spread First Dough Layer
Split dough into two portions. Press one half into a 9×13-inch jelly roll pan, slightly pushing dough up edges.
Step 6: Add Apple Filling
Distribute apple dessert filling evenly across the first dough layer.
Step 7: Create Top Crust
Roll remaining dough to match pan size. Carefully drape over apple filling. Pinch edges together, sealing any gaps. Cut several steam vents across top.
Step 8: Bake to Golden Perfection
Slide pan into preheated oven. Bake 40 minutes, rotating midway. Watch for rich golden-brown crust.
Step 9: Craft Smooth Glaze
Whisk together:Adjust milk for ideal spreading consistency.
Step 10: Final Touch
Once cooled, spread glaze using offset spatula. Allow glaze to set. Slice into 2-3 inch squares. Serve and savor!
Tips to Keep Apple Slices Fresh and Crisp
Storage and Reheating for Sliced Apples
Snacks and Sips to Enjoy with Apple Slices
Apple Slice Serving Ideas and Mix-Ins
Print
Apple Slices Recipe
- Total Time: 1 hour
- Yield: 8 1x
Description
Cinnamon-Kissed Apple Slices bring warmth from classic American kitchens with simple ingredients. Crisp fruit meets sweet spice, creating a delightful treat you can savor with minimal effort and maximum enjoyment.
Ingredients
Main Ingredients:
- 2 cups all-purpose flour
- 32 ounces (907 grams) apple dessert filling/topping
- ¾ cup (170 grams) lard (preferably non-hydrogenated, unprocessed)
- ½ cup (120 milliliters) water
Dough Components:
- 2 egg yolks
- ½ teaspoon baking powder
- ½ teaspoon salt (Diamond kosher salt recommended)
- 1 teaspoon lemon juice
Glaze Ingredients:
- 1 cup (120 grams) powdered sugar
- 2 tablespoons (30 milliliters) melted or softened butter
- 2 tablespoons (30 milliliters) whole milk (more as needed for thinning)
- ½ teaspoon vanilla extract
Instructions
- Warm the oven to a toasty 400°F, creating an ideal baking environment for the pastry.
- Sift dry ingredients together in a spacious mixing bowl, ensuring a smooth, lump-free foundation.
- Incorporate lard into the flour mixture, working it meticulously with fingertips or a pastry cutter until the texture resembles coarse, sandy crumbs.
- Whisk water, egg yolks, and lemon juice in a measuring cup, creating a liquid binding agent.
- Gently fold the liquid mixture into the flour, blending with a fork until a moist, cohesive dough forms.
- Partition the dough into two equal portions, preparing for the base and top layers.
- Press one dough half directly into a 9×13-inch jelly roll pan, carefully extending it slightly up the sides to create a sturdy base.
- Distribute apple dessert filling evenly across the dough, ensuring a consistent layer of fruity goodness.
- Roll out the remaining dough to match the pan’s dimensions, then delicately drape it over the apple filling.
- Seal the edges by pinching and pressing, patching any gaps to create a complete seal and prevent filling leakage.
- Score several strategic slits across the top crust to allow steam escape and prevent potential soggy bottoms.
- Bake for 40 minutes, rotating the pan midway to guarantee uniform golden-brown coloration.
- Transfer the baked pastry to a wire rack, allowing it to cool and settle.
- Prepare a silky glaze by whisking powdered sugar, melted butter, vanilla, and milk until perfectly smooth.
- Adjust glaze consistency with additional milk if needed, aiming for a spreadable texture.
- Use an offset spatula to generously coat the cooled crust with the glossy glaze.
- Allow the glaze to set and harden completely before slicing into delectable 2- or 3-inch squares.
Notes
- Chill the dough briefly before rolling to prevent sticking and make handling easier.
- Use cold lard or butter for the flakiest, most tender crust possible.
- Fresh lemon juice helps tenderize the dough and adds a subtle brightness to the flavor.
- Check the apple filling’s sweetness beforehand to ensure the perfect balance with the crust.
- Allow the dessert to cool completely before glazing to prevent the sugar from melting or becoming runny.
- Slice the apple slices with a sharp knife for clean, neat edges that showcase the layers.
- Prep Time: 20 minutes
- Cook Time: 40 minutes
- Category: Snacks, Breakfast
- Method: Baking
- Cuisine: American
Nutrition
- Serving Size: 8
- Calories: 423
- Sugar: 12g
- Sodium: 234mg
- Fat: 22g
- Saturated Fat: 8g
- Unsaturated Fat: 14g
- Trans Fat: 0g
- Carbohydrates: 53g
- Fiber: 2g
- Protein: 4g
- Cholesterol: 57mg
David Bennett
Founder & Head Recipe Developer
Expertise
Culinary Nutrition, Recipe Development, Nutritional Counseling, Food Science
Education
Johnson & Wales University
Certified Nutrition Specialist® (CNS®)
David Bennett is the lead recipe creator and nutrition expert at HealthyChoices.org, your friendly space for tasty meals that nourish body and mind.
With a Culinary Nutrition degree from Johnson & Wales University and a Certified Nutrition Specialist® credential, David pairs practical nutrition with delicious cooking, creating recipes you’ll crave daily.
At Healthy Choices, David shares easy, nutritious dishes and smart cooking tips to make healthy eating something everyone can enjoy, with no complicated diets needed.