
The Best Birthday Cheesecake Recipe for Sweet Celebrations
Sweet birthday cheesecake converts ordinary celebrations into extraordinary culinary experiences.
Creamy, indulgent, and irresistibly smooth, this dessert promises pure delight for special occasions.
Birthdays demand something magical that goes beyond typical cake offerings.
Rich textures and decadent flavors merge to create a memorable treat that sparks joy.
Each carefully crafted slice represents more than just a dessert—it symbolizes love, connection, and cherished moments.
The perfect balance between creamy filling and delicate crust elevates this confection to an art form.
Passionate bakers understand how a single recipe can turn simple ingredients into something truly spectacular.
Birthday Cheesecake That Tastes Like Celebration in Every Bite
Gather These Ingredients to Make Birthday Cheesecake Magic
Crust Ingredients:Filling Ingredients:Topping Ingredients:How to Bake a Bright and Festive Birthday Cheesecake
Step 1: Prepare Crust Base
Grab a mixing bowl and combine:Mix ingredients until they resemble sandy texture.
Step 2: Shape Crust
Press crumb mixture evenly into 9-inch springform pan, covering bottom and sides.
Line pan with parchment paper for easy removal.
Wrap exterior of pan with aluminum foil to prevent water seepage.
Step 3: Create Cheesecake Filling
Using stand mixer with paddle attachment, beat cream cheese until smooth.
Add sugar and mix on high speed, scraping bowl sides.
Incorporate sour cream and vanilla extract.
Add eggs one at a time, mixing gently.
Fold in colorful sprinkles using spatula.
Step 4: Bake Cheesecake
Preheat oven to 350°F.
Pour filling into prepared crust.
Place springform pan inside larger roasting pan.
Add hot water to roasting pan, filling halfway up springform sides.
Bake 60-70 minutes until golden and slightly jiggly center.
Step 5: Cool and Decorate
Remove cheesecake from water bath.
Cool on wire rack until room temperature.
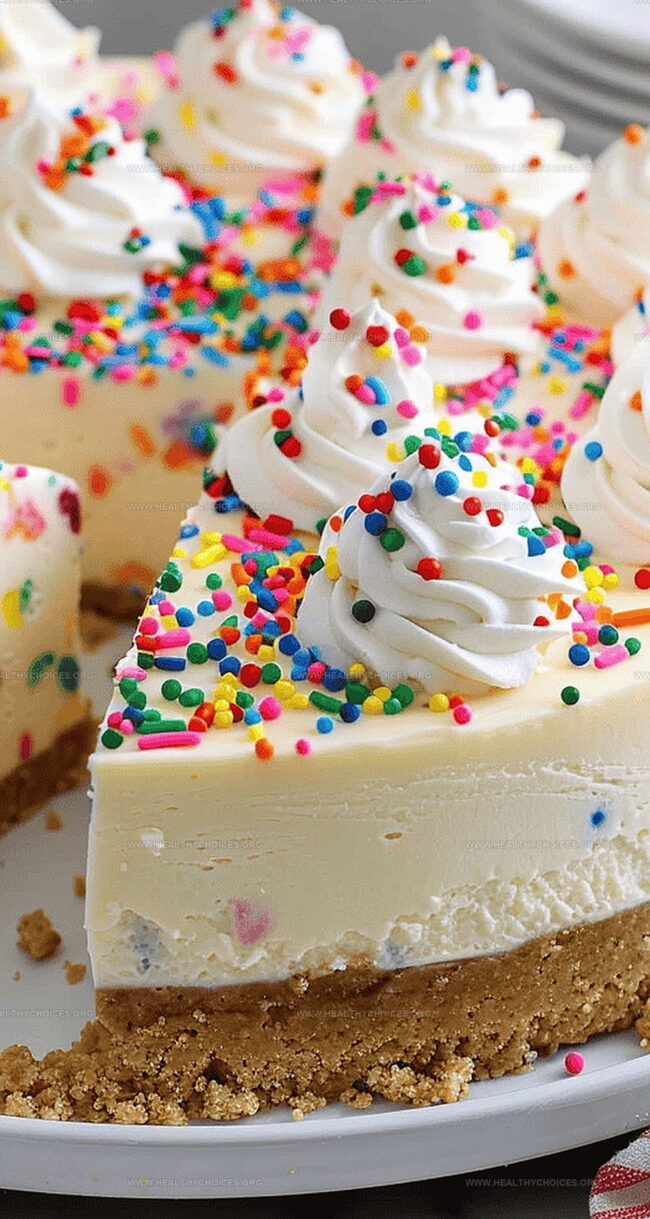
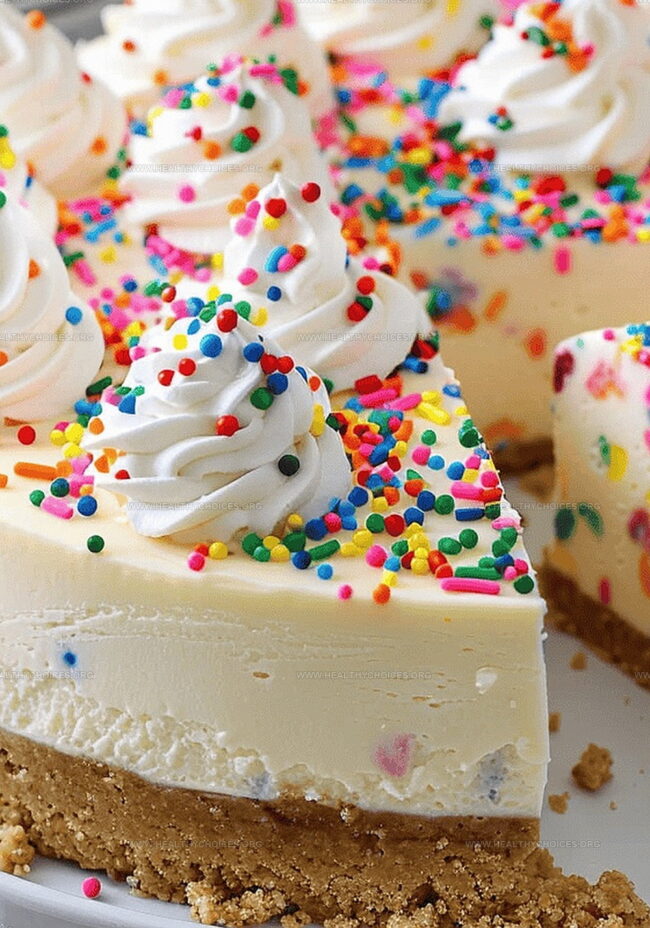
Pipe whipped cream dollops on top.
Sprinkle additional colorful sprinkles for festive look.
Step 6: Chill and Serve
Refrigerate cheesecake for minimum 4 hours.
Slice and enjoy delightful birthday treat!
Tips for Smooth Filling and a Perfect Slice
Store and Serve Birthday Cheesecake Without Losing Texture
Add a Side of Joy with These Cheesecake Pairings
Customizations to Match Any Birthday Vibe
Print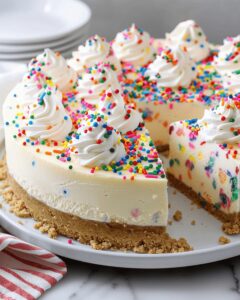
Birthday Cheesecake Recipe
- Total Time: 1 hour 30 minutes
- Yield: 12 1x
Description
Indulgent birthday cheesecake celebrates sweet moments with creamy richness and festive charm. Layers of velvety filling and crumbly crust promise delightful celebration you’ll savor with each delectable bite.
Ingredients
Main Ingredients:
- 4 packages (8 ounces or 226 grams) cream cheese, softened
- 5 large eggs, room temperature
- 1 ½ cups (126 grams) graham cracker crumbs
- 1 ¼ cups (250 grams) granulated sugar
Dairy and Flavorings:
- ½ cup (115 grams) sour cream
- 2 teaspoons vanilla extract
- ⅓ cup unsalted butter, melted
- 6–8 ounces (170–226 grams) whipped cream
Decorative Ingredients:
- ½ cup rainbow jimmies (or sprinkles)
- 2 tablespoons granulated sugar
- Extra rainbow jimmies for garnish
Instructions
- Preheat the oven to a moderate temperature of 350°F (175°C), ensuring the rack is positioned in the center.
- Create a crumbly foundation by thoroughly blending graham cracker crumbs, sugar, and melted butter until the mixture resembles damp sand.
- Transfer the crumb mixture into a parchment-lined springform pan, carefully pressing it across the bottom and slightly up the sides to form an even crust.
- Encase the pan’s exterior with heavy-duty aluminum foil to prevent water infiltration during baking.
- Using a stand mixer, cream the softened cream cheese until completely smooth and lump-free.
- Incorporate sugar into the cream cheese, beating vigorously until the mixture becomes light and fluffy, periodically scraping the bowl’s edges.
- Gently introduce sour cream and vanilla extract, mixing until thoroughly combined.
- Reduce mixer speed and add eggs individually, blending gently after each addition to maintain a silky texture.
- Delicately fold rainbow jimmies into the cheesecake batter using a spatula, ensuring even distribution.
- Pour the velvety filling into the prepared crust, smoothing the surface with a spatula.
- Position the springform pan inside a larger roasting pan and carefully slide into the preheated oven.
- Fill the outer pan with hot water, creating a water bath that reaches approximately halfway up the springform pan’s sides.
- Bake for 60-70 minutes, watching for a golden surface and a center that wobbles slightly when gently shaken.
- Remove from the oven and water bath, allowing the cheesecake to cool completely on a wire rack.
- Once cooled, decorate the top with piped whipped cream swirls.
- Sprinkle additional rainbow jimmies across the surface for a celebratory finish.
Notes
- Ensure cream cheese is softened at room temperature for smooth, lump-free mixing.
- Use heavy-duty aluminum foil to create a water-tight seal, preventing moisture from entering the springform pan during baking.
- Add eggs one at a time and mix gently to maintain the cheesecake’s silky texture and prevent overbeating.
- Create a water bath by placing the springform pan in a larger roasting pan filled with hot water, which helps distribute heat evenly and prevents cracking.
- Cool the cheesecake gradually at room temperature to avoid sudden temperature changes that can cause surface cracks.
- Refrigerate for at least 4 hours or overnight before serving to allow the cheesecake to set completely and develop rich, creamy flavors.
- Prep Time: 20 minutes
- Cook Time: 70 minutes
- Category: Desserts
- Method: Baking
- Cuisine: American
Nutrition
- Serving Size: 12
- Calories: 480
- Sugar: 40 g
- Sodium: 350 mg
- Fat: 30 g
- Saturated Fat: 18 g
- Unsaturated Fat: 9 g
- Trans Fat: 0 g
- Carbohydrates: 44 g
- Fiber: 1 g
- Protein: 6 g
- Cholesterol: 130 mg
David Bennett
Founder & Head Recipe Developer
Expertise
Culinary Nutrition, Recipe Development, Nutritional Counseling, Food Science
Education
Johnson & Wales University
Certified Nutrition Specialist® (CNS®)
David Bennett is the lead recipe creator and nutrition expert at HealthyChoices.org, your friendly space for tasty meals that nourish body and mind.
With a Culinary Nutrition degree from Johnson & Wales University and a Certified Nutrition Specialist® credential, David pairs practical nutrition with delicious cooking, creating recipes you’ll crave daily.
At Healthy Choices, David shares easy, nutritious dishes and smart cooking tips to make healthy eating something everyone can enjoy, with no complicated diets needed.