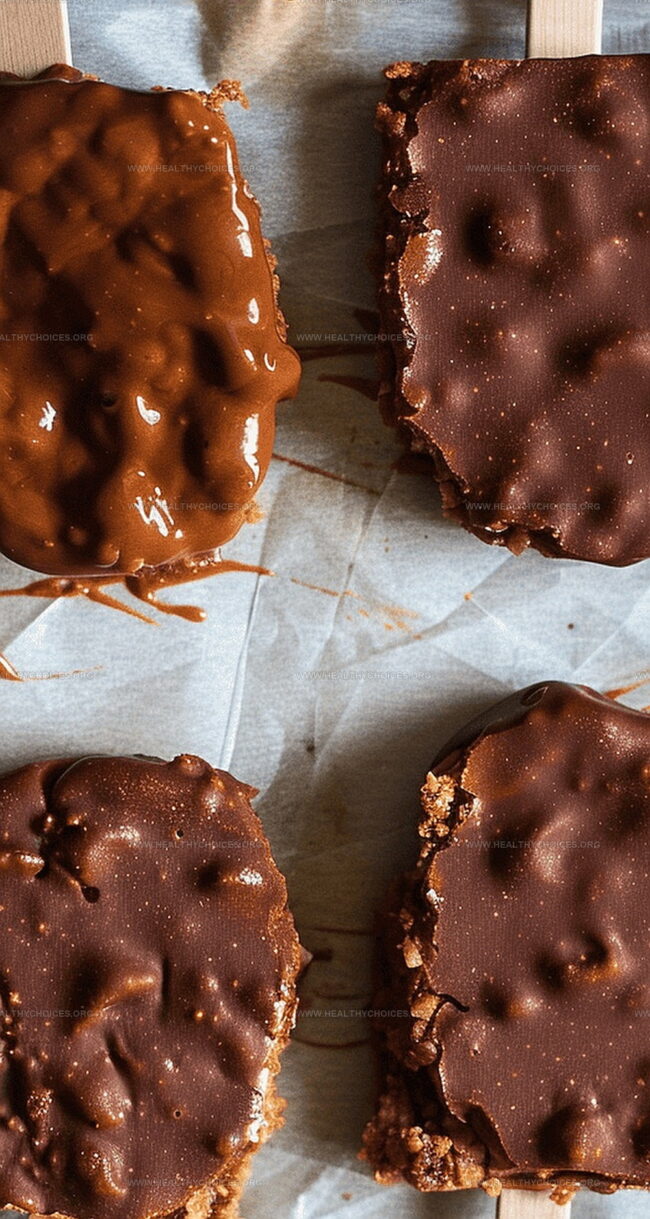
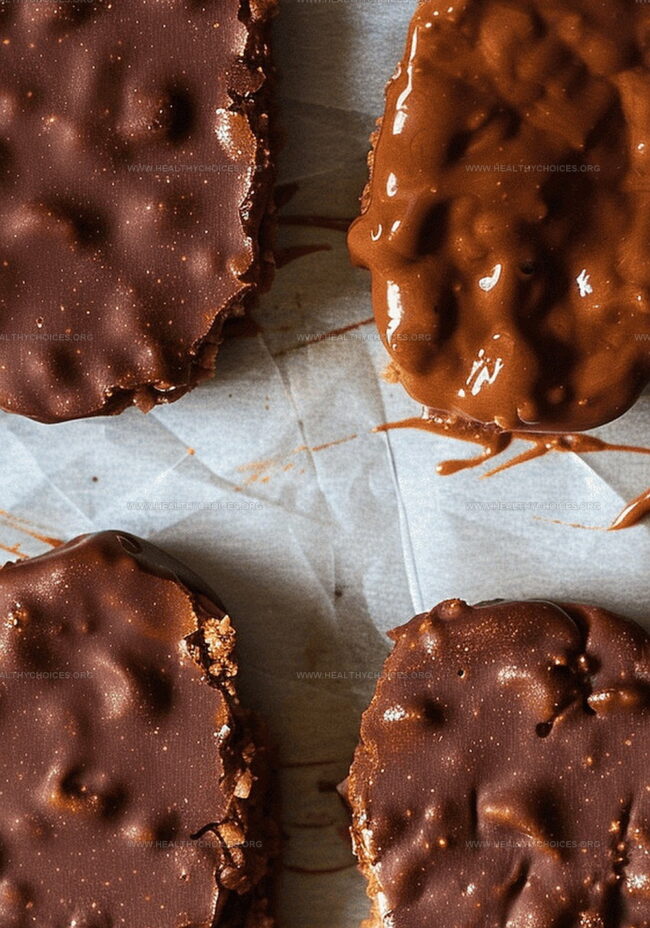
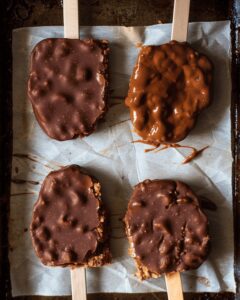
Delightful buster bars combine sweet nostalgia with creamy indulgence, offering a classic dessert that sparks childhood memories.
Cool chocolate layers embrace rich, smooth textures that melt tantalizingly on your tongue.
Ice cream enthusiasts appreciate these frozen treats for their delectable simplicity and irresistible charm.
Homemade desserts like these revolutionize ordinary ingredients into extraordinary culinary experiences that delight family and friends.
Crafting these bars requires minimal kitchen skills and maximum enjoyment, making them perfect for casual gatherings or solo sweet moments.
Each bite promises a harmonious blend of contrasting flavors and temperatures that dance across your palate.
No specialized equipment or professional baking expertise stands between you and these mouthwatering confections.
What Makes Buster Bars a Nostalgic Dessert Favorite
Create Creamy Delight: These bars offer a smooth, luscious texture that melts in your mouth, blending rich peanut butter with cool yogurt for an irresistible treat.
Customize with Ease: Flexible recipe allows personal twists like adding chocolate chips, choosing sweeteners, or sprinkling nuts, making it perfect for individual taste preferences.
No-Bake Summer Cooldown: Quick, freezer-friendly dessert provides instant relief from heat, requiring minimal kitchen time and zero cooking skills while delivering maximum flavor satisfaction.
Healthier Indulgence: Packed with protein from yogurt and peanut butter, these bars offer a guilt-free alternative to traditional ice cream treats, supporting a balanced snacking approach.
Key Ingredients That Build the Perfect Buster Bars
Base Ingredients:
Plain Yogurt: Creamy base that provides a tangy foundation for the bars, choose full-fat yogurt for richer texture.
Peanut Butter: Adds rich, nutty flavor and helps bind the mixture, opt for natural smooth or chunky style.
Sweetener: Optional ingredient to enhance sweetness, such as honey or maple syrup.
Mini Chocolate Chips: Provides extra texture and chocolate burst within the base.
Coating and Topping Ingredients:
Chocolate Chips: Smooth, glossy coating that creates a classic chocolate shell, pick high-quality dark or milk chocolate.
Coconut Oil: Helps create a smooth, shiny chocolate coating that hardens quickly.
Peanuts: Chopped nuts that add delightful crunch and extra nutty flavor to the bars.
Preparation Ingredients:
Popsicle Sticks: Serve as handles for the frozen bars, making them easy to hold and eat.
Parchment Paper: Prevents bars from sticking and makes removal simple, essential for clean freezing process.
How to Layer and Freeze Your Own Buster Bars
Step 1: Prepare the Yogurt Base
Grab a mixing bowl
Combine yogurt
Add peanut butter
Optional: Mix in sweetener
Whisk until smooth and creamy
Gently fold in mini chocolate chips (if desired)
Step 2: Shape the Frozen Treats
Line a baking sheet with parchment paper
Scoop yogurt mixture onto the tray
Create small rounded shapes
Insert popsicle stick into each blob
Smooth mixture around the stick
Sprinkle chopped peanuts on top (optional)
Step 3: First Freezing Stage
Place tray in freezer
Allow bars to become completely solid
Freeze for approximately 2 hours
Step 4: Create Chocolate Coating
Select a microwave-safe bowl
Melt chocolate chips
Optional: Add coconut oil for glossy finish
Stir until completely smooth
Step 5: Dip and Freeze
Remove frozen bars from freezer
Carefully dip each bar in melted chocolate
Ensure complete chocolate coverage
Return to parchment-lined tray
Place back in freezer
Step 6: Final Freeze and Serve
Wait until chocolate shell hardens completely
Store in freezer-safe container
Enjoy within one week
Let sit at room temperature for 2-3 minutes before eating
Tips for Better Texture in Homemade Buster Bars
Smooth Out the Base: Whip the yogurt and peanut butter until completely smooth to prevent icy or grainy textures in your bars.
Optimize Chocolate Coating: Add a touch of coconut oil to melted chocolate for a glossy, crack-free shell that doesn’t instantly melt when touched.
Perfect Freezing Technique: Use a flat, level surface in the freezer to ensure even freezing and prevent uneven bar shapes.
Prevent Sticking: Apply a light cooking spray on parchment paper before placing bars to make removal easier and cleaner.
Customize Crunch: Experiment with different nut toppings like almonds or pecans to add unique texture and flavor variations to your Buster Bars.
The Best Way to Store and Serve Buster Bars
Refrigeration: Wrap each Buster Bar individually in plastic wrap or place in a sealed freezer-safe container to prevent freezer burn and maintain freshness.
Freezer Storage: Keep bars frozen for up to 2 months. Place a layer of parchment paper between bars to prevent sticking and preserve their shape.
Reheating: Remove bars from the freezer and let them sit at room temperature for 2-3 minutes before enjoying. Avoid microwaving, as this will melt the chocolate coating and soften the yogurt base.
What to Pair with Your Cold and Crunchy Buster Bars
Nutty Chocolate Companion: Pair these Buster Bars with a cold glass of almond milk for a creamy, complementary flavor that enhances the peanut butter and chocolate notes.
Wine Lover’s Delight: Select a sweet Port wine to balance the rich chocolate coating, creating a decadent dessert experience that highlights the bar’s complex textures.
Coffee Contrast: Serve alongside a bold espresso or dark roast coffee, which cuts through the sweetness and provides a robust counterpoint to the creamy, chocolatey treat.
Bourbon Indulgence: Match these frozen bars with a smooth bourbon that brings out the nutty undertones and provides a warm, sophisticated drinking companion to the cold dessert.
Flavorful Twists for Your Next Batch of Buster Bars
Nutty Banana Blast: Mash ripe bananas into the yogurt base for a creamy, fruity flavor. Sprinkle crushed walnuts on top before chocolate coating for extra crunch.
Almond Joy Edition: Replace peanut butter with almond butter. Add shredded coconut into the yogurt mixture. Drizzle dark chocolate for a more intense coating.
Berry Chocolate Swirl: Mix raspberry or strawberry puree into the yogurt base. Create a marbled effect with white and dark chocolate drizzle. Garnish with freeze-dried berry pieces.
Protein Power Punch: Incorporate vanilla protein powder into the yogurt mixture. Use sugar-free chocolate for coating. Top with chia seeds for additional nutrition and texture.
Buster bars bring nostalgia with layers of chocolate, peanut butter, and crispy rice. Creamy and crunchy textures combine in this classic Midwest dessert that satisfies sweet cravings without complicated preparation.
Ingredients
Scale
Main Ingredients:
1 cup vanilla yogurt (or vanilla ice cream or vegan yogurt)
1 cup chocolate chips
¼ cup peanut butter (or allergy-friendly substitute)
Sweeteners and Enhancers:
2 tablespoons sweetener of choice (if using unsweetened yogurt)
2 teaspoons coconut oil (optional)
Garnish:
2 tablespoons peanuts, chopped (optional)
Instructions
Craft a velvety base by whisking yogurt, peanut butter, and optional sweetener until achieving a silky, uniform consistency.
Enhance the mixture with scattered mini chocolate chips for an unexpected textural surprise.
Prepare a parchment-lined tray as your canvas for creating these frosty treats.
Carefully deposit generous dollops of the yogurt blend onto the parchment, creating individual portions.
Gently embed a popsicle stick into each yogurt mound, smoothing the edges to create a cohesive shape.
Sprinkle crushed peanuts over the surface for a delightful nutty crunch.
Transfer the tray to the freezer, allowing the bars to solidify completely.
Melt chocolate chips using a gentle double boiler method or microwave, stirring until glossy and smooth.
Incorporate a touch of coconut oil to create a luxurious, glossy chocolate coating.
Extract the frozen bars from their chilly environment.
Immerse each bar into the molten chocolate, ensuring complete and even coverage.
Return the chocolate-drenched bars to the freezer, permitting the shell to set into a crisp, elegant finish.
Once the chocolate has crystallized, your Buster Bars are primed for indulgence.
Store any remaining bars in the freezer to maintain their perfect texture and flavor.
Notes
Customize your bars by experimenting with different nut butters or yogurt types for unique flavor combinations.
Ensure parchment paper is smooth and flat to create clean, professional-looking frozen treats.
Use room temperature ingredients for easier mixing and a smoother base consistency.
Melt chocolate slowly and carefully to prevent burning, stirring frequently for a glossy finish.
Add optional toppings like crushed nuts, sprinkles, or coconut flakes before the chocolate sets for extra texture and visual appeal.
Wrap individual bars in plastic wrap after fully freezing to maintain freshness and prevent freezer burn.
Focus: Blending culinary arts with nutritional science to create health-focused cuisine.
Certified Nutrition Specialist® (CNS®)
Credential: Advanced certification in personalized nutrition therapy.
David Bennett is the lead recipe creator and nutrition expert at HealthyChoices.org, your friendly space for tasty meals that nourish body and mind.
With a Culinary Nutrition degree from Johnson & Wales University and a Certified Nutrition Specialist® credential, David pairs practical nutrition with delicious cooking, creating recipes you’ll crave daily.
At Healthy Choices, David shares easy, nutritious dishes and smart cooking tips to make healthy eating something everyone can enjoy, with no complicated diets needed.

David Bennett
Founder & Head Recipe Developer
Expertise
Culinary Nutrition, Recipe Development, Nutritional Counseling, Food Science
Education
Johnson & Wales University
Certified Nutrition Specialist® (CNS®)
David Bennett is the lead recipe creator and nutrition expert at HealthyChoices.org, your friendly space for tasty meals that nourish body and mind.
With a Culinary Nutrition degree from Johnson & Wales University and a Certified Nutrition Specialist® credential, David pairs practical nutrition with delicious cooking, creating recipes you’ll crave daily.
At Healthy Choices, David shares easy, nutritious dishes and smart cooking tips to make healthy eating something everyone can enjoy, with no complicated diets needed.