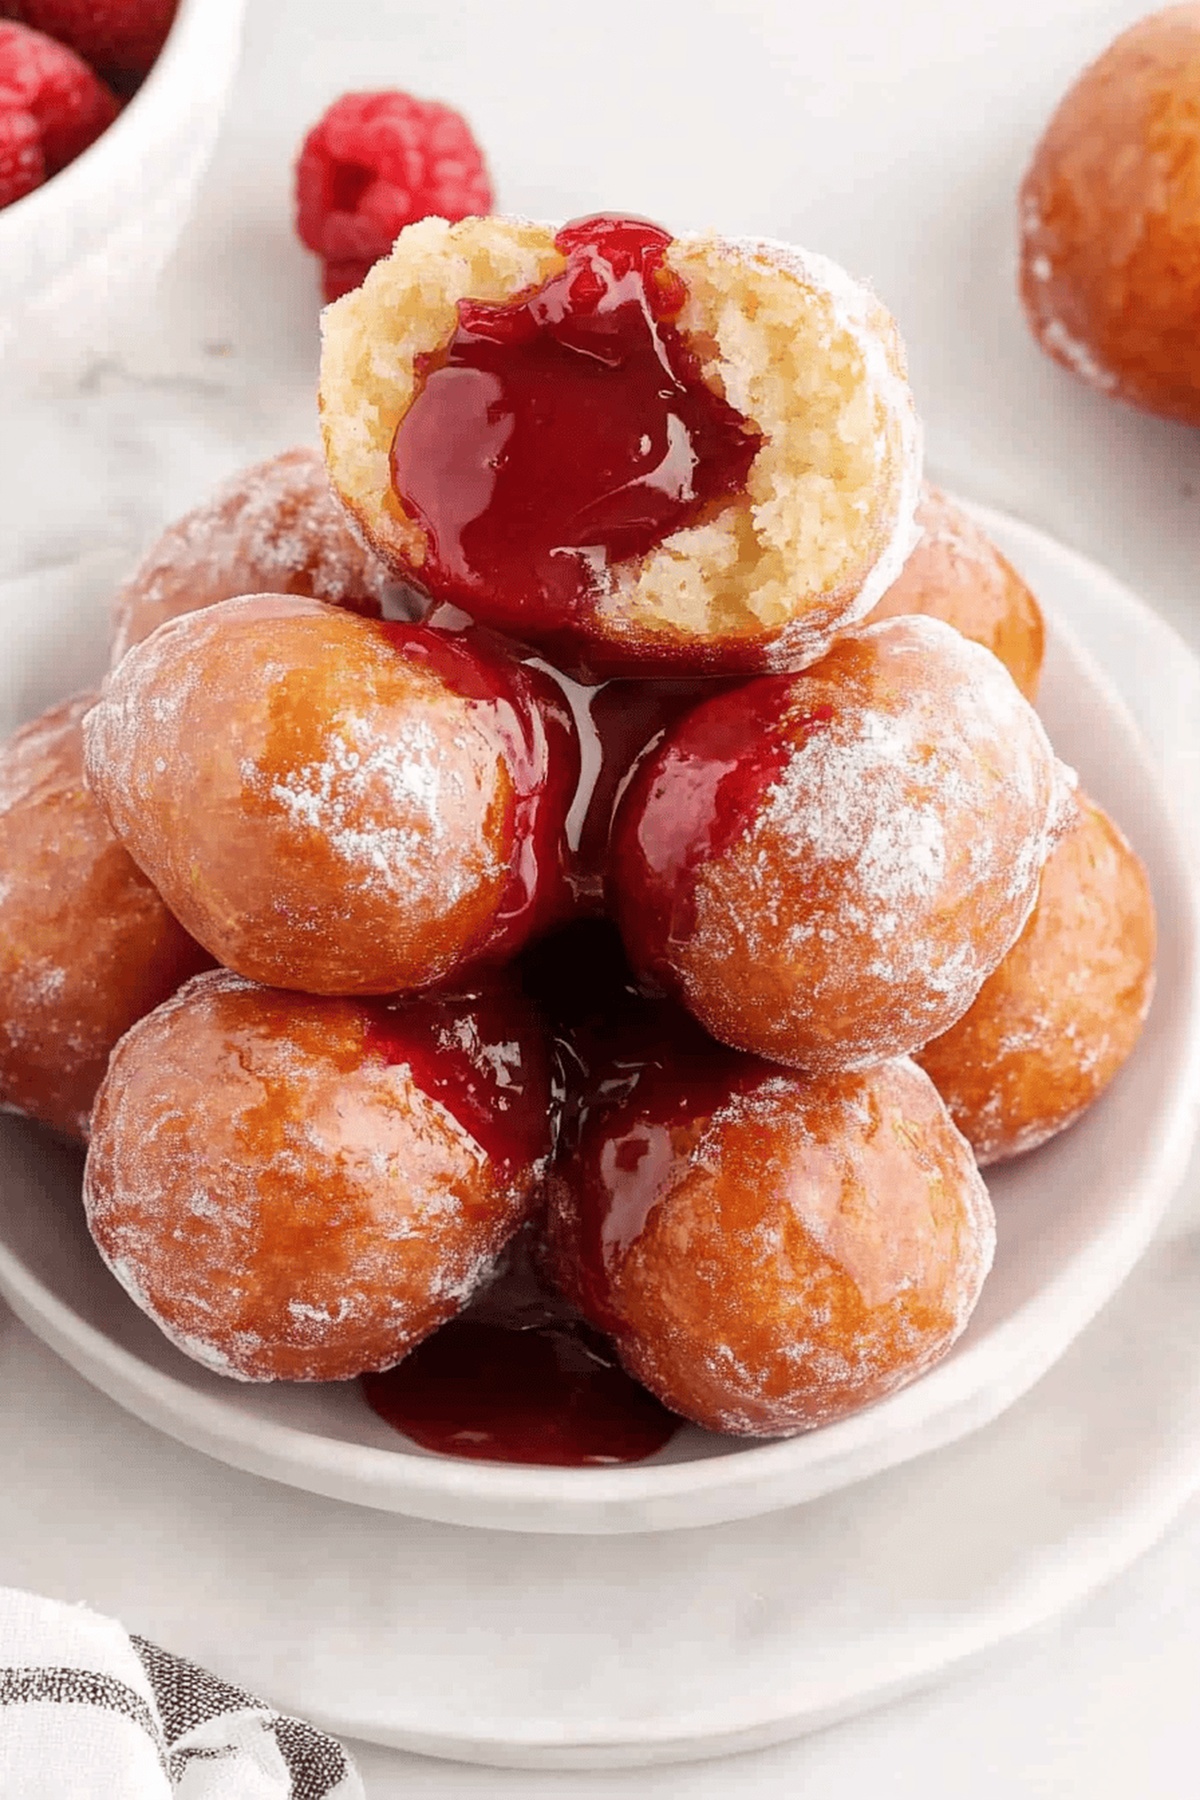
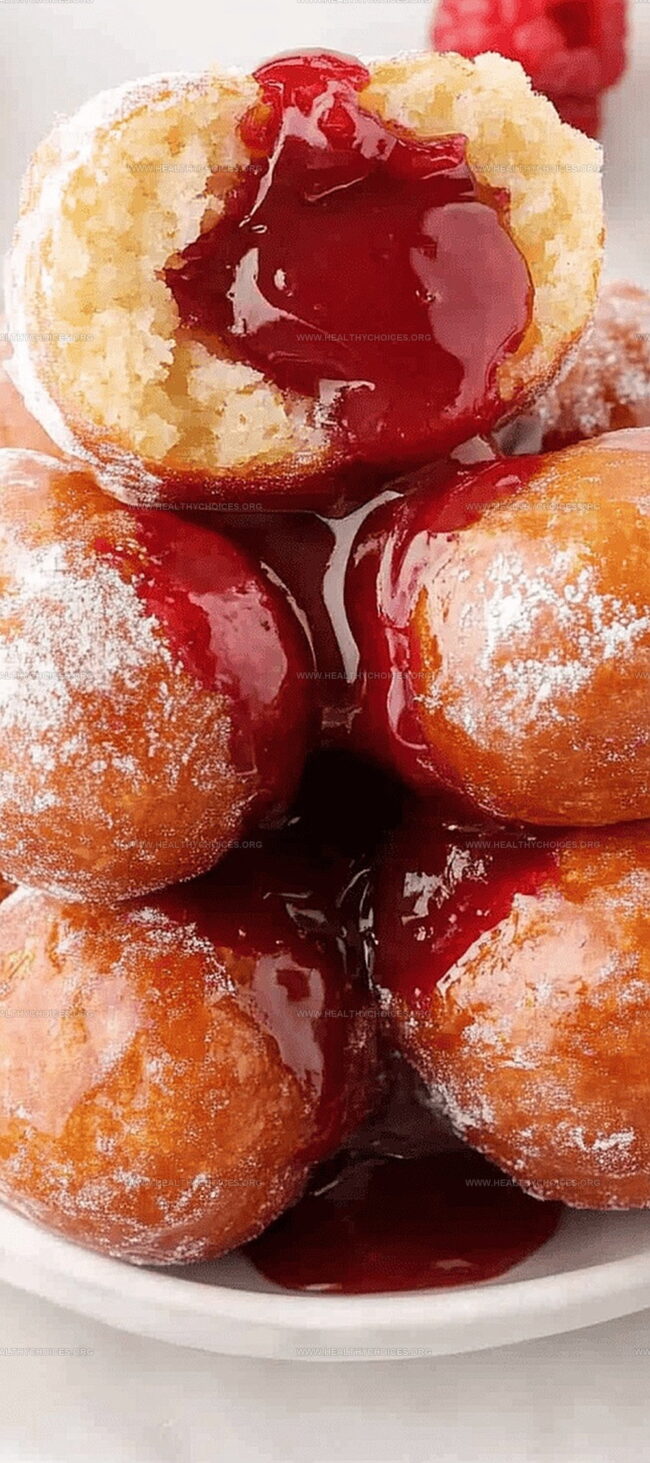
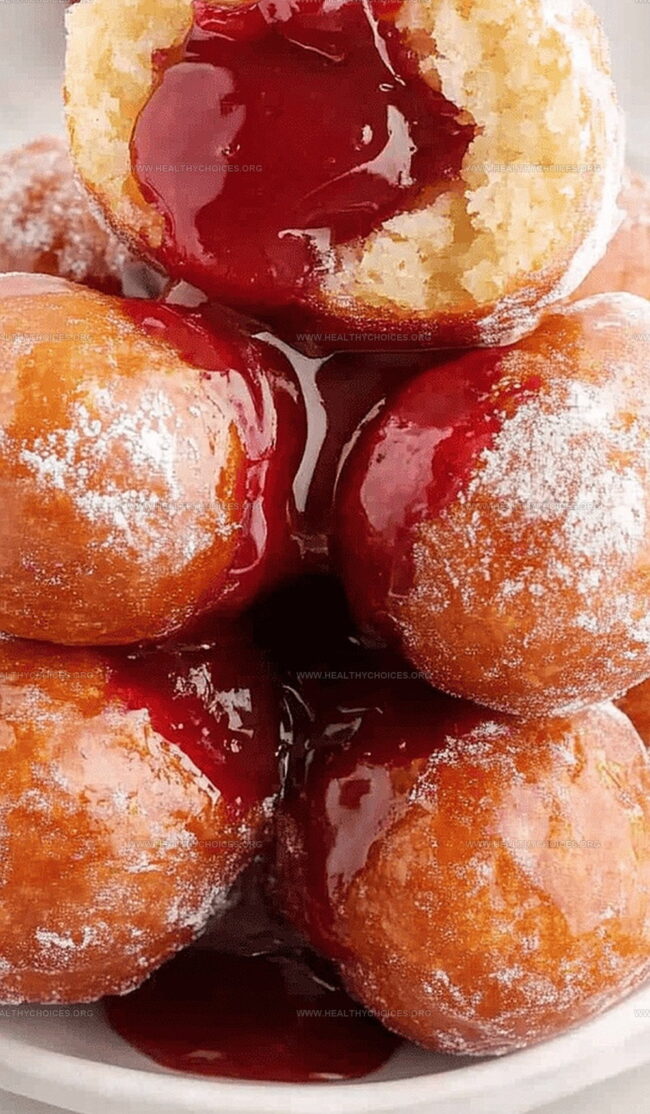
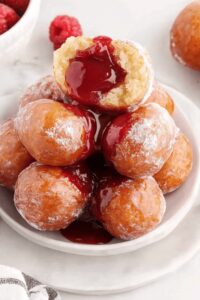
Bursting with fruity goodness, cherry pie bombs deliver a delightful explosion of sweet, tangy flavors in every single bite.
These miniature dessert sensations combine classic pastry techniques with modern culinary creativity.
Small yet mighty, these treats upgrade traditional pie expectations into something truly spectacular.
Compact and irresistible, each bomb packs a concentrated punch of rich cherry filling surrounded by buttery, flaky pastry.
Their crisp exterior gives way to a molten core that promises pure indulgence for dessert enthusiasts.
Home bakers will find these delectable morsels surprisingly simple to craft with just a few strategic ingredients.
The magic happens when unexpected textures and temperatures collide in one perfect, handheld package.
Why Cherry Pie Bombs Are Bursting with Sweet Surprise
Indulge in Quick Homemade Delights: These cherry pie bombs transform simple biscuit dough into crispy, golden-brown treats that burst with sweet cherry filling in just minutes.
Master Simple Frying Techniques: Perfect for home cooks of all skill levels, this recipe teaches precise oil temperature control and gentle frying methods that create evenly cooked, beautifully golden desserts.
Create Portable Party Pleasers: Compact, handheld, and irresistibly glazed, these bite-sized desserts are ideal for gatherings, potlucks, or spontaneous sweet cravings without complicated preparation.
Enjoy Texture Explosion: Experience the delightful contrast between crispy fried exterior, soft dough layers, and gooey cherry center, all enhanced by a smooth, sweet sugar glaze that adds an extra layer of indulgence.
Ingredients for Easy Cherry Pie Bombs
Main Ingredients:
Dough Base:
Canned Biscuits: Soft, flaky base that creates a quick and easy pastry shell for the pie bombs, look for brands with multiple layers for best results.
Vegetable Oil: High-heat cooking oil perfect for deep frying, neutral flavor that won’t overpower the dessert.
Filling:
Cherry Pie Filling: Sweet and tangy fruit filling that provides the classic cherry flavor, choose a high-quality brand with whole cherries.
Glaze Ingredients:
Dry Ingredients:
Powdered Sugar: Creates a smooth, sweet coating for the pie bombs, ensures a glossy and even glaze.
Wet Ingredients:
Milk: Helps thin and smooth the glaze, provides a creamy consistency.
Light Corn Syrup: Adds shine and prevents the glaze from becoming too hard, ensures a silky finish.
Cooking Notes:
Proper oil temperature is crucial for even cooking and achieving a golden-brown exterior.
Use a slotted spoon for safe and controlled frying.
Allow excess glaze to drip off for a clean, professional look.
How to Assemble and Bake Cherry Pie Bombs
Step 1: Prepare the Cooking Oil
Fill a heavy-bottomed saucepan halfway with vegetable oil
Ensure oil is deep enough to completely cover the dough balls
Set saucepan aside for later use
Step 2: Separate Biscuit Dough
Open biscuit can
Gently pull apart each biscuit into two halves
Carefully flatten each piece using fingers or rolling pin
Avoid making dough too thin
Step 3: Create Filling Pockets
Place cherry pie filling in the center of each dough circle
Pinch dough edges together to seal filling
Roll dough into smooth ball shape
Ensure seams are completely sealed to prevent leaks
Step 4: Heat Oil to Perfect Temperature
Warm oil to exactly 325°F
Use a cooking thermometer for precise temperature
Maintain consistent heat throughout frying process
Step 5: Fry Pie Bombs
Use slotted metal spoon to carefully lower dough balls into hot oil
Fry 2-3 bombs at a time
Gently roll balls in oil for even cooking
Watch for golden brown color
Cooking time is approximately 5 minutes
Step 6: Drain Excess Oil
Transfer fried bombs to paper towel-lined plate
Allow excess oil to absorb
Continue frying remaining dough balls
Step 7: Prepare Sugary Glaze
Ingredients:
Powdered sugar
Milk
Light corn syrup
Whisk ingredients in small bowl
Mix until smooth and glossy
Step 8: Glaze and Finish
Dip each fried bomb completely in glaze
Let excess glaze drip off
Place on parchment paper or cooling rack
Allow glaze to set for 10 minutes
Step 9: Serve and Enjoy
Serve warm or at room temperature
Best enjoyed immediately after glazing
Perfect for dessert or sweet snack time
Tips for Flaky Dough and Juicy Centers
Seal Thoroughly: Pinch dough edges extra carefully to prevent filling leakage during frying, ensuring a perfect seal with no gaps.
Temperature Precision: Use a reliable candy or deep-fry thermometer to maintain exact 325°F oil temperature, preventing burning or undercooking.
Gentle Frying Technique: Move pie bombs slowly in hot oil using a slotted spoon, rotating gently to achieve uniform golden-brown color on all sides.
Drainage Matters: Let excess oil drip completely on paper towels to keep pie bombs crispy and avoid greasy texture.
Glaze with Care: Dip warm pie bombs into glaze quickly and let excess drip off, creating a smooth, even coating that sets beautifully.
How to Save and Reheat Leftover Pie Bombs
Refrigerate: Place cooled cherry pie bombs in an airtight container and store in the refrigerator for up to 3 days. Cover with plastic wrap to prevent drying out.
Reheat in Oven: Warm pie bombs at 350°F for 5-7 minutes until heated through. Spread on a baking sheet lined with parchment paper to maintain crispiness.
Microwave Option: Zap pie bombs for 15-20 seconds, but expect slightly softer texture compared to oven reheating. Best consumed fresh for optimal taste and crunch.
Perfect Pairings for Cherry Pie Bombs
Pair with Vanilla Dreams: Serve warm cherry pie bombs alongside a scoop of creamy vanilla ice cream for a delightful contrast between hot and cold, crispy and smooth textures.
Sip Sweet Harmony: Complement the dessert with a chilled glass of moscato wine or a light cherry-infused cocktail that echoes the fruity cherry filling and enhances the overall sweetness.
Brew Perfect Companions: Enjoy with a hot cup of black coffee or chai tea, which cuts through the richness of the fried dough and balances the sugary glaze with robust, slightly spicy undertones.
Morning Magic Combo: Transform these pie bombs into a breakfast treat by pairing with a cold glass of milk or a freshly brewed cappuccino for a delightful morning indulgence.
Unique Fillings to Try in Pie Bombs
Blueberry Burst Bombs: Swap cherry filling with fresh blueberry compote for a tangy, fruity alternative that bursts with summer flavor. Use the same dough technique and frying method for consistent texture.
Chocolate Cream Surprise: Replace pie filling with rich chocolate pudding or Nutella. Dust the finished bombs with cocoa powder instead of glaze for a decadent chocolate lover’s treat.
Apple Cinnamon Pockets: Fill dough with spiced apple pie filling and add a sprinkle of ground cinnamon before sealing. Drizzle with a caramel glaze after frying for extra warmth and sweetness.
Savory Cheese Poppers: Transform the recipe into a savory snack by using shredded cheese and herbs like chives or thyme. Serve with a marinara dipping sauce for a completely different flavor profile.
Homemade cherry pie bombs deliver explosive flavor with crispy golden pastry and sweet cherry centers. Flaky layers cradle warm fruit filling, creating irresistible dessert bites that invite indulgence in one perfect, delectable moment.
Ingredients
Scale
Main Ingredients:
2 cups powdered sugar
16.3 ounces (462 grams) Grands “Big” biscuits, flaky
21 ounces (595 grams) cherry pie filling
Liquid and Binding Ingredients:
¼ cup (60 milliliters) milk
1 tablespoon (15 milliliters) light corn syrup
Cooking Ingredient:
Vegetable oil, for frying
Instructions
Prepare a heavy-bottomed saucepan by filling it slightly over halfway with vegetable oil, ensuring sufficient depth to submerge the dough balls completely.
Carefully separate each biscuit into two layers by gently pulling apart the flaky center, then delicately flatten each piece using fingers or a rolling pin without making the dough too thin.
Position a dollop of cherry pie filling precisely in the center of each dough circle.
Meticulously seal the edges by pinching them together, then craft the dough into a smooth spherical shape, ensuring all seams are tightly closed to prevent filling leakage during frying.
Heat the oil to a precise 325°F, maintaining a consistent temperature throughout the cooking process.
Gently introduce the dough balls into the hot oil using a slotted metal spoon, working in small batches of 2-3 pieces. Continuously rotate the balls with the spoon to achieve uniform golden-brown coloration and prevent sticking.
Vigilantly monitor oil temperature, making real-time adjustments to prevent burning or uneven cooking.
Extract the perfectly fried pie bombs using the slotted spoon, transferring them to a paper towel-lined plate to absorb excess oil.
Craft a smooth glaze by whisking powdered sugar, milk, and light corn syrup until completely integrated.
Immerse each golden bomb into the glaze, ensuring complete coverage, then allow excess to drip off before placing on parchment paper or a cooling rack.
Let the glaze set for approximately 10 minutes, or serve immediately for a warm, decadent treat.
Notes
Prep with care by using flaky biscuit dough that separates easily for perfect filling pockets.
Maintain oil temperature exactly at 325°F to prevent burning or uneven cooking of delicate dough bombs.
Work in small batches of 2-3 dough balls to ensure consistent golden-brown coloring and crispy texture.
Seal dough edges thoroughly to prevent filling leakage during intense frying process.
Create smooth glaze by whisking powdered sugar, milk, and corn syrup until no lumps remain for professional-looking finish.
Allow glazed pie bombs to set for 10 minutes to achieve ideal sweet coating that complements crispy exterior.
Focus: Blending culinary arts with nutritional science to create health-focused cuisine.
Certified Nutrition Specialist® (CNS®)
Credential: Advanced certification in personalized nutrition therapy.
David Bennett is the lead recipe creator and nutrition expert at HealthyChoices.org, your friendly space for tasty meals that nourish body and mind.
With a Culinary Nutrition degree from Johnson & Wales University and a Certified Nutrition Specialist® credential, David pairs practical nutrition with delicious cooking, creating recipes you’ll crave daily.
At Healthy Choices, David shares easy, nutritious dishes and smart cooking tips to make healthy eating something everyone can enjoy, with no complicated diets needed.
David Bennett
Founder & Head Recipe Developer
Expertise
Culinary Nutrition, Recipe Development, Nutritional Counseling, Food Science
Education
Johnson & Wales University
Certified Nutrition Specialist® (CNS®)
David Bennett is the lead recipe creator and nutrition expert at HealthyChoices.org, your friendly space for tasty meals that nourish body and mind.
With a Culinary Nutrition degree from Johnson & Wales University and a Certified Nutrition Specialist® credential, David pairs practical nutrition with delicious cooking, creating recipes you’ll crave daily.
At Healthy Choices, David shares easy, nutritious dishes and smart cooking tips to make healthy eating something everyone can enjoy, with no complicated diets needed.