Quick & Chewy Homemade Granola Bars Recipe: Simple Joy in Every Bite
Crafting chewy homemade granola bars revolutionizes ordinary ingredients into a delightful snack that bursts with natural goodness.
These wholesome treats blend nutrition and flavor in ways that store-bought versions can never replicate.
Nutritionists praise homemade granola bars for their superior ingredient control and healthier composition.
Simple kitchen techniques turn basic pantry staples into something extraordinary and satisfying.
Mixing seeds, nuts, and grains creates a textural experience that delights taste buds and nourishes the body.
Each bite offers a perfect balance of sweetness, crunch, and nutritional value that keeps you energized throughout the day.
Customizing these bars allows you to experiment with different combinations and discover your personal favorite.
Why Chewy Homemade Granola Bars Are Better Than Store-Bought
All the Good Stuff That Goes into Homemade Granola Bars
Base Ingredients:Sweeteners and Binding Agents:Topping:How to Press and Slice Granola Bars Like a Pro
Step 1: Prepare Baking Pan
Grab an 8-inch square pan and give it a light spray with nonstick cooking spray. Line the pan with parchment paper, letting the edges hang over for easy removal.
Step 2: Combine Dry Ingredients
In a spacious mixing bowl, gently mix:Set the bowl aside for the next delicious step.
Step 3: Create Sticky Binding Mixture
In a small saucepan, combine:Bring the mixture to a rolling boil over medium-high heat. Reduce heat and let it simmer until sugar completely dissolves, about 2 minutes. Remove from heat and stir in vanilla extract for an extra flavor boost.
Step 4: Blend Wet and Dry Ingredients
Pour the warm, sticky mixture over the dry ingredients. Mix thoroughly until every single oat and cereal piece is coated and glistening.
Step 5: Pack and Press
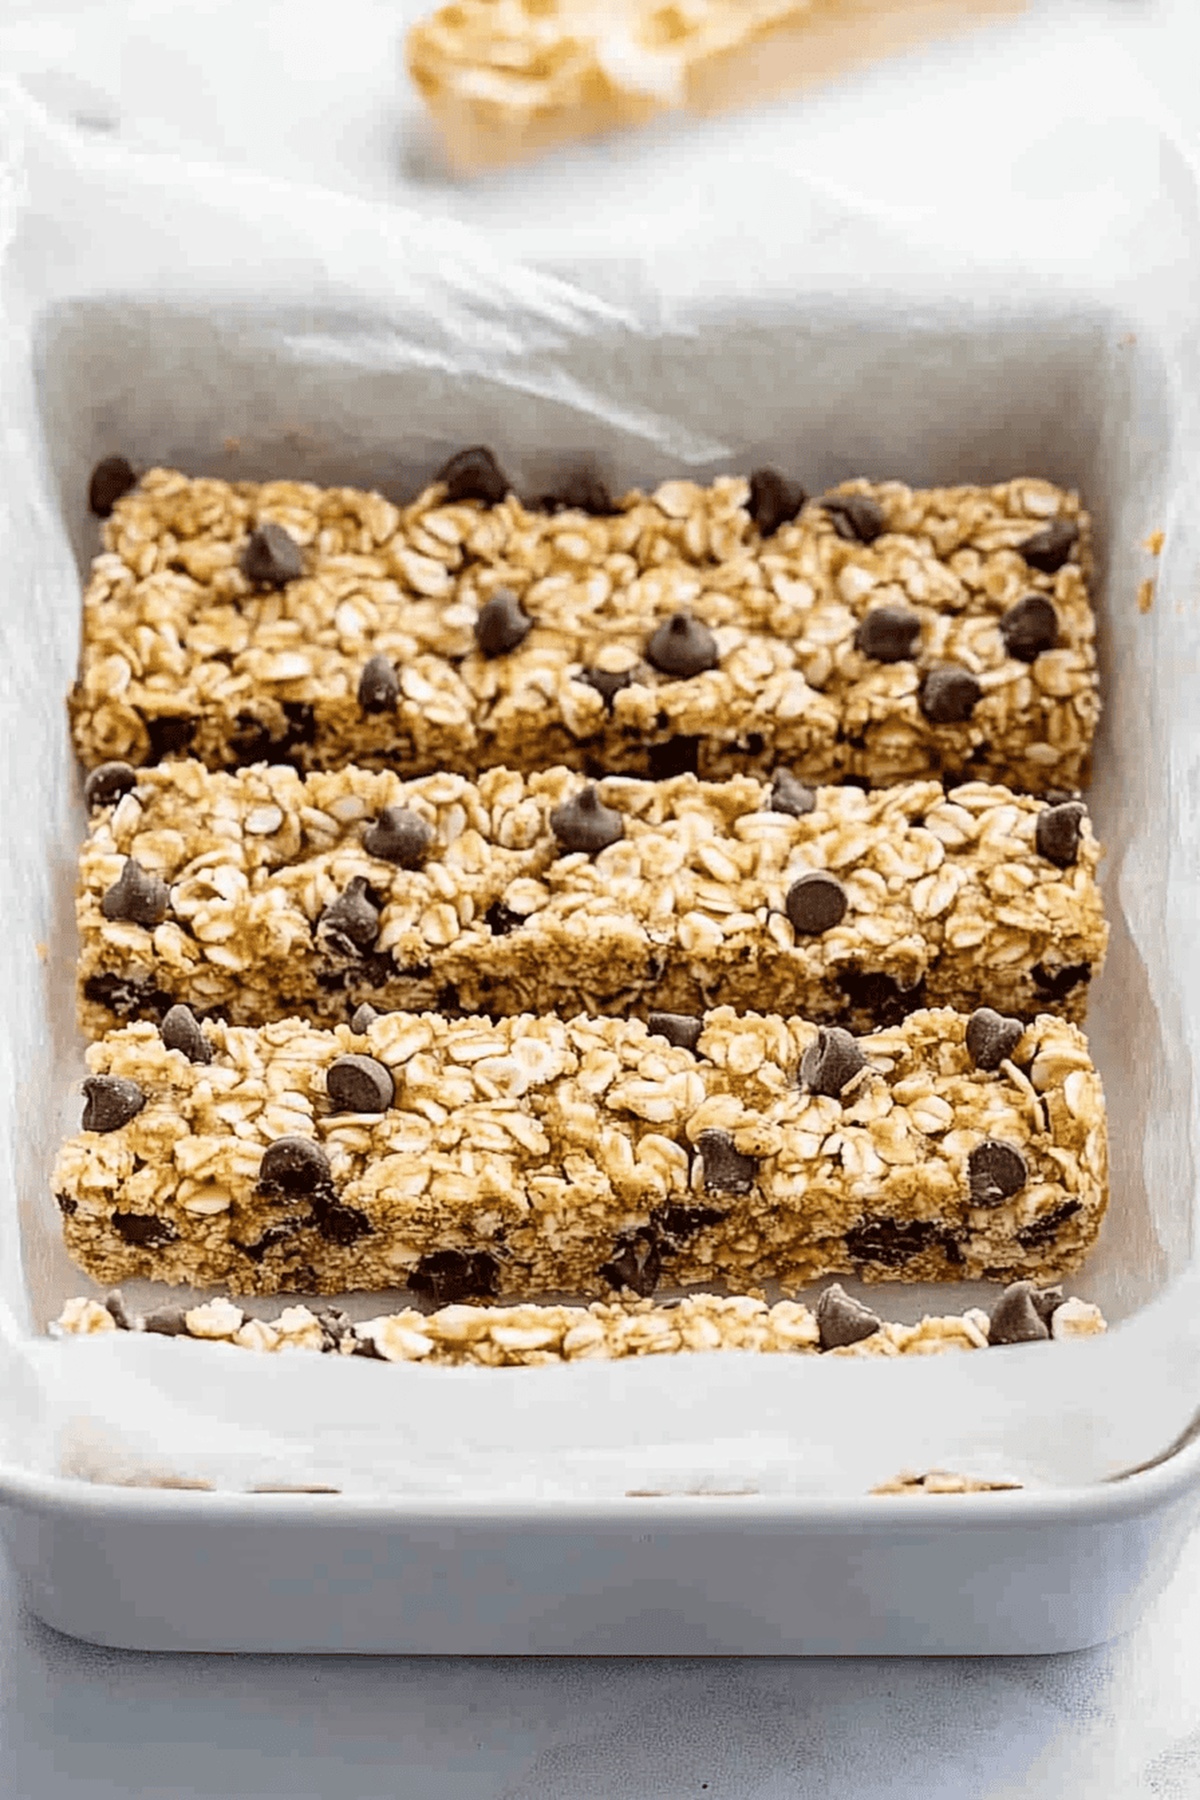
Transfer the mixture into the prepared pan. Use a spatula or your hands to press down firmly, creating a compact and even layer. Sprinkle mini chocolate chips across the top and gently press them into the surface.
Step 6: Cool and Cut
Let the granola bars cool at room temperature for 2-3 hours until completely set. Use the parchment paper edges to lift the entire block out, then slice into individual bars using a sharp knife.
Enjoy your homemade chewy granola bars!
Tips for Keeping Granola Bars Moist and Snack-Ready
How to Store Granola Bars for the Week (or Trip!)
Perfect Add-Ons to Serve with Granola Bars
Variations to Match Every Taste or Season
Print
Chewy Homemade Granola Bars Recipe
- Total Time: 15 minutes
- Yield: 12 1x
Description
Chewy homemade granola bars deliver wholesome goodness packed with nutty oats, sweet honey, and crunchy almonds. Quick and simple to make, these bars provide a perfect energy boost for busy mornings or afternoon snacks you’ll crave again and again.
Ingredients
Main Ingredients:
- 2 cups (480 milliliters) quick-cooking oats
- 1 cup (240 milliliters) crispy rice cereal
- ⅓ cup (80 milliliters) packed light brown sugar
- 4 tablespoons (60 milliliters) unsalted butter
Liquid Ingredients:
- ¼ cup (60 milliliters) honey
- 1 teaspoon (5 milliliters) vanilla extract
Topping Ingredients:
- 3 tablespoons (45 milliliters) mini chocolate chips
Instructions
- Prepare a foundational workspace by greasing an 8-inch square baking pan with nonstick spray and layering parchment paper for easy removal.
- Combine rolled oats and crispy rice cereal in a spacious mixing bowl, creating a textural base for the granola bars.
- Craft a sticky binding syrup by heating brown sugar, honey, and butter in a saucepan, allowing the ingredients to bubble and meld together until sugar completely dissolves.
- Remove syrup from heat and infuse with fragrant vanilla extract, stirring to distribute the rich flavor evenly.
- Pour the warm, glossy syrup over the dry oat mixture, gently folding and stirring until every grain is thoroughly coated and glistening.
- Transfer the moistened mixture into the prepared pan, using firm, even pressure to compact the ingredients into a dense, cohesive layer.
- Generously scatter mini chocolate chips across the surface, tenderly pressing them into the granola with the back of a spoon to ensure they adhere.
- Allow the bars to set and solidify at room temperature for approximately two hours, enabling the ingredients to bond and create a sturdy, chewy texture.
- Once completely cooled, slice into uniform bars using a sharp knife, creating perfect portable snacks.
Notes
- Prep your pan ahead of time by using both nonstick spray and parchment paper for easy removal and cleanup.
- Boiling the brown sugar, honey, and butter creates a sticky binding agent that helps hold the granola bars together perfectly.
- Press the mixture firmly into the pan to ensure compact, chewy bars that won’t crumble when you bite into them.
- Allow complete cooling at room temperature to help the bars set and maintain their shape before slicing.
- Customize by swapping chocolate chips with dried fruit, nuts, or seeds for a personalized healthy snack.
- Store in an airtight container at room temperature for up to a week to maintain freshness and texture.
- Prep Time: 10 minutes
- Cook Time: 5 minutes
- Category: Breakfast, Snacks, Desserts
- Method: Baking
- Cuisine: American
Nutrition
- Serving Size: 12
- Calories: 150
- Sugar: 8 g
- Sodium: 50 mg
- Fat: 7 g
- Saturated Fat: 4 g
- Unsaturated Fat: 2 g
- Trans Fat: 0 g
- Carbohydrates: 22 g
- Fiber: 1 g
- Protein: 2 g
- Cholesterol: 15 mg
David Bennett
Founder & Head Recipe Developer
Expertise
Culinary Nutrition, Recipe Development, Nutritional Counseling, Food Science
Education
Johnson & Wales University
Certified Nutrition Specialist® (CNS®)
David Bennett is the lead recipe creator and nutrition expert at HealthyChoices.org, your friendly space for tasty meals that nourish body and mind.
With a Culinary Nutrition degree from Johnson & Wales University and a Certified Nutrition Specialist® credential, David pairs practical nutrition with delicious cooking, creating recipes you’ll crave daily.
At Healthy Choices, David shares easy, nutritious dishes and smart cooking tips to make healthy eating something everyone can enjoy, with no complicated diets needed.