Deep, robust coffee flavors intertwine seamlessly with decadent chocolate notes, creating a sensory symphony for passionate bakers and dessert enthusiasts.
The bold coffee essence elevates traditional brownie recipes with complex aromatic dimensions that tantalize taste buds.
Smooth, intense coffee undertones complement the dense chocolate base, promising an indulgent treat that transcends standard sweet expectations.
Dark roasted coffee characteristics weave through each delectable bite, offering a sophisticated twist on classic brownie preparation.
Intense and irresistible, these brownies blend two beloved ingredients into a harmonious dessert that sparks immediate cravings.
Baking these coffee-infused brownies guarantees a luxurious experience that satisfies both chocolate and coffee lovers.
Coffee Brownies for the Ultimate Afternoon Boost
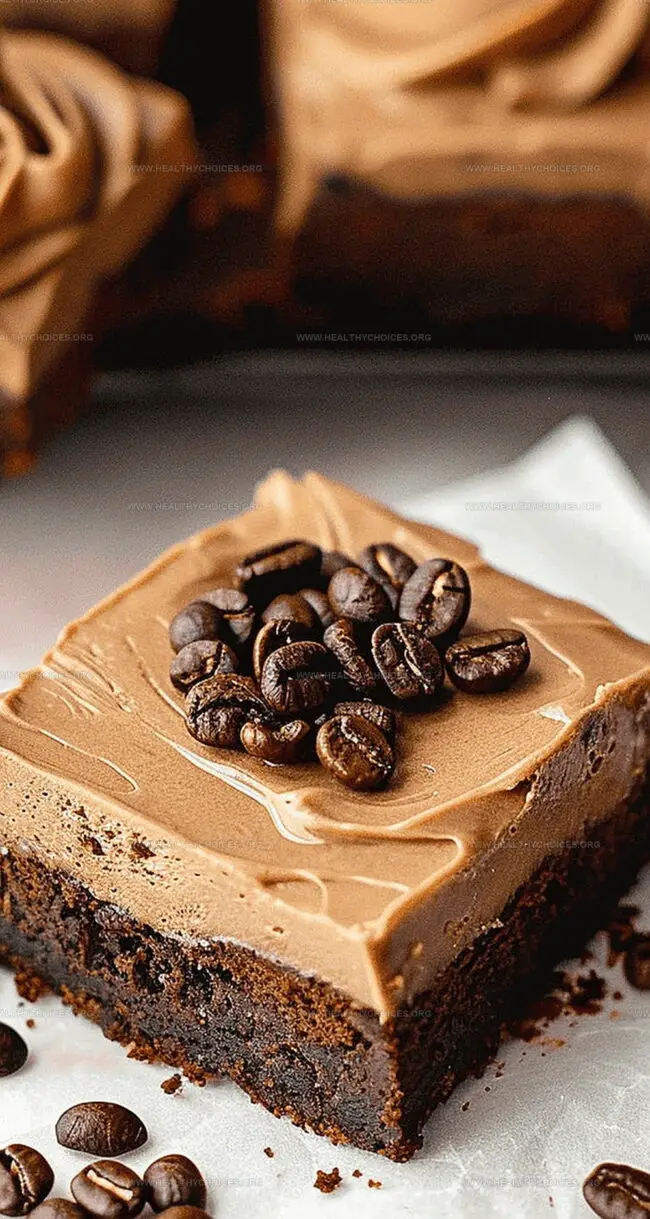
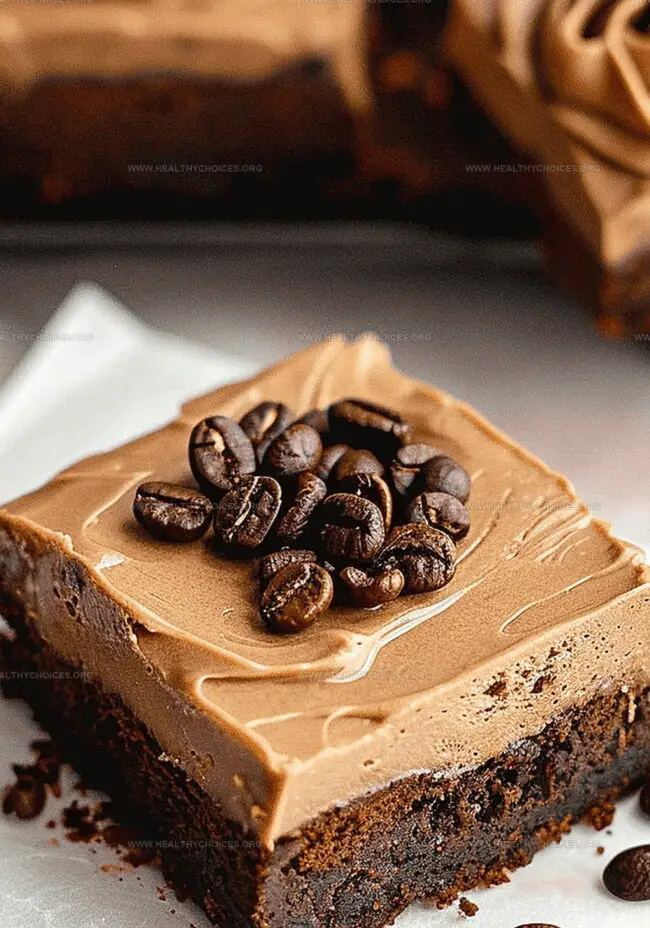
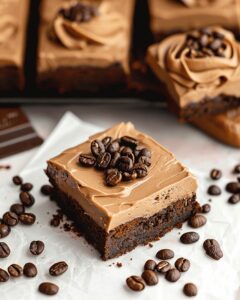
Amplify Coffee Flavor: These brownies pack an intense coffee punch by reducing brewed coffee and incorporating it directly into both the batter and frosting, creating a deep, rich mocha experience that coffee lovers will adore.
Decadent Texture Delight: The recipe promises ultra-fudgy brownies with a velvety smooth chocolate base and creamy mocha frosting, delivering a melt-in-your-mouth texture that balances dense chocolate and silky coffee notes perfectly.
Simple Gourmet Magic: Despite looking and tasting like a professional dessert, this recipe uses straightforward cooking methods and basic kitchen tools, making it accessible for bakers of all skill levels while producing an impressive, bakery-quality treat.
Versatile Make-Ahead Option: These brownies can be stored at room temperature for a week or frozen for up to three months, offering convenience and flexibility for meal planning, parties, or unexpected sweet cravings.
What You’ll Need for Coffee-Infused Brownies
Main Ingredients:
Chocolate Base:
Unsweetened Baking Chocolate: Rich, deep flavor that provides the intense chocolate foundation for brownies.
Butter: Adds richness, moisture, and helps create a smooth, tender texture.
Sweeteners:
Light Brown Sugar, Granulated Sugar: Provide sweetness and contribute to the dense, fudgy brownie texture.
Coffee Components:
Brewed Coffee, Concentrated Coffee: Intensifies chocolate flavor and adds depth to the brownie profile.
Supporting Ingredients:
Binding and Texture:
Eggs: Bind ingredients together and provide structure to the brownies.
All-Purpose Flour: Creates the base structure and helps hold the brownie together.
Salt: Enhances overall flavor and balances sweetness.
Powdered Sugar: Provides sweetness and helps achieve creamy frosting consistency.
Moisture and Flavor Enhancers:
Milk or Cream: Adjusts frosting texture and adds creaminess.
Pinch of Salt: Balances and brightens the frosting’s flavor profile.
Instructions for Fudgy Coffee Brownies
Step 1: Concentrate Coffee
Pour brewed coffee into a small saucepan
Heat over medium heat until boiling
Reduce coffee to 2 tablespoons
Remove from heat and set aside
Step 2: Prepare Baking Pan
Preheat oven to 350°F (177°C)
Line 8-inch or 9-inch square baking pan with foil
Spray foil with nonstick cooking spray
Step 3: Melt Chocolate Base
Use medium saucepan over medium heat
Melt butter and chopped chocolate
Stir frequently until smooth
Allow mixture to cool for 15 minutes
Step 4: Create Brownie Batter
Whisk light brown sugar and granulated sugar into cooled chocolate
Add eggs one at a time
Whisk after each egg addition
Incorporate concentrated coffee
Step 5: Combine Dry Ingredients
Gently fold flour and salt into mixture
Mix until completely combined
Step 6: Bake Brownies
Pour batter into prepared pan
Bake for 25-30 minutes
Check doneness with toothpick
Toothpick should come out mostly clean
Step 7: Prepare Mocha Frosting
Melt chocolate and butter in small saucepan
Cool mixture for 15 minutes
Use handheld or stand mixer
Combine chocolate mixture, coffee, and milk
Gradually add powdered sugar
Mix until smooth
Adjust consistency with additional milk
Add pinch of salt
Step 8: Frost and Serve
Allow brownies to cool completely
Lift brownies from pan using foil
Spread frosting evenly
Cut into individual servings
Step 9: Storage
Store at room temperature up to 1 week
Freeze up to 3 months
Thaw in refrigerator overnight
Tips for the Best Flavor and Texture
Brew Coffee Carefully: Reduce coffee slowly to concentrate flavor without burning, creating a rich base for intense coffee notes.
Chocolate Melting Technique: Use low, steady heat when melting chocolate and butter, stirring constantly to prevent scorching and ensure smooth texture.
Whisking Wisdom: Add eggs one at a time, whisking thoroughly between each addition to create a smooth, well-integrated batter that ensures even brownie texture.
Baking Precision: Watch brownies closely during final minutes of baking; a slightly underbaked center keeps them fudgy and moist.
Frosting Finesse: Adjust frosting consistency gradually by adding milk or cream in small increments, ensuring a spreadable yet firm topping that complements the brownie’s rich flavor.
How to Store and Reheat Coffee Brownies Properly
Refrigerator Storage: Seal brownies in an airtight container with a tight-fitting lid to maintain moisture and prevent them from absorbing other food odors. Line between layers with parchment paper to prevent sticking.
Freezer Storage: Wrap individual brownies or the entire batch tightly in plastic wrap, then place inside a freezer-safe container or freezer bag. Press out excess air to prevent freezer burn and maintain freshness for up to 3 months.
Reheating: Warm refrigerated or thawed brownies in the microwave for 10-15 seconds on medium power. For a crisp edge, briefly toast in a preheated oven at 300°F for 3-5 minutes before serving, which helps restore their original texture and warmth.
Delicious Drinks to Enjoy with These Brownies
Pair with Espresso Martini: Craft a sophisticated cocktail that amplifies the coffee notes in the brownies, creating a decadent dessert experience with complementary rich, bold flavors.
Match with Vanilla Bean Ice Cream: Serve a scoop of creamy, smooth vanilla ice cream alongside the brownies to balance the intense chocolate and coffee profiles, providing a cool, refreshing contrast.
Complement with Toasted Almond Milk: Enjoy a glass of lightly toasted almond milk to enhance the nutty undertones and provide a subtle, creamy backdrop that softens the brownie’s deep, intense taste.
Serve with Whipped Cream and Cinnamon: Top the brownies with a dollop of freshly whipped cream and a sprinkle of ground cinnamon to add a light, aromatic layer that brightens the dessert’s rich chocolate and coffee elements.
Swaps and Enhancements for Coffee Brownies
Espresso Intensity: Swap regular coffee with rich espresso for a deeper, more robust coffee flavor that intensifies the brownie’s chocolate profile.
Nutty Mocha Crunch: Fold chopped toasted almonds or hazelnuts into the batter, adding texture and complementing the coffee-chocolate combination.
Salted Caramel Coffee Layer: Drizzle homemade salted caramel sauce between the brownie layer and frosting, creating a luxurious sweet-salty contrast that enhances the coffee notes.
Mexican Spiced Mocha: Mix in a pinch of cinnamon and a hint of cayenne pepper to the batter, transforming the brownies into a warm, complex dessert reminiscent of traditional Mexican hot chocolate.
Rich chocolate brownies infused with robust espresso create an irresistible dessert that elevates classic comfort. Coffee lovers will savor deep cocoa notes melding with intense espresso, delivering a sophisticated twist on traditional brownies.
Ingredients
Scale
Main Ingredients:
8 ounces (240 milliliters) strong coffee
½ cup (113 grams) unsalted butter
8 ounces (227 grams) semi-sweet chocolate
3 large eggs
¾ cup (90 grams) all-purpose flour
Sweeteners:
¾ cup (150 grams) light brown sugar
¼ cup (50 grams) granulated sugar
2 cups (240 grams) powdered sugar
Flavor Enhancers and Seasonings:
1 tablespoon (15 milliliters) concentrated coffee
¼ teaspoon salt
2 ounces (40 grams) unsweetened baking chocolate
4 tablespoons (57 grams) unsalted butter
1 to 2 tablespoons (15–30 milliliters) milk or cream
Pinch of salt
Instructions
Distill coffee in a small saucepan over medium heat, reducing liquid to a concentrated essence. Remove from heat and reserve for later use.
Prepare baking vessel by lining an 8″ or 9″ square pan with foil, lightly misting with non-stick spray.
Gently melt chocolate and butter in a saucepan, stirring continuously until smooth and glossy. Allow mixture to cool for approximately 15 minutes.
Incorporate sugars into cooled chocolate base, whisking until fully integrated. Add eggs individually, blending thoroughly after each addition.
Introduce concentrated coffee essence into the chocolate mixture, stirring until uniform.
Delicately fold flour and salt into batter, ensuring complete incorporation without overmixing.
Transfer batter to prepared pan, spreading evenly. Bake in a preheated 350ºF oven for 25-30 minutes, checking doneness with a toothpick.
While brownies cool, create mocha frosting by melting unsweetened chocolate and butter. Allow to rest for 15 minutes.
Combine cooled chocolate mixture with coffee essence and milk. Gradually whip in powdered sugar until smooth, adjusting consistency with additional liquid if needed.
Once brownies have completely cooled, elevate from pan using foil edges. Generously spread mocha frosting across surface.
Slice into individual servings. Store at room temperature for up to one week or freeze for three months, thawing overnight in refrigerator.
Notes
Concentrate coffee by reducing it to intensify the rich, bold flavor profile throughout the brownie and frosting.
Use high-quality dark chocolate for deeper, more complex taste that elevates the dessert’s overall richness.
Line the baking pan with foil for easy removal and clean cutting of brownies without sticking or crumbling.
Cool chocolate mixture completely before adding eggs to prevent accidental scrambling and ensure smooth texture.
Check brownies early and remove when toothpick comes out mostly clean to maintain a perfectly fudgy, moist center.
Adjust frosting consistency by gradually adding milk or cream for the ideal spreadable, silky-smooth topping.
Focus: Blending culinary arts with nutritional science to create health-focused cuisine.
Certified Nutrition Specialist® (CNS®)
Credential: Advanced certification in personalized nutrition therapy.
David Bennett is the lead recipe creator and nutrition expert at HealthyChoices.org, your friendly space for tasty meals that nourish body and mind.
With a Culinary Nutrition degree from Johnson & Wales University and a Certified Nutrition Specialist® credential, David pairs practical nutrition with delicious cooking, creating recipes you’ll crave daily.
At Healthy Choices, David shares easy, nutritious dishes and smart cooking tips to make healthy eating something everyone can enjoy, with no complicated diets needed.

David Bennett
Founder & Head Recipe Developer
Expertise
Culinary Nutrition, Recipe Development, Nutritional Counseling, Food Science
Education
Johnson & Wales University
Certified Nutrition Specialist® (CNS®)
David Bennett is the lead recipe creator and nutrition expert at HealthyChoices.org, your friendly space for tasty meals that nourish body and mind.
With a Culinary Nutrition degree from Johnson & Wales University and a Certified Nutrition Specialist® credential, David pairs practical nutrition with delicious cooking, creating recipes you’ll crave daily.
At Healthy Choices, David shares easy, nutritious dishes and smart cooking tips to make healthy eating something everyone can enjoy, with no complicated diets needed.