
Perfect Classic Cheesecake Recipe: Smooth & Heavenly Dessert Magic
Indulge in the creamy magic of a classic cheesecake recipe that promises pure dessert bliss.
This timeless treat has delighted taste buds for generations with its silky smooth texture and rich flavor profile.
Every baker dreams of mastering the perfect classic cheesecake, a dessert that speaks volumes of culinary skill.
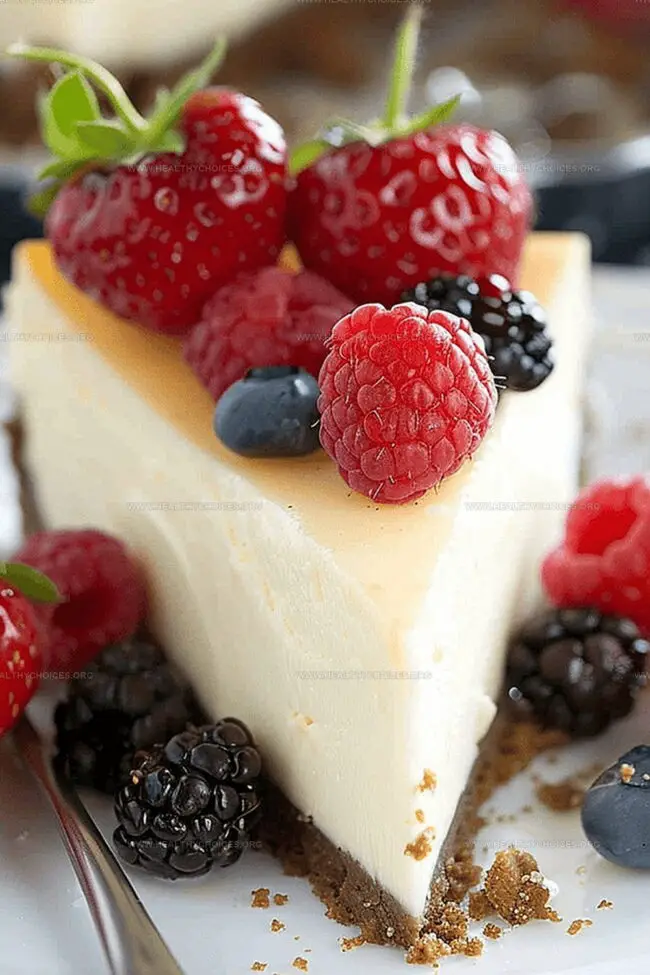
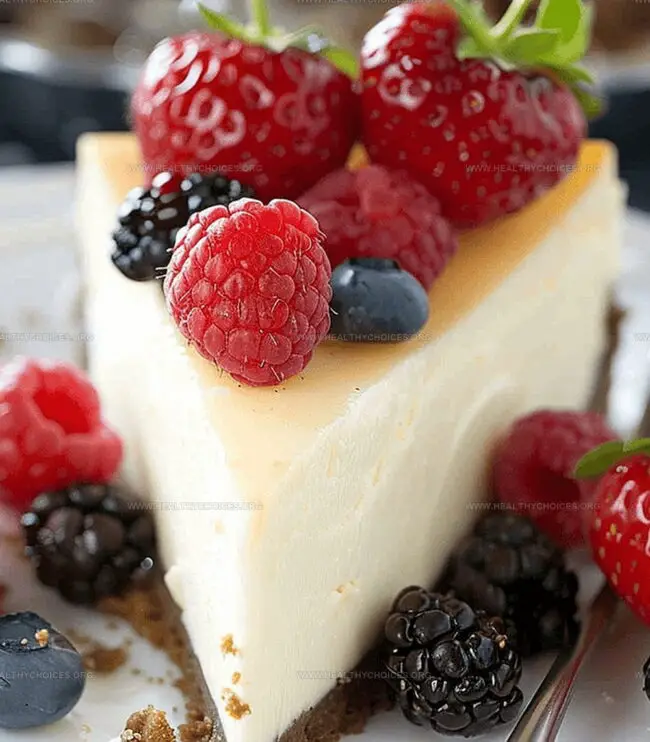
The combination of velvety cream cheese, buttery graham cracker crust, and delicate vanilla notes creates an irresistible symphony of taste.
Professional pastry chefs and home bakers alike cherish this dessert for its elegant simplicity.
Whip up this decadent cheesecake and watch as it becomes the star of any gathering, leaving everyone craving another slice.
Quick Recipe Overview
Ingredients for Classic Cheesecake
For Crust Base:For Creamy Filling:For Baking Support:What You Need for Cheesecake Baking
Step-by-Step Cheesecake Baking Instructions
Create a buttery base by crushing graham crackers and mixing with brown sugar and cinnamon. Press the crumbly mixture firmly into a springform pan, then quickly bake until golden and let cool completely.
Whip cream cheese until ultra-smooth, gradually blending in sugar and vanilla. Gently fold in eggs one at a time, ensuring each is fully integrated for a luxurious, velvety texture.
Place the filled springform pan inside a larger pan with warm water. This gentle cooking technique helps prevent unsightly cracks and ensures a creamy, even consistency.
After baking until the center is just set, turn off the oven and let the cheesecake rest inside with the door slightly open. This gradual cooling prevents sudden temperature changes that can cause splitting.
Transfer the cooled cheesecake to the refrigerator and let it rest overnight. This final resting period allows the flavors to meld and the texture to become wonderfully dense and smooth.
Tips for Silky-Smooth Cheesecake
How to Slice and Plate Cheesecake
Make-Ahead Tips for Cheesecake Lovers
Print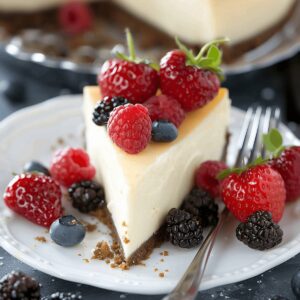
Creamy Classic Cheesecake Recipe
- Total Time: 12 hours
- Yield: 13 1x
Description
Rich New York-style cheesecake delivers creamy perfection with graham cracker crust and silky cream cheese filling. Dessert enthusiasts will savor each elegant slice of this timeless American classic.
Ingredients
- 3 packages (8 oz/226 g) cream cheese, room temperature
- 3 large eggs
- 1 cup granulated sugar
- 2 cups graham cracker crumbs
- 6 tbsps unsalted butter, melted
- ¼ cup brown sugar
- 1 tsp vanilla extract
- ¼ tsp cinnamon
- 1 oven-safe turkey bag
Instructions
- Crust Preparation: Pulverize graham crackers into fine crumbs using a food processor, then combine with brown sugar, cinnamon, and melted butter until the mixture resembles damp sand.
- Crust Formation: Press the crumb mixture firmly into the bottom of a springform pan, creating an even, compact foundation, then lightly toast in the oven until golden and aromatic.
- Cheesecake Base: Whip cream cheese until ultra-smooth, gradually blending in sugar and vanilla extract to create a luxurious, lump-free batter.
- Batter Integration: Gently fold eggs into the cream cheese mixture one at a time, ensuring a silky, homogeneous texture without overmixing.
- Baking Technique: Wrap the springform pan in aluminum foil, place in a water bath, and pour the velvety batter over the prepared crust with a delicate touch.
- Oven Strategy: Bake at a precise temperature, allowing the cheesecake to develop a perfectly set center with a subtle wobble, then turn off the oven and leave the door slightly open for a gradual cooling process.
- Chilling and Setting: Refrigerate the cheesecake overnight, allowing it to firm completely and develop a rich, decadent flavor profile that promises a sublime dessert experience.
Notes
- Crush Crackers Carefully: Use a food processor for uniform, fine graham cracker crumbs to ensure a smooth, consistent crust foundation.
- Bind Crust Perfectly: Mix cracker crumbs with melted butter and brown sugar until the mixture holds together like damp sand, preventing crumbling during serving.
- Press Firmly and Evenly: Apply steady, even pressure when forming the crust to create a compact, stable base that won’t fall apart when slicing.
- Prevent Cheesecake Cracks: Use a water bath and gradual cooling technique to minimize surface cracking and maintain a silky, creamy texture throughout baking.
- Prep Time: 20 minutes
- Cook Time: 70-80 minutes
- Category: Desserts
- Method: Baking
- Cuisine: American
Nutrition
- Serving Size: 13
- Calories: 380
- Sugar: 28 g
- Sodium: 350 mg
- Fat: 24 g
- Saturated Fat: 14 g
- Unsaturated Fat: 9 g
- Trans Fat: 0 g
- Carbohydrates: 34 g
- Fiber: 1 g
- Protein: 6 g
- Cholesterol: 90 mg
Emily Roberts
Content Creator & Kitchen Tips Specialist
Expertise
Dietary Planning, Public Health Nutrition, Nutritional Education, Content Development
Education
University of Illinois at Urbana-Champaign
Registered Dietitian Nutritionist (RDN)
Emily Roberts is our content specialist and registered dietitian at HealthyChoices.org. With her Master’s degree in Nutritional Sciences from the University of Illinois and her Registered Dietitian Nutritionist certification, Emily uses her deep nutrition knowledge to write helpful, easy-to-understand guides about healthy eating.
Her warm, practical advice empowers readers to confidently make healthier choices, turning everyday meals into simple moments of wellness and joy.