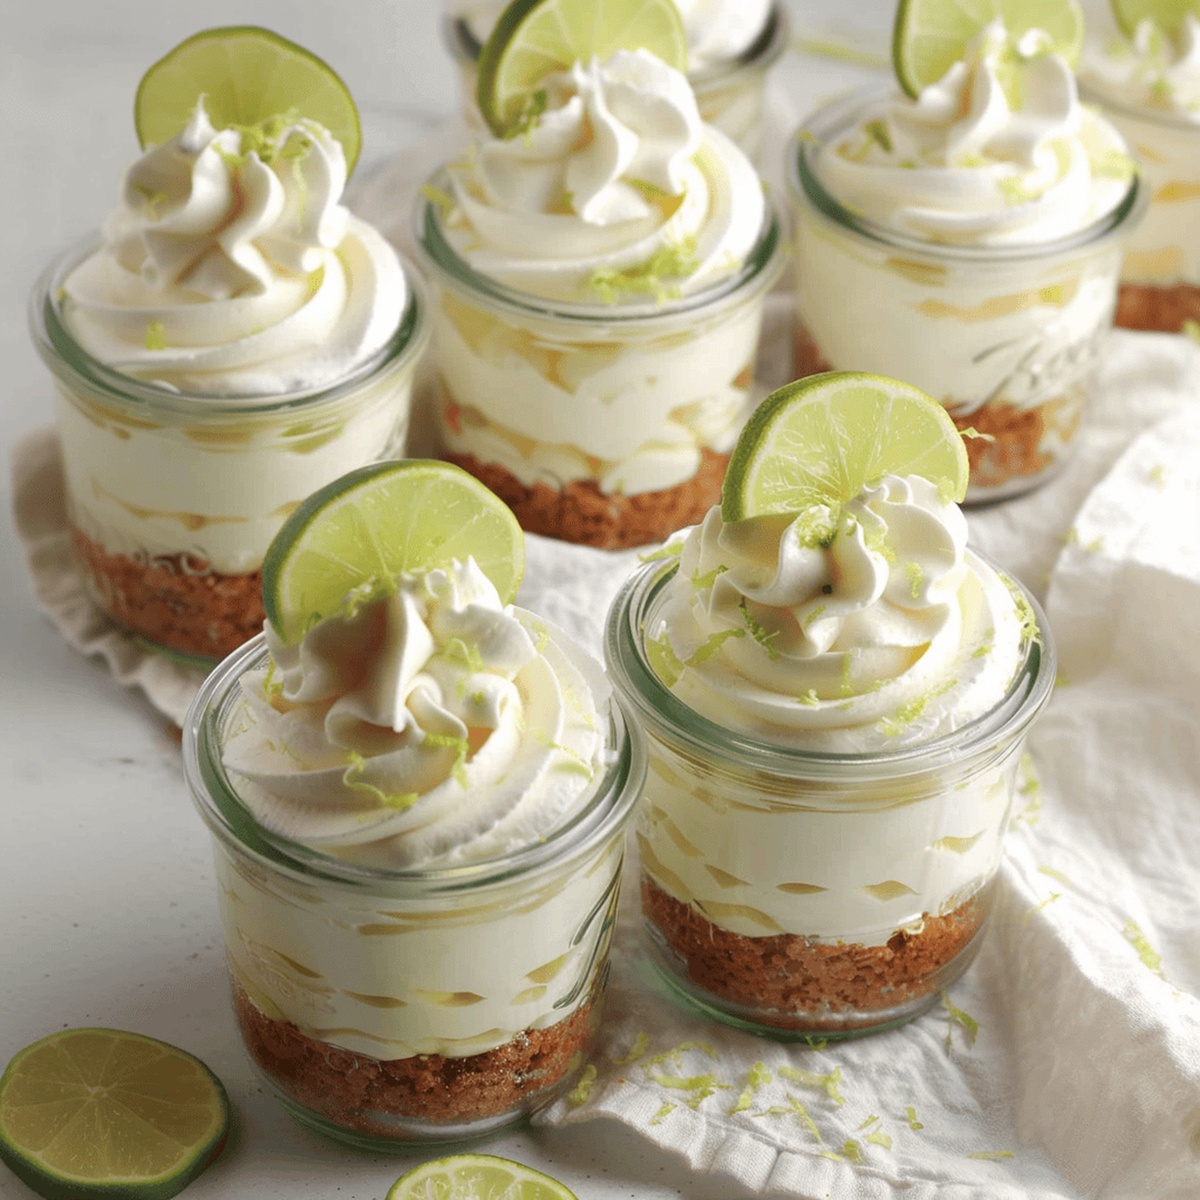
Dreamy Key Lime Cheesecake Jars: A Tangy Sweet Treat Recipe
Creamy and tangy, these key lime cheesecake jars will transport you to a tropical paradise with every spoonful.
Layers of zesty lime-infused filling dance atop a buttery graham cracker base, creating a dessert that’s both elegant and irresistible.
Mason jars add a charming rustic touch to this delightful treat.
The smooth cream cheese blend perfectly complements the sharp citrus notes, making each bite a refreshing experience.
Portable and impressive, these individual desserts work magic at summer gatherings or quiet evening indulgences.
Quick to assemble and even quicker to devour, they promise a delectable escape from ordinary desserts.
Get ready to become the star of any occasion with these mouthwatering little delights.
Quick Recipe Overview
Key Lime Cheesecake Jars Ingredient Essentials
For Crust Base:For Creamy Filling:For Topping Cream:Equipment Setup for Key Lime Cheesecake Jars
Making Your Key Lime Cheesecake Jars
Crush graham crackers into fine crumbs, blending with sweet sugar and melted butter until perfectly combined. Press this delightful mixture firmly into the bottom of cute glass jars, creating a golden base that hints at the deliciousness to come.
Whip cream cheese until supremely smooth, gently folding in sweet condensed milk and tangy key lime juice. Mix until the texture becomes silky and luxurious, creating a velvety landscape of tropical flavor.
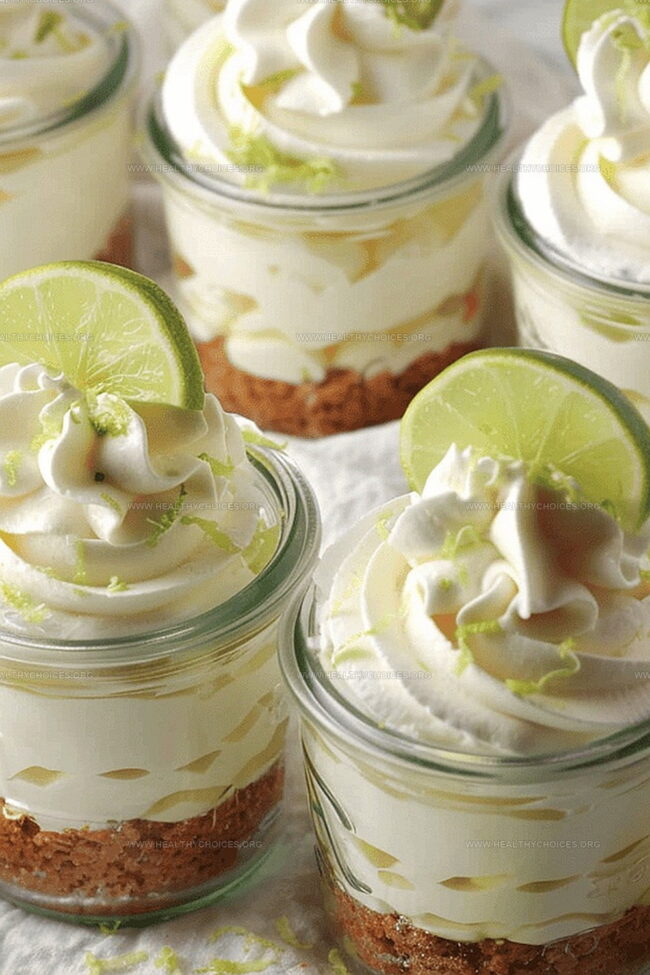
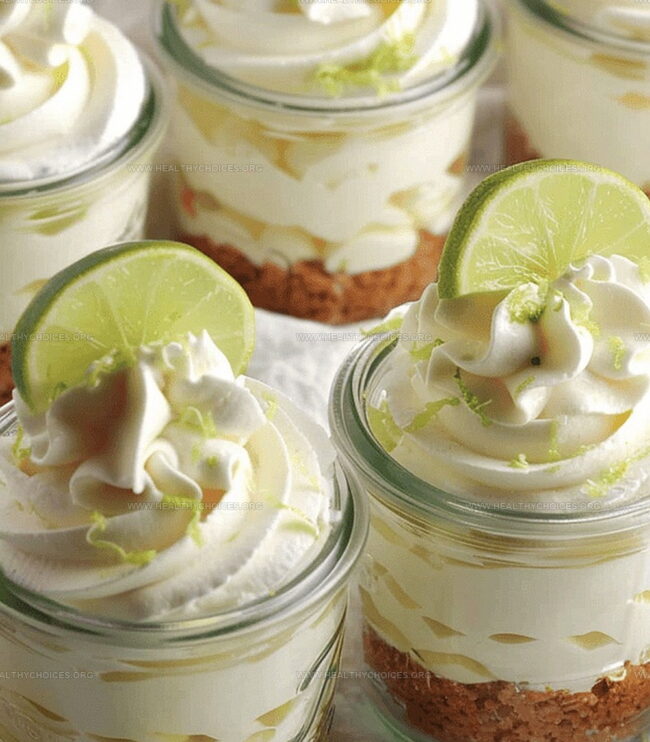
Craft a cloud-like whipped cream by blending cream cheese, sugar, and whipping cream until peaks form beautifully. Dollop or swirl this fluffy topping over the key lime layer with artistic flair.
Tuck the jars into the refrigerator, allowing them to cool and set for about an hour. Just before serving, add a playful garnish of fresh lime slices to brighten the dessert and wow your guests with a burst of citrusy charm.
Baking Tips for Key Lime Cheesecake Jars
Creative Serving for Key Lime Cheesecake Jars
Storage Notes for Key Lime Cheesecake Jars
Print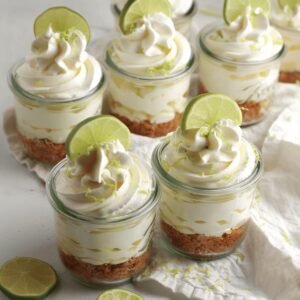
Creamy Key Lime Cheesecake Jars
- Total Time: 1 hour 30 minutes
- Yield: 9 1x
Description
Creamy key lime cheesecake jars blend tangy citrus with sweet graham cracker base. Small mason jars make this dessert portable and perfect for summer gatherings.
Ingredients
- 28 oz (794 g) sweetened condensed milk
- 16 oz (454 g) cream cheese, softened
- 1 cup (240 ml) key lime juice
- 1¼ cups (150 g) graham cracker crumbs
- 4 tbsps (56 g) butter, melted
- 2 tbsps (25 g) sugar
- 4 oz (113 g) cream cheese, softened
- 2 tbsps (25 g) granulated sugar
- 1 cup (240 ml) heavy whipping cream, cold
- 1 tsp (5 ml) vanilla extract (optional)
Instructions
- Crust Preparation: Pulverize graham crackers with sugar, integrating thoroughly. Drizzle melted butter and fold until mixture achieves uniform consistency. Gently press crumb foundation into individual serving jars, creating a compact base layer.
- Filling Creation: Whisk cream cheese until velvety smooth, eliminating potential lumps. Gradually incorporate sweetened condensed milk while maintaining continuous mixing. Stream key lime juice into mixture, blending vigorously and scraping container edges to ensure homogeneous texture.
- Whipped Cream Assembly: In pristine mixing vessel, combine cream cheese and sugar. Introduce cold whipping cream, whisking energetically until robust peaks form. Carefully transfer cheesecake mixture into prepared jars, ensuring balanced distribution.
- Chilling and Garnishing: Nestle jars in refrigerator, allowing minimum sixty minutes for complete stabilization. Just before serving, crown with delicately piped whipped cream topping. Embellish with vibrant lime medallions to enhance visual appeal and citrusy flavor profile.
Notes
- Crumb Consistency Matters: Finely pulverize graham crackers to create a smooth, compact base that binds perfectly with melted butter.
- Cream Cheese Technique: Whisk thoroughly to eliminate lumps, ensuring a silky-smooth texture that blends seamlessly with other ingredients.
- Whipping Cream Perfection: Achieve stiff peaks by starting with cold cream and whisking vigorously for a light, airy topping.
- Chilling is Crucial: Refrigerate for at least one hour to allow flavors to meld and texture to set, creating the ultimate creamy dessert experience.
- Prep Time: 30 minutes
- Cook Time: 0 minutes
- Category: Desserts, Snacks
- Method: Blending
- Cuisine: American
Nutrition
- Serving Size: 9
- Calories: 470
- Sugar: 37 g
- Sodium: 360 mg
- Fat: 32 g
- Saturated Fat: 18 g
- Unsaturated Fat: 8 g
- Trans Fat: 0 g
- Carbohydrates: 42 g
- Fiber: 1 g
- Protein: 6 g
- Cholesterol: 95 mg
Emily Roberts
Content Creator & Kitchen Tips Specialist
Expertise
Dietary Planning, Public Health Nutrition, Nutritional Education, Content Development
Education
University of Illinois at Urbana-Champaign
Registered Dietitian Nutritionist (RDN)
Emily Roberts is our content specialist and registered dietitian at HealthyChoices.org. With her Master’s degree in Nutritional Sciences from the University of Illinois and her Registered Dietitian Nutritionist certification, Emily uses her deep nutrition knowledge to write helpful, easy-to-understand guides about healthy eating.
Her warm, practical advice empowers readers to confidently make healthier choices, turning everyday meals into simple moments of wellness and joy.