Savory Roasted Garlic Pizza Dip Sliders Recipe for Game Day Fun
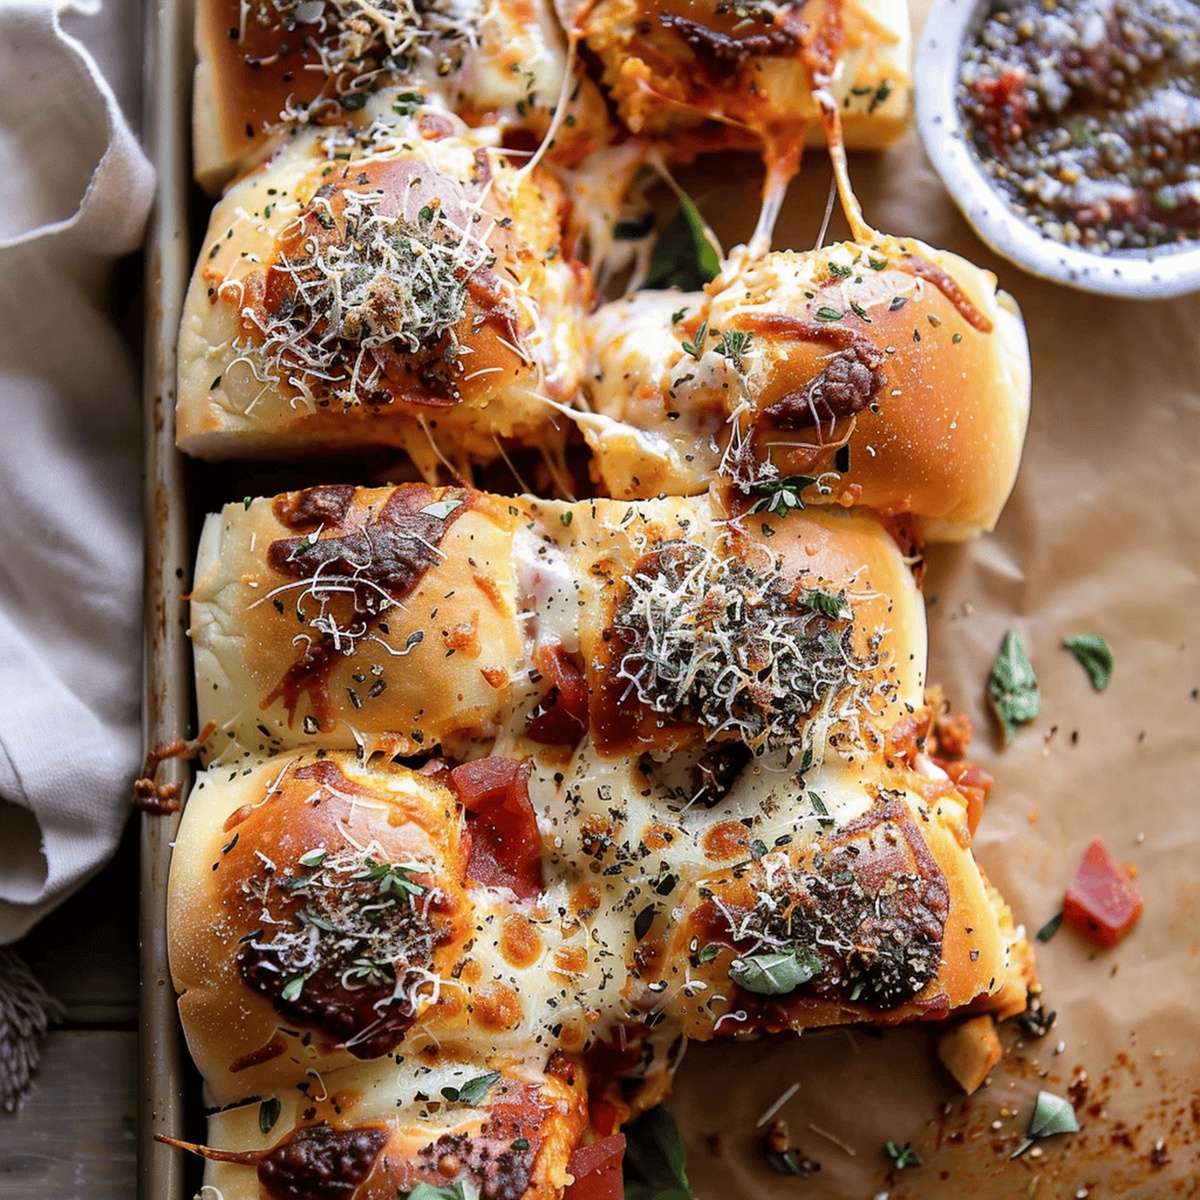
Melted cheese and roasted garlic pizza dip sliders create a mouthwatering fusion that’ll make your taste buds dance with excitement.
This crowd-pleasing appetizer blends the best of pizza flavors with classic slider magic.
Imagine soft, pillowy rolls packed with gooey, herbaceous goodness.
Each bite delivers a punch of savory comfort that screams deliciousness.
The combination of melted cheese, zesty herbs, and perfectly roasted garlic makes these sliders irresistible.
You’ll love how quickly these come together for any gathering or game day celebration.
Dive into this recipe and get ready to become the ultimate party food hero.
Quick Recipe Overview
Ingredients for Roasted Garlic Pizza Dip Sliders
For Bread Base:For Cheese Lovers:For Flavor Boosters:Kitchen Tools for Roasted Garlic Pizza Dip Sliders
Directions for Roasted Garlic Pizza Dip Sliders
Slice the top off a garlic head and drizzle with olive oil. Wrap in foil and bake until golden and soft, releasing an incredible aroma that fills the kitchen.
Layer dinner roll bottoms with marinara sauce, creating a vibrant base. Sprinkle mozzarella, provolone, and parmesan cheeses over the sauce. Add pepperoni for a spicy kick.
Squeeze roasted garlic cloves into softened butter. Mix with parmesan, herbs, and a touch of chili flakes to create a mouth-watering spread that will make taste buds dance.
Spread herbed garlic butter across slider tops. Cover with foil and bake until cheese becomes gloriously melted. Remove foil for a final crisp and golden finish.
Brush extra garlic butter over sliders for a glossy, appetizing shine. Serve immediately while warm and watch everyone’s eyes light up with excitement.
Flavor Suggestions for Roasted Garlic Pizza Dip Sliders
Serving Instructions for Roasted Garlic Pizza Dip Sliders
Storing Roasted Garlic Pizza Dip Sliders
Print
Creamy Roasted Garlic Pizza Dip Sliders Recipe
- Total Time: 70-80 minutes
- Yield: 13 1x
Description
Irresistible garlic pizza dip sliders combine classic Italian flavors with crowd-pleasing comfort. Melted cheese, zesty marinara, and herbed rolls create a mouthwatering experience perfect for game day or casual gatherings.
Ingredients
- 1 (12-count) package dinner rolls, halved lengthwise
- 1–1.5 cups marinara sauce
- ½ cup pepperoni, thinly sliced
- ¾ cup mozzarella cheese, shredded
- ¾ cup provolone cheese, shredded
- ¼ cup parmesan cheese, grated
- 1 head garlic
- 3 tbsps (42 grams) salted butter, room temperature or melted
- 1 tbsp sage, fresh and chopped
- 2 teaspoons basil, dried
- 1 teaspoon oregano, dried
- 1 teaspoon parsley, dried
- 1 pinch chili flakes
- Extra virgin olive oil, for drizzling
Instructions
- Preparation Setup: Preheat oven to 400°F (200°C), positioning rack in center for optimal heat distribution.
- Garlic Roasting: Slice garlic head top, drizzle with olive oil, wrap in aluminum foil, and roast for 40-55 minutes until cloves turn golden and tender.
- Slider Foundation: Arrange roll bottoms on lined baking sheet, spreading marinara sauce uniformly across surface.
- Cheese Layer: Distribute mozzarella, provolone, and half the parmesan cheese evenly, creating a creamy base.
- Protein Placement: Add pepperoni slices strategically across cheese layer for enhanced flavor profile.
- Garlic Butter Fusion: Squeeze roasted garlic cloves, blend with salted butter, remaining parmesan, sage, basil, oregano, parsley, and chili flakes.
- Assembly: Position roll tops, generously spread garlic butter mixture over entire surface, ensuring complete coverage.
- Baking Process: Cover with foil, bake for 10 minutes, then uncover and continue baking for additional 10 minutes until cheese melts perfectly.
- Finishing Touch: Remove from oven, brush tops with remaining garlic butter, allowing flavors to intensify.
- Serving: Present immediately while hot, delivering a rich, multilayered culinary experience.
Notes
- Garlic Roasting Technique: Slice off the garlic head’s top and drizzle with olive oil to ensure even, caramelized roasting that releases deep, rich flavors.
- Cheese Layer Strategy: Distribute mozzarella and provolone evenly to create a uniform, melty base that guarantees delicious coverage in every bite.
- Foil Baking Protection: Cover sliders with foil initially to prevent excessive browning and ensure gentle, even heating of the delicate rolls.
- Flavor Enhancing Finale: Brush remaining garlic butter on top after baking to intensify the aromatic herb and butter profile, elevating the overall taste experience.
- Prep Time: 15 minutes
- Cook Time: 55-65 minutes
- Category: Appetizer, Snacks
- Method: Baking
- Cuisine: American
Nutrition
- Serving Size: 13
- Calories: 320
- Sugar: 4 g
- Sodium: 680 mg
- Fat: 18 g
- Saturated Fat: 10 g
- Unsaturated Fat: 8 g
- Trans Fat: 0 g
- Carbohydrates: 30 g
- Fiber: 1 g
- Protein: 12 g
- Cholesterol: 45 mg
Emily Roberts
Content Creator & Kitchen Tips Specialist
Expertise
Dietary Planning, Public Health Nutrition, Nutritional Education, Content Development
Education
University of Illinois at Urbana-Champaign
Registered Dietitian Nutritionist (RDN)
Emily Roberts is our content specialist and registered dietitian at HealthyChoices.org. With her Master’s degree in Nutritional Sciences from the University of Illinois and her Registered Dietitian Nutritionist certification, Emily uses her deep nutrition knowledge to write helpful, easy-to-understand guides about healthy eating.
Her warm, practical advice empowers readers to confidently make healthier choices, turning everyday meals into simple moments of wellness and joy.