
Gooey Cheese-Stuffed Breadsticks Recipe: A Warm Homemade Treat
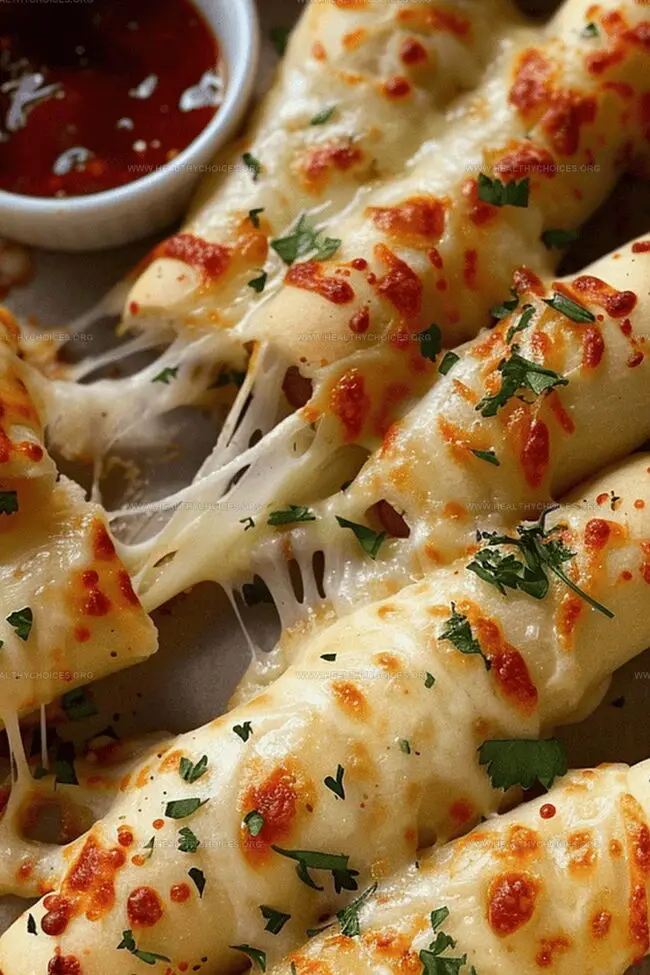
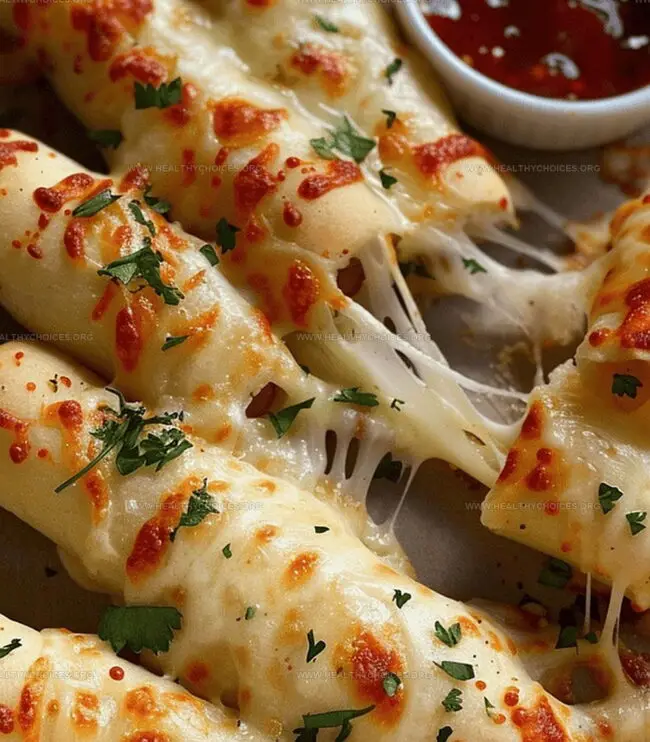
Crispy, golden breadsticks bursting with melted cheese create an irresistible snack that’ll have everyone reaching for more.
These homemade cheese-stuffed breadsticks deliver a mouthwatering blend of soft dough and gooey filling.
Perfectly seasoned and baked to a delightful crunch, they’re a guaranteed crowd-pleaser for any gathering.
The secret lies in the simple yet delectable combination of fresh ingredients and careful technique.
Warm, cheesy, and packed with flavor, these breadsticks promise to be the star of your next meal or appetizer spread.
Whether you’re hosting a casual get-together or looking for a quick comfort food fix, this recipe will become your new go-to favorite.
Dive into this delicious creation and watch as these irresistible breadsticks disappear in moments.
Quick Recipe Overview
What You Need for Cheese-Stuffed Breadsticks
For Base Ingredients:For Flavor Enhancers:For Seasoning Blend:Kitchen Tools for Cheese-Stuffed Breadsticks
Equipment & Tools:Baking Cheese-Stuffed Breadsticks Instructions
Spread soft pizza dough on a clean countertop, creating a smooth canvas for your cheesy adventure.
Carefully position cheese sticks across one half of the dough landscape, ensuring even spacing and promising pockets of melty delight.
Gently fold the remaining dough over the cheese, creating a cozy cover that seals in all the deliciousness.
Slice the dough into individual breadstick parcels, making sure each edge is tightly sealed to prevent cheese escape.
Slide the breadsticks into a hot oven, watching them turn a beautiful golden brown that signals crispy perfection.
Brush the freshly baked breadsticks with a magical garlic butter blend, adding a final layer of irresistible flavor that will make taste buds dance.
Cheese Tips & Twists for Stuffed Breadsticks
Presenting Cheese-Stuffed Breadsticks
Store Cheese-Stuffed Breadsticks Properly
Print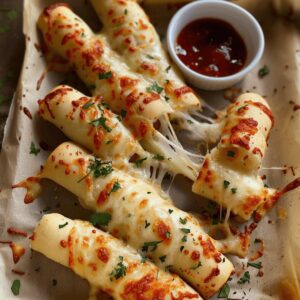
Crispy Cheese-Stuffed Breadsticks
- Total Time: 28 minutes
- Yield: 7 1x
Description
Homemade cheese-stuffed breadsticks combine Italian flavors with crispy golden edges and gooey mozzarella centers. Seasoned herbs and garlic elevate this simple snack for hungry friends craving comfort and deliciousness.
Ingredients
- 2 pounds (907 g) pizza dough
- 12 mozzarella sticks
- ⅓ cup (79 ml) shredded mozzarella
- 4 tbsps (60 ml) unsalted butter, melted
- 1 tbsp (15 ml) parmesan, grated
- 1 tbsp (15 ml) parsley, finely chopped
- ¼ tsp salt
- ¼ tsp garlic powder
- 1 pinch black pepper
Instructions
- Dough Preparation: Dust work surface with flour and stretch pizza dough into rectangular shapes, creating a smooth foundation for cheese stick assembly.
- Cheese Layering: Position cheese sticks strategically across one dough sheet, maintaining uniform spacing, then gently drape second dough sheet to form a cheese-filled sandwich structure.
- Sealing and Cutting: Apply firm pressure around cheese stick edges to seal completely, preventing potential cheese leakage. Methodically slice the layered dough into individual breadstick segments using a pizza cutter.
- Baking Setup: Arrange breadsticks on parchment-lined baking sheet with adequate spacing, then slide into oven preheated to 425°F (220°C).
- Flavor Infusion: While breadsticks bake to golden perfection, whisk melted butter with parsley, parmesan, salt, garlic powder, and black pepper to create a robust finishing glaze.
- Finishing Touch: Upon emerging from oven with a crisp, sun-kissed exterior, immediately brush breadsticks generously with prepared garlic butter mixture, ensuring comprehensive coverage.
- Serving: Present these molten, cheese-filled delicacies while piping hot, inviting immediate and enthusiastic consumption.
Notes
- Flour Surface Prep: Lightly dust your workspace with flour to prevent sticky dough and ensure smooth handling.
- Dough Stretching Technique: Carefully stretch dough into even rectangles to create uniform, professional-looking breadsticks.
- Seal Like a Pro: Press edges firmly around cheese sticks to prevent cheese from oozing out during baking, creating perfect sealed pockets.
- Butter Brush Magic: Immediately coat hot breadsticks with garlic butter mixture for maximum flavor absorption and irresistible golden finish.
- Prep Time: 15 minutes
- Cook Time: 13 minutes
- Category: Appetizer, Snacks
- Method: Baking
- Cuisine: Italian
Nutrition
- Serving Size: 7
- Calories: 352
- Sugar: 1 g
- Sodium: 367 mg
- Fat: 23 g
- Saturated Fat: 14 g
- Unsaturated Fat: 8 g
- Trans Fat: 0 g
- Carbohydrates: 27 g
- Fiber: 1 g
- Protein: 12 g
- Cholesterol: 58 mg
Emily Roberts
Content Creator & Kitchen Tips Specialist
Expertise
Dietary Planning, Public Health Nutrition, Nutritional Education, Content Development
Education
University of Illinois at Urbana-Champaign
Registered Dietitian Nutritionist (RDN)
Emily Roberts is our content specialist and registered dietitian at HealthyChoices.org. With her Master’s degree in Nutritional Sciences from the University of Illinois and her Registered Dietitian Nutritionist certification, Emily uses her deep nutrition knowledge to write helpful, easy-to-understand guides about healthy eating.
Her warm, practical advice empowers readers to confidently make healthier choices, turning everyday meals into simple moments of wellness and joy.