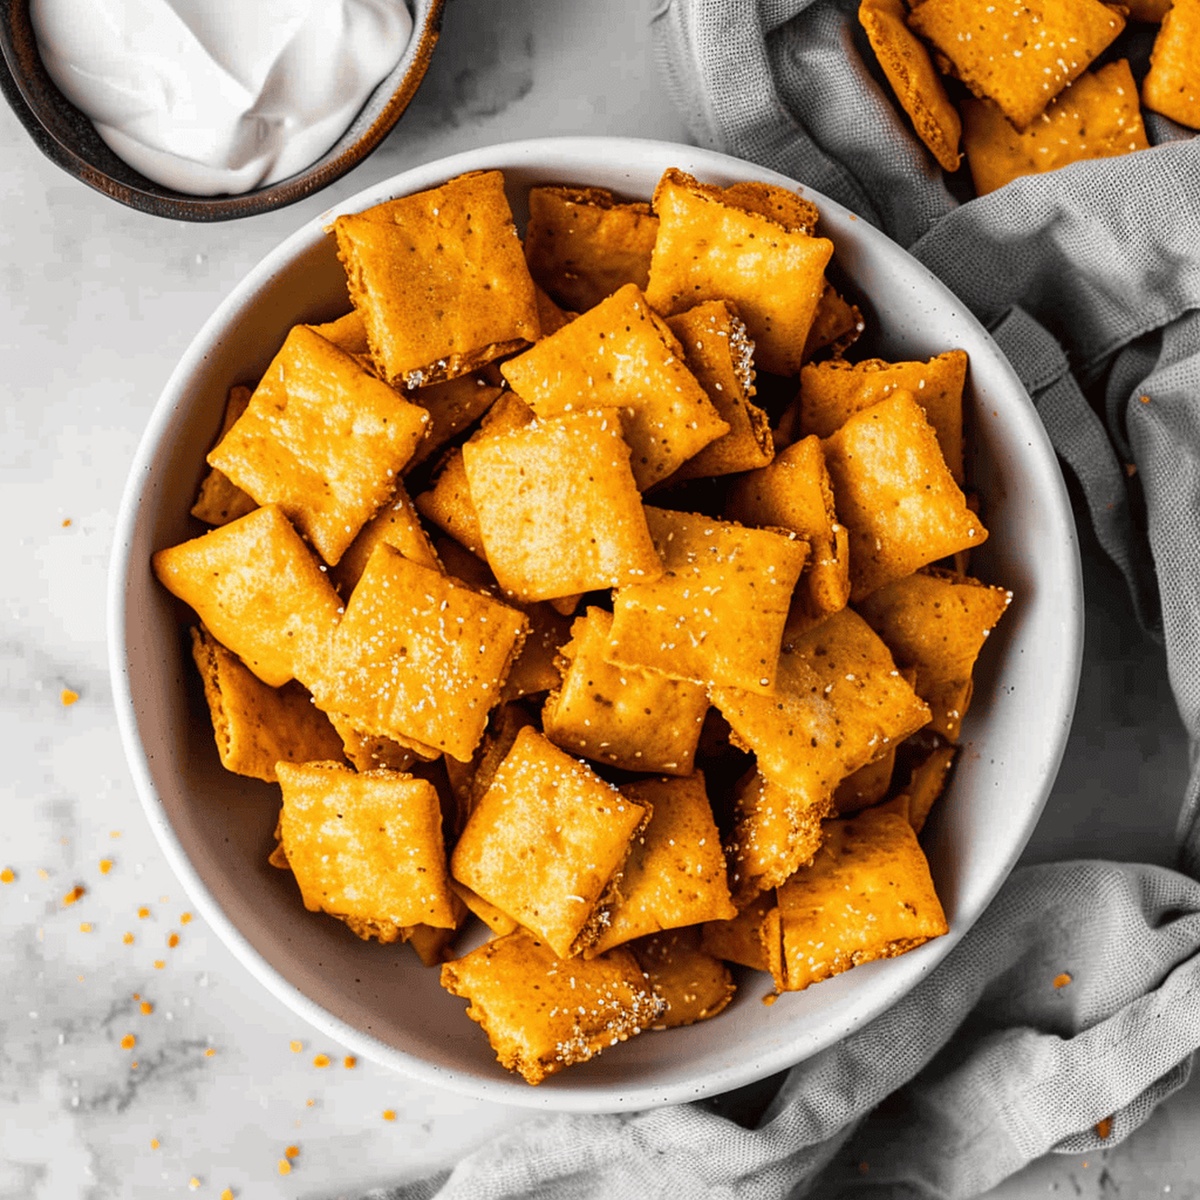
Crunchy Homemade Cheez Its Recipe: Better Than Store-Bought
Crispy, cheesy snacks hit differently when you craft these irresistible homemade cheez its from scratch.
The golden, crackers pack a punch of nostalgic flavor that store-bought versions can’t match.
Every bite delivers a satisfying crunch with sharp cheddar notes dancing across your palate.
These delightful little squares bring back memories of childhood afternoons and late-night munchies.
Anyone can whip up these simple crackers with just a few pantry staples and minimal effort.
The blend of sharp cheese and buttery dough creates an addictive snack that disappears faster than you can bake them.
Dive into this recipe and unlock the secret to the most irresistible homemade cheese crackers you’ll ever taste.
Quick Recipe Overview
Cheez Its Ingredients for a Homemade Crunch
For Cheesy Base:For Dry Ingredients:For Moisture and Coating:Tools to Bake Snack Crackers Like a Pro
How to Make Cheesy Crackers from Scratch
Start by creating a rich, creamy base with softened butter and sharp cheddar cheese. Mix these ingredients until they transform into a fluffy, decadent mixture that promises delicious results.
Combine flour with a pinch of salt, then gently incorporate this dry mixture into the cheese blend. The goal is to create a crumbly texture that hints at the crispy crackers to come.
Slowly introduce cold water to bind the ingredients, working the mixture until it forms a cohesive dough. The perfect consistency should feel firm yet malleable, ready to be transformed.
Shape the dough into a smooth disk and let it rest in the refrigerator. This crucial pause allows flavors to mingle and the dough to become more manageable.
Roll out the chilled dough into a thin sheet, then carefully cut into small squares. Use a wooden skewer to create signature center holes that will help the crackers bake evenly.
Brush the squares with a light coating of olive oil and sprinkle with salt. Bake in a hot oven until the edges turn a beautiful golden brown and the crackers become wonderfully crisp.
Transfer the freshly baked crackers to a cooling rack, allowing them to reach the perfect crunch. Enjoy your homemade cheese crackers as a delightful snack that beats any store-bought version.
Spices and Toppings to Try on Your Batch
Serve Homemade Cheez Its for Any Occasion
Keep Crackers Crisp After Baking
Print
Crispy Homemade Cheez Its
- Total Time: 1 hour 25-27 minutes
- Yield: 13 1x
Description
Crispy homemade Cheez-Its promise a nostalgic snack adventure with sharp cheddar and buttery crunch. Cheese crackers deliver irresistible flavor that connects you to childhood memories and satisfies sharp cheddar cravings.
Ingredients
- 8 oz (226 g) sharp cheddar cheese, shredded
- 1.25 cups all-purpose flour
- 0.25 cup unsalted butter, room temperature
- 2–3 tbsps cold water
- 2 tbsps olive oil
- 1 tsp kosher salt
- Additional kosher salt for topping
Instructions
- Blend Base: Cream softened butter and sharp cheddar cheese in a mixing bowl using an electric mixer until smooth and fully integrated.
- Develop Dough: Incorporate flour and kosher salt into the cheese mixture on low speed, gradually transforming the texture into a coarse, crumbly consistency. Introduce cold water incrementally, gently kneading until a cohesive dough forms.
- Chill Preparation: Shape the dough into a compact disk, wrap in plastic, and refrigerate for 60 minutes to stabilize ingredients and solidify texture.
- Prepare for Baking: Preheat oven to 375°F. Roll out chilled dough on parchment paper into an ultra-thin rectangular sheet approximately ⅛ inch thick. Slice into precise 1-inch squares using a sharp pizza cutter.
- Enhance and Season: Pierce each cracker square with a wooden skewer for ventilation. Brush with olive oil and sprinkle additional kosher salt to elevate flavor profile.
- Bake to Perfection: Arrange crackers on a baking sheet, maintaining slight separation. Bake for 15-17 minutes until edges turn golden-amber and surfaces achieve maximum crispness.
- Finish and Serve: Transfer immediately to a cooling rack, allowing crackers to reach room temperature and develop ultimate crunchiness before serving.
Notes
- Butter Temperature Tip: Ensure butter is precisely softened but not melty for optimal dough consistency and texture.
- Chilling Importance: Refrigeration allows gluten to relax and prevents crackers from becoming tough, creating a delicate, crisp result.
- Salt Precision: Use kosher salt for balanced flavor; sprinkle evenly to enhance overall cracker taste without overwhelming saltiness.
- Baking Timing: Watch crackers closely during final minutes to prevent burning; golden-amber edges indicate perfect doneness and crispy texture.
- Prep Time: 1 hour 10 minutes
- Cook Time: 15-17 minutes
- Category: Snacks, Appetizer
- Method: Baking
- Cuisine: American
Nutrition
- Serving Size: 13
- Calories: 150
- Sugar: 0.5 g
- Sodium: 180 mg
- Fat: 9 g
- Saturated Fat: 5 g
- Unsaturated Fat: 3 g
- Trans Fat: 0 g
- Carbohydrates: 15 g
- Fiber: 0.5 g
- Protein: 4 g
- Cholesterol: 20 mg
Emily Roberts
Content Creator & Kitchen Tips Specialist
Expertise
Dietary Planning, Public Health Nutrition, Nutritional Education, Content Development
Education
University of Illinois at Urbana-Champaign
Registered Dietitian Nutritionist (RDN)
Emily Roberts is our content specialist and registered dietitian at HealthyChoices.org. With her Master’s degree in Nutritional Sciences from the University of Illinois and her Registered Dietitian Nutritionist certification, Emily uses her deep nutrition knowledge to write helpful, easy-to-understand guides about healthy eating.
Her warm, practical advice empowers readers to confidently make healthier choices, turning everyday meals into simple moments of wellness and joy.