Elegant Crème Brûlée Pie Recipe with Caramelized Golden Sugar Top
Crème brûlée pie reinvents an elegant French dessert into a decadent pastry experience that tempts even the most discerning sweet lovers.
Classic culinary techniques merge with innovative baking approaches to create this luxurious confection.
Smooth, silky custard forms the heart of this indulgent treat, promising rich flavor in every single bite.
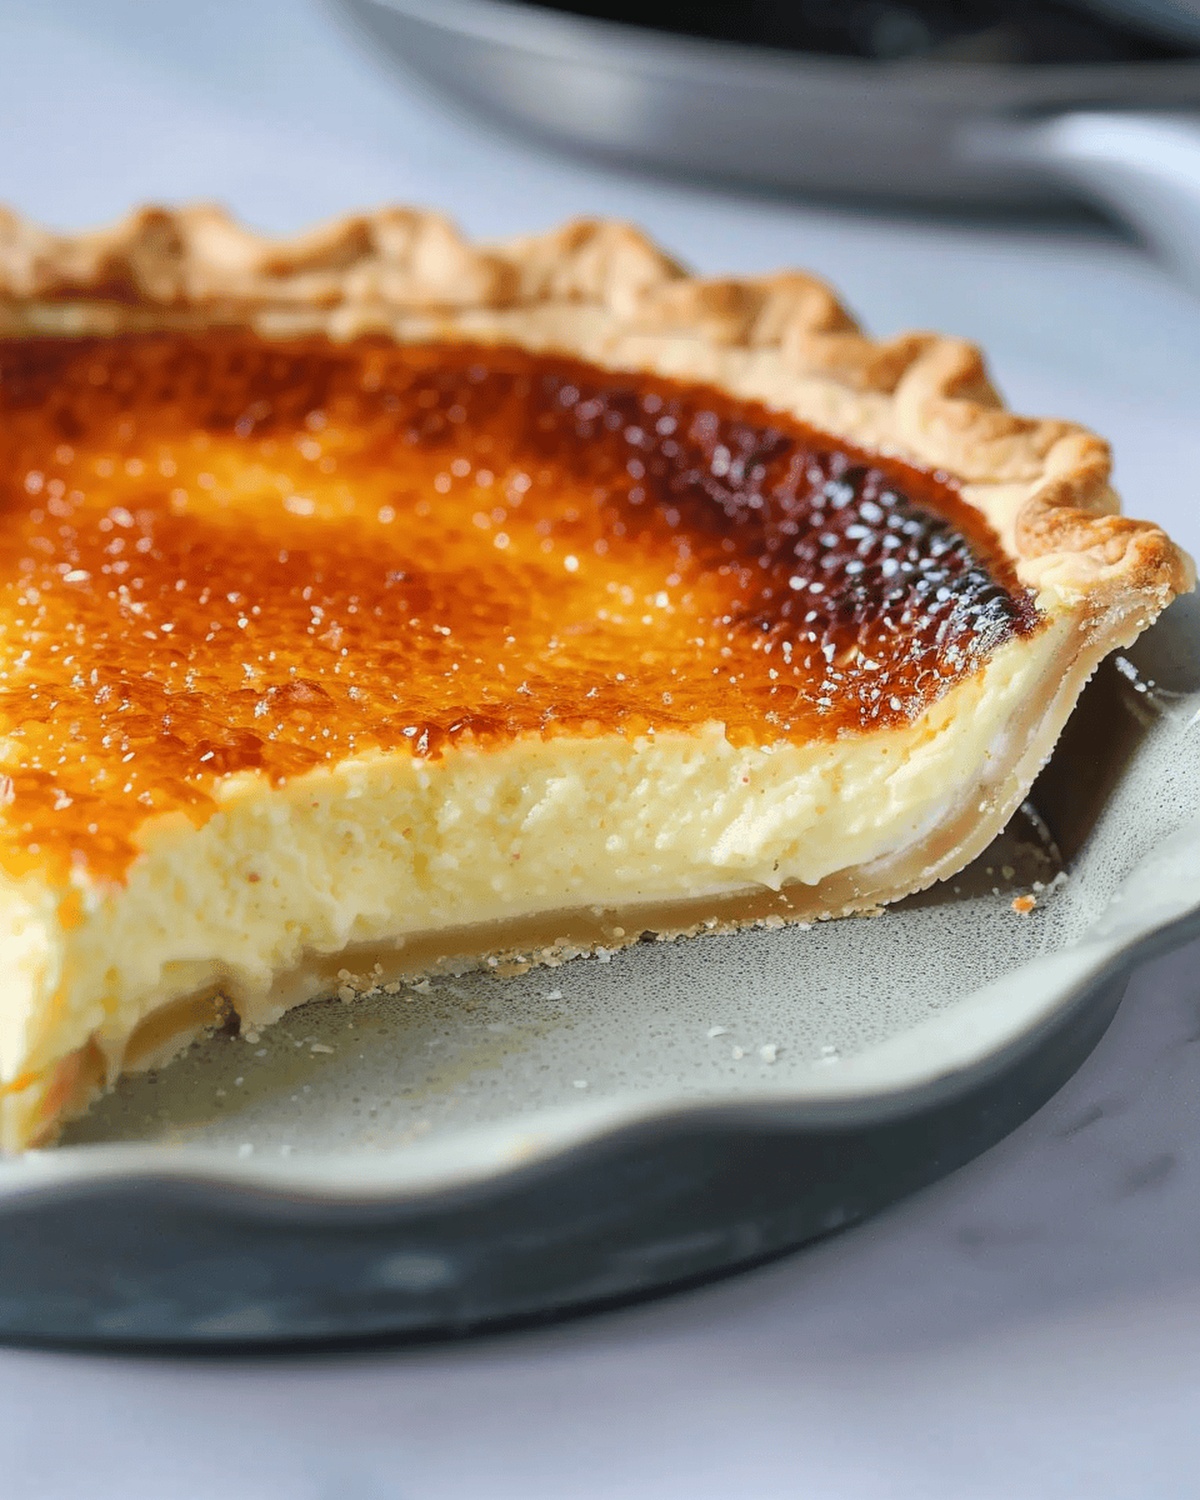
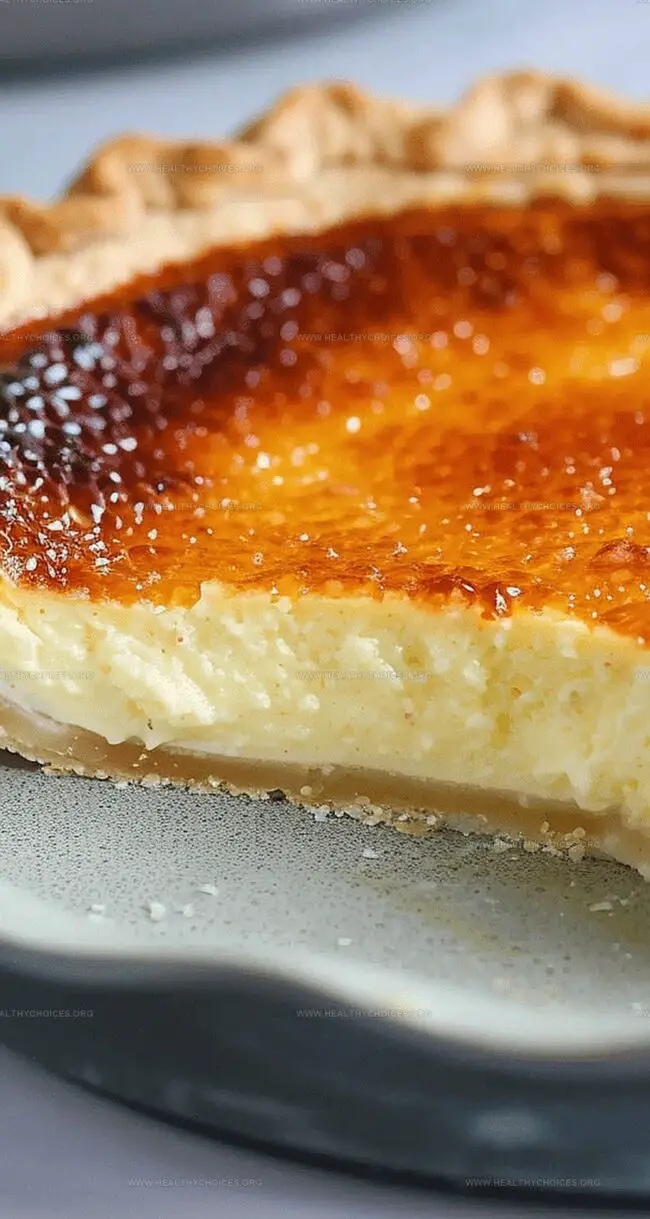
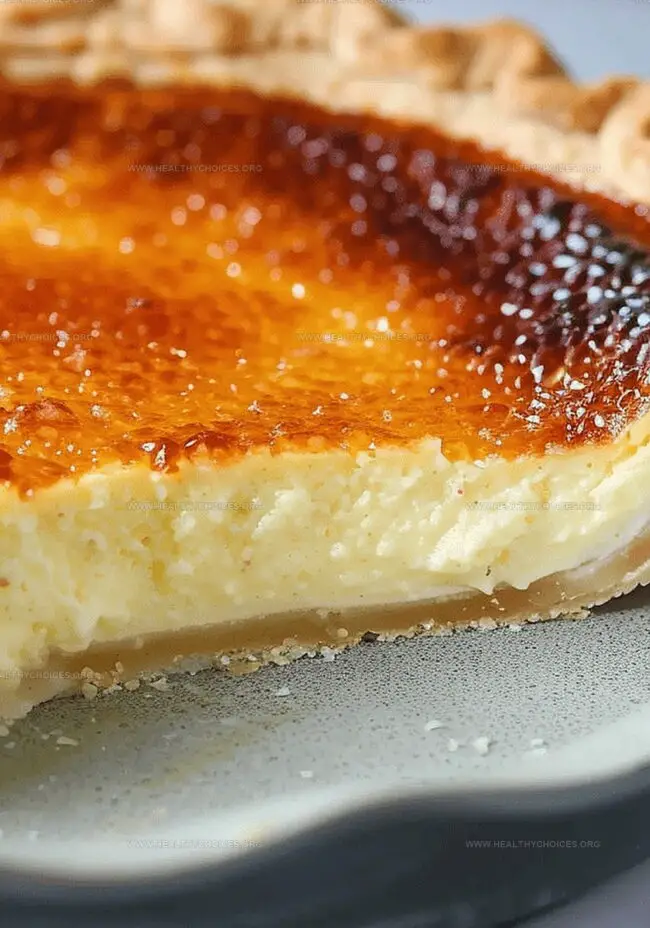
Delicate caramelized sugar tops the creamy filling, adding a perfect crisp contrast that delights the senses.
Sophisticated yet approachable, this dessert bridges traditional and modern pastry techniques with remarkable finesse.
Guests will marvel at the luxurious texture and complex flavor profile that seems to dance between comfort and sophistication.
Professional bakers and home cooks alike can master this impressive dessert with careful technique and quality ingredients.
Crème Brûlée Pie with a Crackly Top and Creamy Surprise
Ingredients That Create a Luxurious Crème Brûlée Pie
Pie Crust:Custard Filling Liquids:Custard Filling Sweeteners and Seasonings:Custard Filling Proteins:How to Bake Crème Brûlée Pie with Silky Perfection
Step 1: Prepare the Pie Crust
Grab your favorite pie dough recipe (classic or gluten-free). Roll out the dough on a lightly floured surface. Gently transfer to a pie pan, trimming the edges and creating a beautiful crimped border. Pro tip: Chill the dough for 30 minutes before rolling- this helps prevent shrinkage.
Ingredients for prebaking:Prebake the crust:Let the crust cool completely and lower oven temperature to 300°F.
Step 2: Craft the Creamy Custard
In a medium saucepan, combine:Bring the mixture to a gentle simmer, whisking softly. Remove from heat.
In a separate bowl, whisk egg yolks until smooth. Slowly stream the hot cream into the yolks, whisking constantly to prevent scrambling. This technique creates a silky-smooth custard base.
Step 3: Assemble and Bake the Pie
Pour the luxurious custard into the cooled pie crust. Use a kitchen torch to pop any surface bubbles for a flawless finish. Bake at 300°F for 35-45 minutes- you’re looking for set edges with a slight jiggle in the center.
Step 4: Chill and Prepare
Cool the pie at room temperature for an hour. Refrigerate for at least 4 hours or overnight to set completely.
Step 5: Create the Caramelized Topping
Just before serving, sprinkle an even layer of sugar across the pie’s surface.
Tips for Torching and Serving Crème Brûlée Pie
How to Store Crème Brûlée Pie and Keep That Crackle
Pairing Ideas That Go with Crème Brûlée Pie
Flavor Infusions to Make Crème Brûlée Pie Extra Special
Print
Crme Brle Pie Recipe
- Total Time: 1 hour 45 minutes
- Yield: 8 1x
Description
Crème brûlée pie merges classic French dessert elegance with American pie tradition. Silky custard nestles in a buttery crust, crowned with a glass-like caramelized sugar topping that shatters with each delightful spoon.
Ingredients
Main Ingredients:
- 2 cups heavy cream
- 6 egg yolks
- 2 vanilla beans, insides scraped out
Supporting Ingredients:
- ½ cup granulated sugar
Finishing Ingredients:
- 2 tablespoons granulated sugar
- ½ teaspoon salt
Instructions
- Prepare the pie crust according to the traditional or gluten-free method, ensuring the dough is chilled and rolled out carefully to fit the pie pan. Trim and crimp the edges neatly.
- Line the crust with parchment paper and fill with pie weights. Blind bake in a preheated oven at 400°F (200°C) for 15-20 minutes, removing weights for the final 5-8 minutes to achieve a golden finish.
- Reduce oven temperature to 300°F (150°C) and allow the crust to cool completely to room temperature.
- Create the custard base by gently heating cream, sugar, salt, and vanilla in a saucepan until it reaches a steep, aromatic point.
- Carefully temper egg yolks by gradually whisking the hot cream mixture into them, taking care to prevent scrambling. Stir continuously to create a smooth, silky custard.
- Pour the luxurious custard into the pre-baked pie shell, ensuring an even distribution and eliminating any surface bubbles with a gentle torch technique.
- Bake the pie for 35-45 minutes, watching for a subtle wiggle in the center while the edges set firmly.
- Allow the pie to cool at room temperature for one hour, then refrigerate for a minimum of four hours or overnight to achieve the perfect set.
- Just before serving, sprinkle a thin, even layer of sugar across the surface and use a culinary torch to caramelize, creating a crisp, golden-brown topping that shatters beautifully when cracked.
- Slice and serve immediately to enjoy the contrast between the creamy custard and the crackling caramel top.
Notes
- Prep Ahead: Pie dough can be made up to 3 days in advance, giving you flexibility for hosting or baking.
- Crust Technique: Use parchment paper and pie weights to prevent the crust from puffing up or shrinking during blind baking.
- Egg Tempering: Slowly add hot cream to egg yolks to prevent scrambling, creating a smooth, silky custard base.
- Baking Precision: Watch for the perfect custard consistency – set edges with a slight wiggle in the center indicates ideal doneness.
- Caramelization Tip: Apply sugar evenly and use a kitchen torch for a crisp, golden-brown caramel topping just before serving.
- Chilling Matters: Refrigerate the pie for at least 4 hours to allow the custard to set completely and develop rich flavors.
- Prep Time: 45 minutes
- Cook Time: 1 hour
- Category: Desserts
- Method: Baking
- Cuisine: French
Nutrition
- Serving Size: 8
- Calories: 400
- Sugar: 22 g
- Sodium: 90 mg
- Fat: 34 g
- Saturated Fat: 20 g
- Unsaturated Fat: 10 g
- Trans Fat: 0 g
- Carbohydrates: 27 g
- Fiber: 0 g
- Protein: 6 g
- Cholesterol: 210 mg
David Bennett
Founder & Head Recipe Developer
Expertise
Culinary Nutrition, Recipe Development, Nutritional Counseling, Food Science
Education
Johnson & Wales University
Certified Nutrition Specialist® (CNS®)
David Bennett is the lead recipe creator and nutrition expert at HealthyChoices.org, your friendly space for tasty meals that nourish body and mind.
With a Culinary Nutrition degree from Johnson & Wales University and a Certified Nutrition Specialist® credential, David pairs practical nutrition with delicious cooking, creating recipes you’ll crave daily.
At Healthy Choices, David shares easy, nutritious dishes and smart cooking tips to make healthy eating something everyone can enjoy, with no complicated diets needed.