
Irresistible Peanut Butter Cup Cookie Bars Recipe
Decadent chocolate and peanut butter collide in these irresistible peanut butter cup gooey cookie bars that melt in your mouth.
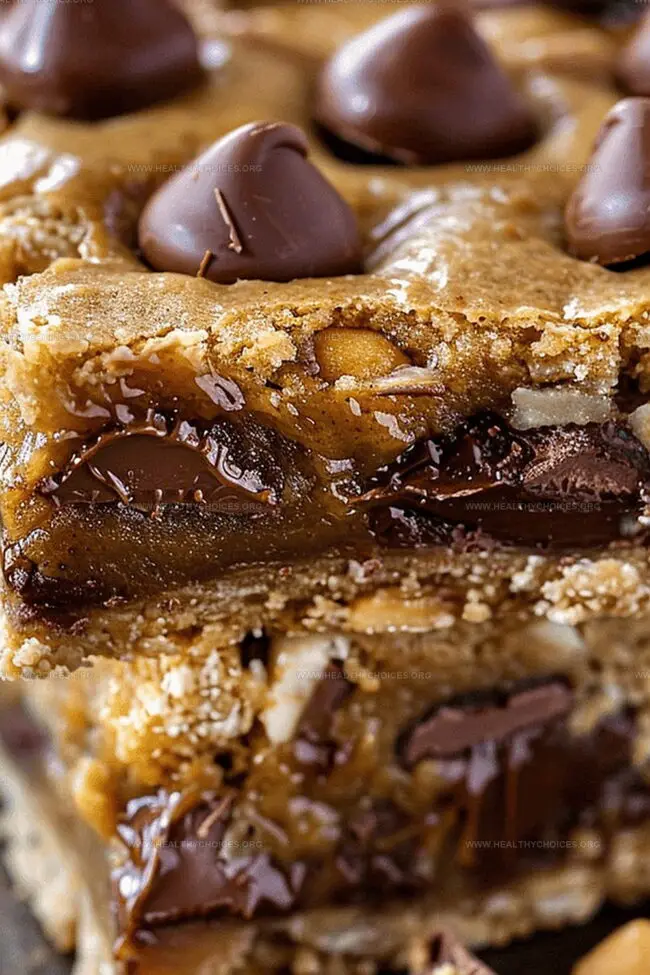
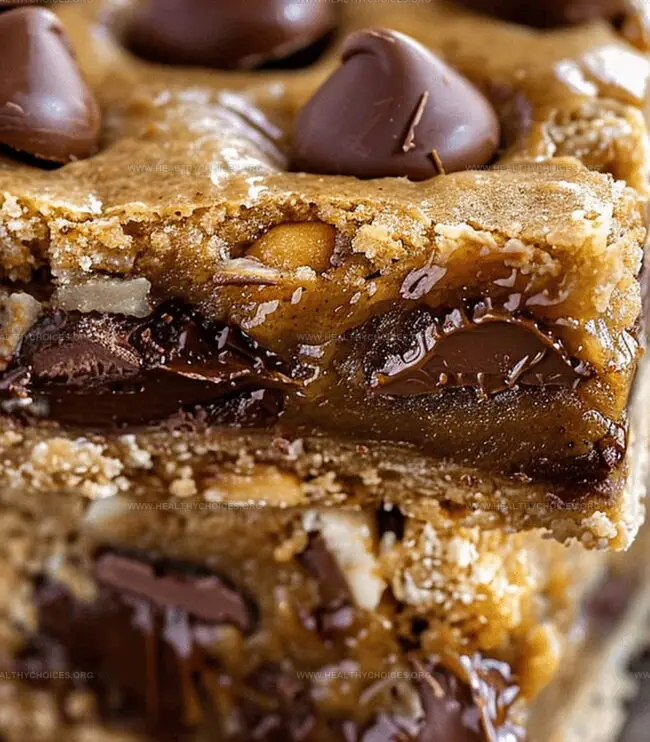
Sweet layers of rich chocolate chips and creamy peanut butter create a dessert lovers dream.
Soft, chewy, and packed with incredible flavor, these bars bring serious indulgence to any gathering.
The combination of classic cookie texture with intense peanut butter cup chunks delivers an unbeatable treat.
Each bite promises a perfect balance of gooey centers and crisp edges that’ll make dessert enthusiasts swoon.
Chocolate and peanut butter fanatics won’t be able to resist this simple yet spectacular dessert that comes together in mere minutes.
Get ready to become the star baker with this crowd-pleasing recipe that guarantees smiles and empty plates.
Quick Recipe Overview
Saving Peanut Butter Cup Gooey Cookie Bars
For Base and Binding:For Structure and Leavening:For Flavor Boosters and Decadent Mix-Ins:Mississippi Mud Pie: Full Ingredient Breakdown
Equipment & Tools:Tools and Bakeware for Mississippi Mud Pie
Organize your baking station with all essential tools and get ready for a delightful dessert adventure.
Create a rich, buttery base by combining sugars and melted butter, then gradually incorporate eggs and flour for a perfect cookie consistency.
Craft a creamy peanut butter mixture that will serve as a luxurious middle layer between soft cookie dough.
Carefully build your bars by pressing initial dough layer, strategically placing peanut butter cups, and drizzling peanut butter cream.
Gently scatter remaining dough across the surface, creating a rustic and inviting appearance.
Allow the bars to transform in the oven, watching them turn golden and develop a tantalizing aroma.
Patience is key – let the bars cool completely to ensure they hold their shape and develop maximum flavor complexity.
Slice into squares and savor each decadent bite of this irresistible dessert that combines classic chocolate and peanut butter flavors.
Follow These Steps to Make Mississippi Mud Pie
Tips for Enhancing Mississippi Mud Pie Flavor
Ideas for Serving Mississippi Mud Pie
Print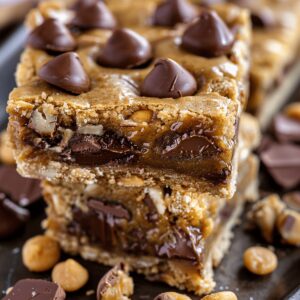
Decadent Peanut Butter Cup Gooey Cookie Bars
- Total Time: 45-50 minutes
- Yield: 25 1x
Description
Rich chocolate chip cookie bars feature a gooey peanut butter cup center that melts into each delectable bite. Chocolate lovers will savor these indulgent bars packed with creamy peanut butter and sweet chocolate chips.
Ingredients
- 3.25 cups (standard) / 3 ¼ cups (American) all-purpose flour
- 1 cup (226 grams) unsalted butter, melted
- 1 can (14 oz/397 grams) fat-free sweetened condensed milk
- 1 cup light brown sugar, packed
- 0.75 cup granulated sugar
- 2 large eggs
- 0.25 cup creamy peanut butter
- 0.75 cup chocolate chips
- 30 miniature peanut butter cups
- 1 tbsp pure vanilla extract
- 1 tsp baking soda
- 0.5 tsp salt
Instructions
- Preparation: Preheat oven to 350°F and line a 9×13″ baking pan with foil, applying nonstick spray for easy removal.
- Cookie Dough Base: Blend melted butter with sugars until smooth, then incorporate eggs, vanilla, salt, and baking soda, mixing thoroughly. Gradually fold in flour to create a dense dough, gently folding chocolate chips throughout.
- Peanut Butter Filling: Whisk sweetened condensed milk with peanut butter until achieving a silky, uniform consistency.
- Layer Construction: Press half the cookie dough evenly across the pan’s bottom, creating a solid foundation. Strategically place miniature peanut butter cups across the surface, gently embedding them.
- Filling Application: Generously drizzle the peanut butter and condensed milk mixture over the cups, ensuring complete coverage.
- Final Layer: Crumble remaining cookie dough across the top, attempting to conceal the milk layer as comprehensively as possible.
- Baking Process: Bake for 30-35 minutes until the surface achieves a golden-brown hue and the center appears set.
- Cooling and Serving: Allow bars to cool completely within the pan to maintain structural integrity. Once cooled, slice into individual squares and serve at room temperature for optimal flavor experience.
Notes
- Precise Ingredient Mixing: Blend wet ingredients thoroughly to ensure even distribution and prevent clumping, creating a smooth, consistent dough texture.
- Strategic Layering Technique: Press first dough layer firmly and evenly to create a solid foundation that supports subsequent layers and prevents crumbling.
- Proper Baking Time Watch: Monitor golden-brown surface and set center carefully; slight underbaking maintains gooey texture while preventing burnt edges.
- Cooling Critical Step: Allow bars to cool completely in pan to stabilize structure, enhance flavor melding, and ensure clean, precise cutting of squares.
- Prep Time: 15 minutes
- Cook Time: 30-35 minutes
- Category: Desserts, Snacks
- Method: Baking
- Cuisine: American
Nutrition
- Serving Size: 25
- Calories: 320
- Sugar: 22 g
- Sodium: 150 mg
- Fat: 16 g
- Saturated Fat: 8 g
- Unsaturated Fat: 7 g
- Trans Fat: 0 g
- Carbohydrates: 40 g
- Fiber: 1 g
- Protein: 5 g
- Cholesterol: 30 mg
Emily Roberts
Content Creator & Kitchen Tips Specialist
Expertise
Dietary Planning, Public Health Nutrition, Nutritional Education, Content Development
Education
University of Illinois at Urbana-Champaign
Registered Dietitian Nutritionist (RDN)
Emily Roberts is our content specialist and registered dietitian at HealthyChoices.org. With her Master’s degree in Nutritional Sciences from the University of Illinois and her Registered Dietitian Nutritionist certification, Emily uses her deep nutrition knowledge to write helpful, easy-to-understand guides about healthy eating.
Her warm, practical advice empowers readers to confidently make healthier choices, turning everyday meals into simple moments of wellness and joy.