The Best Salted Chocolate Cookies Recipe for Sweet-Salty Bliss
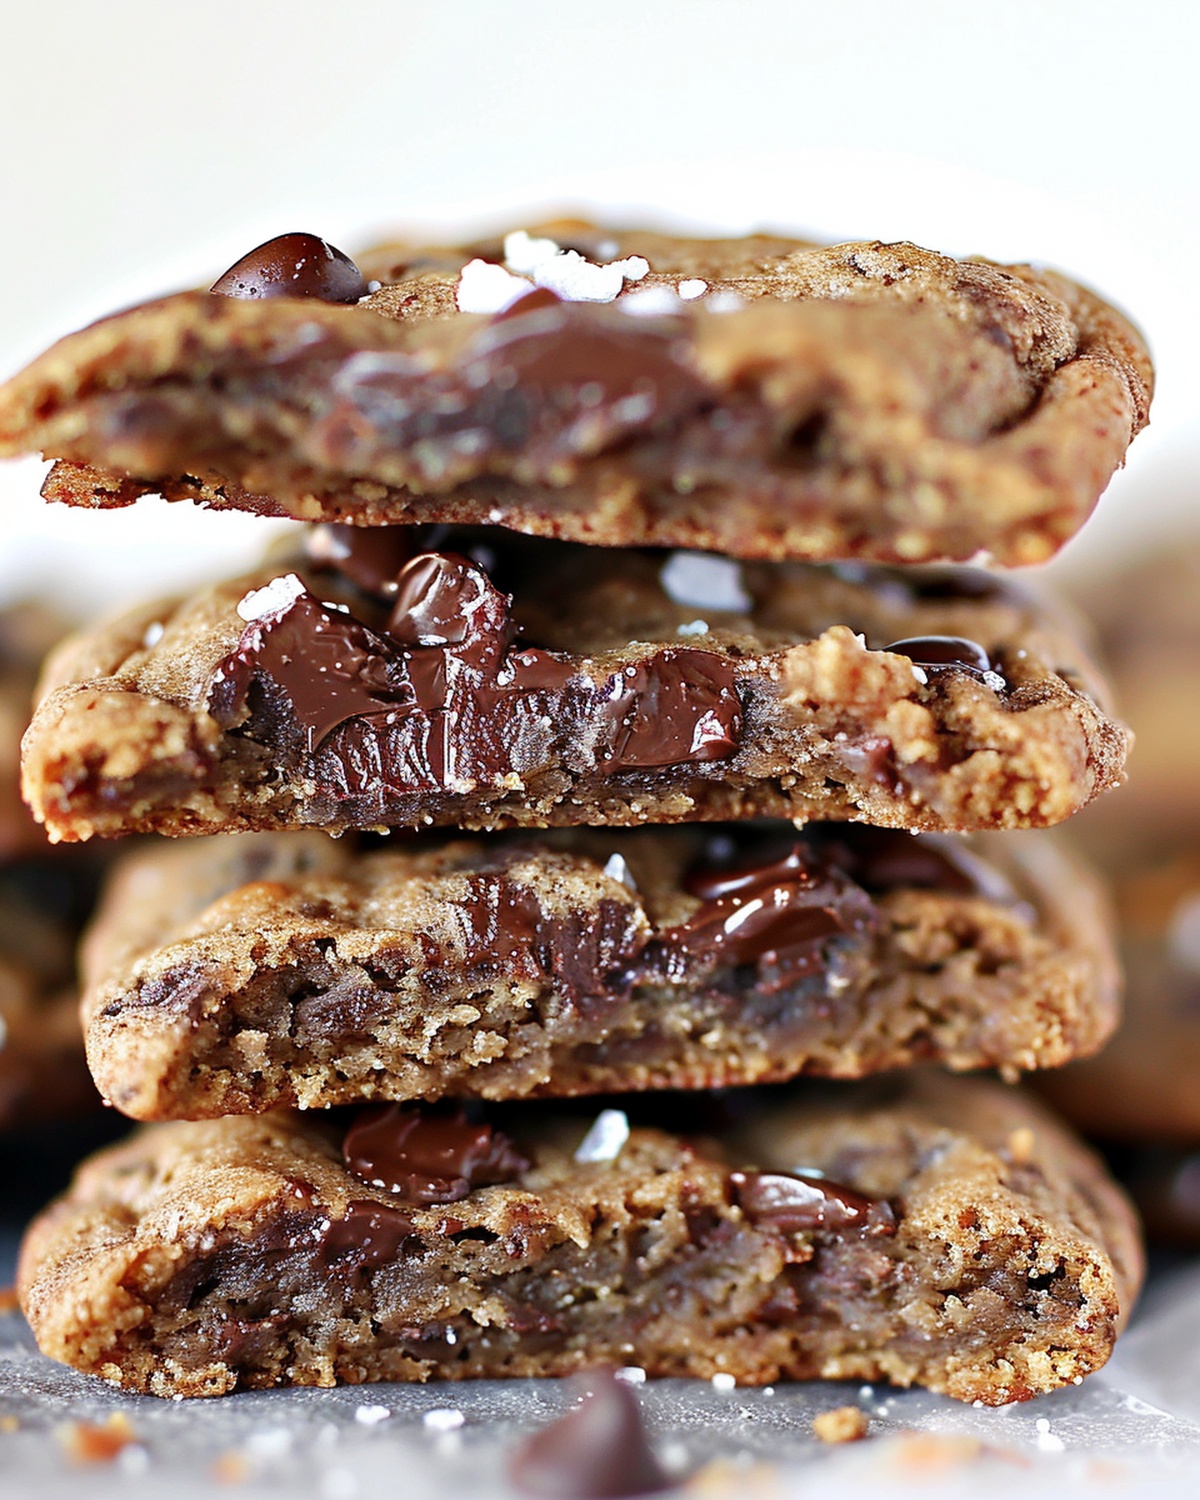
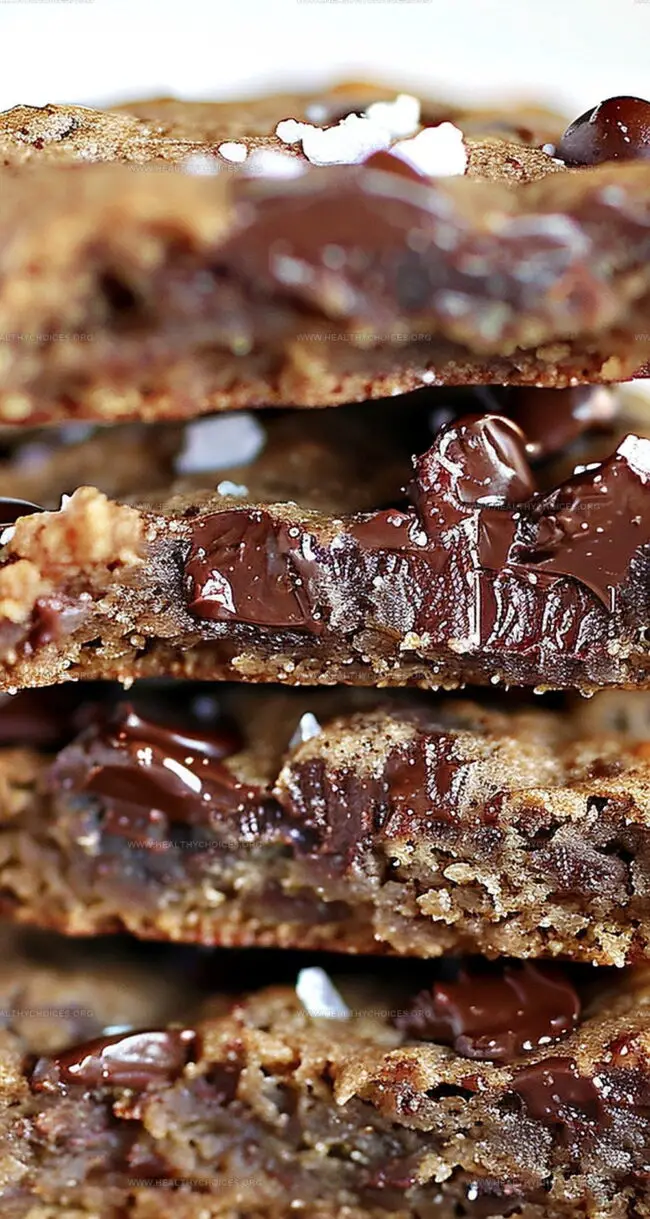
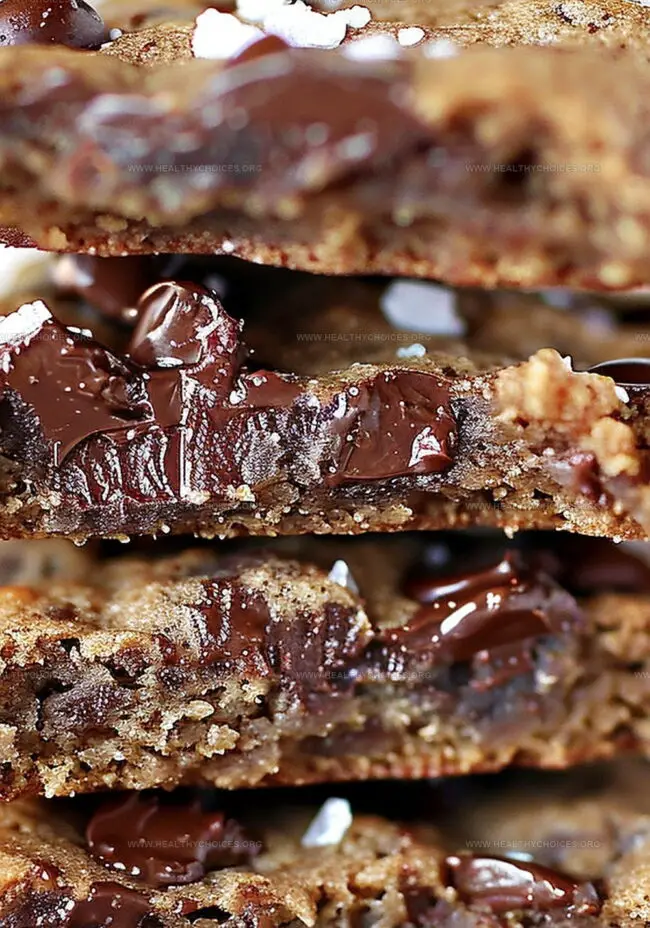
When chocolate meets salt in these irresistible salted chocolate cookies, culinary magic happens.
The delicate dance between rich cocoa and crystalline sea salt creates a symphony of flavors that captivates every taste bud.
Dark chocolate chunks melt into pools of decadence, while a sprinkle of flaky salt enhances each sweet and intense bite.
The contrast between sweet and savory sends these cookies soaring beyond ordinary desserts.
Crisp edges give way to a soft, tender center that promises pure indulgence.
Bakers of all skill levels can master this simple yet sophisticated treat.
One bite will convince you these cookies are the ultimate reward for any chocolate lover.
Quick Recipe Overview
Salted Chocolate Cookie Ingredients That Work
For Sweet Base:For Binding and Flavor Enhancers:For Structure and Chocolate Elements:Tools for Baking Salted Cookies Just Right
How to Make Chocolate Cookies with a Salty Kick
Salted Chocolate Cookies
Create a luxurious base by softening butter at room temperature. Blend butter with sugars and sea salt until the mixture transforms into a silky, creamy texture that promises delectable cookies.
Gently introduce an egg and vanilla into the butter blend. Stir carefully to ensure a smooth, homogeneous mixture that hints at the deliciousness to come.
Combine flour and rising agent, sifting to eliminate any potential lumps. Fold dry ingredients into wet mixture with a light touch, creating a dough that’s just perfectly mixed.
Generously fold dark chocolate chunks through the dough. Chill the mixture to allow flavors to meld and make handling easier.
Heat the oven and prepare a baking sheet. Shape chilled dough into generous rounds, spacing them to allow room for spreading. Bake until edges turn golden and tops develop beautiful, inviting cracks.
Let cookies rest briefly on the baking sheet to set. Transfer to a cooling rack and optionally embellish with extra chocolate pieces while still warm. Enjoy these decadent treats that balance sweet and salty notes perfectly.
Ideas for Flavoring Salted Chocolate Cookies
Serve Salted Cookies with a Touch of Class
How to Store Salted Cookies for the Week
Print
Decadent Salted Chocolate Cookies
- Total Time: 58 minutes
- Yield: 13 1x
Description
Homemade salted chocolate cookies blend rich cocoa with sea salt crystals for a sophisticated dessert experience. Chocolate lovers will relish this simple recipe that balances sweet and salty notes perfectly.
Ingredients
- 150 g (5.3 oz) all-purpose flour
- 120 g (4.2 oz) dark chocolate, coarsely chopped
- 120 g (4.2 oz) unsalted butter
- 90 g (3.2 oz) caster sugar
- 60 g (2.1 oz) muscovado sugar (or light brown sugar)
- 35 g (1.2 oz) egg (about ⅔ of one medium egg)
- 3 g (0.1 oz) fleur de sel
- 1 tsp vanilla extract
- 1 g (0.04 oz) baking powder
Instructions
- Butter Preparation: Soften butter to a pliable state without melting, then combine with muscovado and caster sugars and fleur de sel in a mixing bowl, creaming until smooth and homogeneous.
- Liquid Integration: Whisk egg and vanilla extract into the sugar-butter mixture, stirring precisely until completely blended and uniform.
- Dry Ingredient Incorporation: Sift flour and baking powder together, then gently fold into the wet ingredients with minimal stirring to maintain the cookie’s delicate structure. Mix in dark chocolate fragments until evenly distributed.
- Dough Chilling: Cover and refrigerate the slightly tacky dough for 30 minutes to enhance flavor development and improve handling.
- Baking Preparation: Preheat oven to 180°C and line a baking sheet with parchment paper. Form uniform dough balls, spacing them appropriately on the prepared sheet.
- Baking Process: Bake for 13 minutes, observing for subtle surface cracking and golden-bronze edges with a tender center. Cookies should appear set but not completely firm.
- Cooling and Finishing: Allow cookies to rest on the baking sheet for 15 minutes to stabilize structure, then transfer to a cooling rack. Optionally, garnish with additional chocolate fragments while still warm for enhanced visual and flavor appeal.
Notes
- Butter Softening Strategy: Warm butter gently to soft consistency without melting, crucial for achieving perfect cookie texture and even mixing.
- Sugar Creaming Technique: Blend muscovado and caster sugars thoroughly until smooth, creating a foundational base that guarantees rich, complex flavor profile.
- Dough Resting Importance: Refrigerate dough for minimum 30 minutes to develop deeper flavors, improve structural integrity, and enhance chocolate distribution.
- Baking Precision: Watch cookies closely during 13-minute bake, aiming for golden edges and slightly soft center to ensure ideal chewy-crisp balance.
- Prep Time: 30 minutes
- Cook Time: 13 minutes
- Category: Desserts, Snacks
- Method: Baking
- Cuisine: American
Nutrition
- Serving Size: 13
- Calories: 210
- Sugar: 10g
- Sodium: 100mg
- Fat: 12g
- Saturated Fat: 7g
- Unsaturated Fat: 4g
- Trans Fat: 0g
- Carbohydrates: 25g
- Fiber: 1g
- Protein: 2g
- Cholesterol: 15mg
Emily Roberts
Content Creator & Kitchen Tips Specialist
Expertise
Dietary Planning, Public Health Nutrition, Nutritional Education, Content Development
Education
University of Illinois at Urbana-Champaign
Registered Dietitian Nutritionist (RDN)
Emily Roberts is our content specialist and registered dietitian at HealthyChoices.org. With her Master’s degree in Nutritional Sciences from the University of Illinois and her Registered Dietitian Nutritionist certification, Emily uses her deep nutrition knowledge to write helpful, easy-to-understand guides about healthy eating.
Her warm, practical advice empowers readers to confidently make healthier choices, turning everyday meals into simple moments of wellness and joy.