Irresistible Homemade Peanut Butter Eggs Recipe For Easter Joy
Chocolate and peanut butter create a magical combination that speaks to dessert lovers everywhere with this homemade peanut butter eggs recipe.
Sweet memories of holiday treats dance in our minds with each bite.
Crafting these delectable eggs is easier than you might expect.
The rich, creamy peanut butter filling nestled inside a smooth chocolate coating promises pure indulgence.
Every ingredient comes together effortlessly in your kitchen.
These eggs deliver a nostalgic taste that rivals any store-bought confection.
Dive into this delightful recipe and savor the irresistible blend of classic flavors.
Quick Recipe Overview

Peanut Butter Egg Must-Haves for Home Treats
For Base and Filling:For Coating:For Decoration (Optional):Tools for Making Peanut Butter Eggs by Hand
How to Shape and Fill Peanut Butter Eggs

Create a smooth and creamy base by gently warming peanut butter and soft butter until they blend perfectly. Stir in a splash of vanilla and a pinch of salt for depth of flavor.
Fold powdered sugar into the mixture gradually, creating a texture that’s somewhere between dough and dream. Add a touch of milk to bring everything together into a delightful consistency.
Press the peanut butter magic into a pan and let it chill until firm. Use a playful egg-shaped cookie cutter to transform the mixture into adorable egg shapes. Don’t worry about perfection – each egg tells its own sweet story.
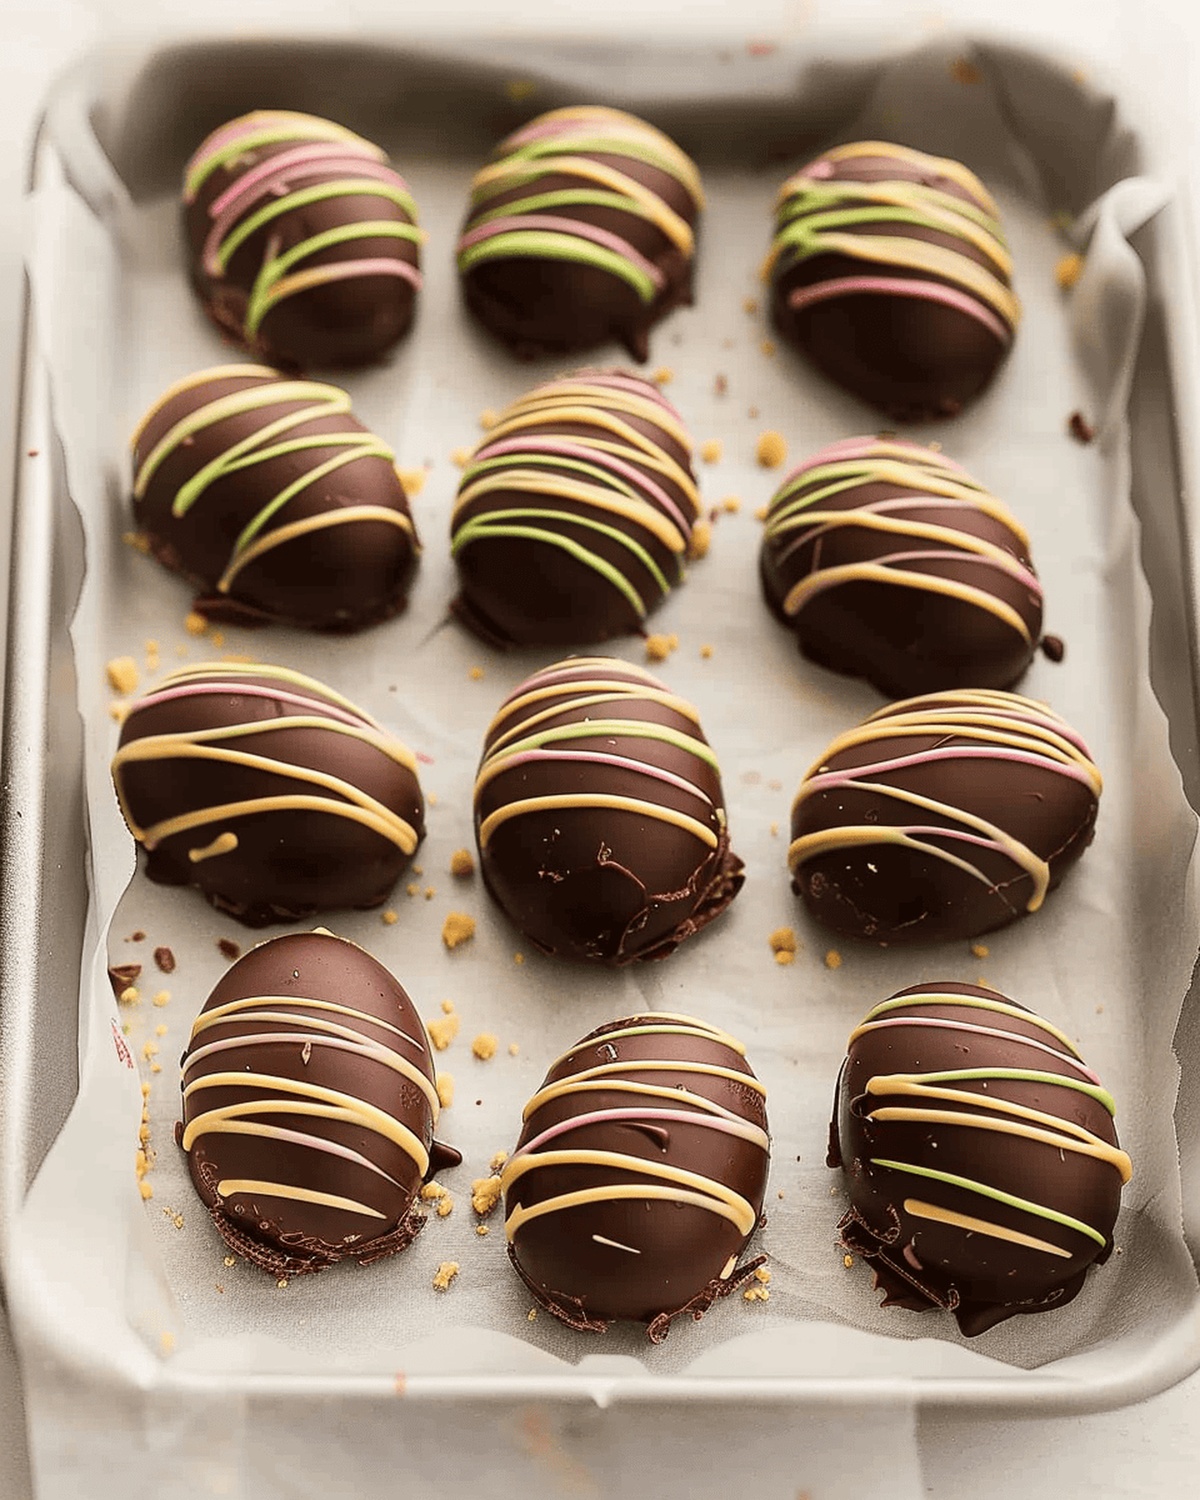
Melt dark chocolate using a gentle water bath, creating a glossy pool of indulgence. Carefully dip each peanut butter egg, letting excess chocolate drip away. For an artistic touch, drizzle white chocolate in delicate patterns across the surface.
Tuck your homemade treats into the refrigerator or freezer, keeping them cool and ready to surprise and delight whenever a craving strikes.
Sweet Adjustments to Make Them Your Own
How to Serve Peanut Butter Eggs Creatively
Storage Tips for These Classic Candy Treats
Print
Dreamy Peanut Butter Eggs Recipe
- Total Time: 1 hour 15 minutes – 2 hours 15 minutes
- Yield: 13 1x
Description
Reese’s-inspired homemade peanut butter eggs bring nostalgic Easter candy magic straight to home kitchens. Chocolate-coated peanut butter centers offer delightful sweetness with simple ingredients you can craft in under an hour.
Ingredients
- 2 cups (480 ml / 16 fl oz) smooth peanut butter
- 3 cups (360 grams / 12.7 oz) powdered sugar
- ½ cup (113 grams / 4 oz) unsalted butter
- 5–6 tbsps (75–90 ml / 2.5–3 fl oz) milk
- 1 tbsp (15 ml / 0.5 fl oz) vanilla extract
- ½ tsp salt
- 350 grams (12.3 oz) dark chocolate
- 3 tsps (15 ml / 0.5 fl oz) canola oil
- 100 grams (3.5 oz) white chocolate (optional)
- food coloring
Instructions
- Prepare Base: Gently melt peanut butter and unsalted butter until smooth, creating a luxurious foundation for the confection.
- Flavor Enhancement: Integrate vanilla extract and salt, stirring to develop a complex taste profile that elevates the mixture’s depth.
- Sugar Integration: Fold powdered sugar into the mixture, working until a moldable consistency emerges, transforming the blend into a promising filling.
- Texture Refinement: Introduce milk to achieve an optimal dough consistency—pliable yet structured, ready for shaping and molding.
- Pan Preparation: Line a pan with parchment paper, spreading the peanut butter mixture evenly to create a uniform base for precise egg formation.
- Chilling and Shaping: Refrigerate the mixture until firm, then extract and cut into distinctive egg shapes using a specialized cookie cutter.
- Structural Solidification: Transfer egg-shaped pieces to a parchment-lined sheet and freeze, ensuring structural integrity for chocolate coating.
- Chocolate Enrobing: Create a silky chocolate coating using a double boiler, melting dark chocolate with a hint of canola oil for a glossy finish.
- Dipping Technique: Immerse each frozen peanut butter egg into the molten chocolate, allowing excess to cascade off for an elegant, even coverage.
- Decorative Flourish: Optionally drizzle white chocolate using a carefully prepared piping method for an artistic final touch.
- Storage and Preservation: Refrigerate or freeze the completed peanut butter eggs, maintaining their texture and flavor until ready to serve.
Notes
- Butter Blending Technique: Warm peanut butter and unsalted butter gently to achieve a smooth, nearly liquefied consistency without overheating.
- Flavor Enhancement Tip: Add vanilla extract and salt carefully to develop deep, rich undertones that elevate the overall taste profile.
- Dough Consistency Mastery: Gradually mix powdered sugar and milk to create a pliable dough that holds shape without becoming too dry or sticky.
- Chocolate Coating Perfection: Use a double boiler method with a touch of canola oil to create a glossy, smooth chocolate coating that adheres perfectly to frozen peanut butter eggs.
- Prep Time: 15 minutes
- Cook Time: 30-60 minutes
- Category: Desserts, Snacks
- Method: Blending
- Cuisine: American
Nutrition
- Serving Size: 13
- Calories: 270
- Sugar: 23 g
- Sodium: 90 mg
- Fat: 18 g
- Saturated Fat: 7 g
- Unsaturated Fat: 10 g
- Trans Fat: 0 g
- Carbohydrates: 30 g
- Fiber: 1 g
- Protein: 5 g
- Cholesterol: 15 mg
Emily Roberts
Content Creator & Kitchen Tips Specialist
Expertise
Dietary Planning, Public Health Nutrition, Nutritional Education, Content Development
Education
University of Illinois at Urbana-Champaign
Registered Dietitian Nutritionist (RDN)
Emily Roberts is our content specialist and registered dietitian at HealthyChoices.org. With her Master’s degree in Nutritional Sciences from the University of Illinois and her Registered Dietitian Nutritionist certification, Emily uses her deep nutrition knowledge to write helpful, easy-to-understand guides about healthy eating.
Her warm, practical advice empowers readers to confidently make healthier choices, turning everyday meals into simple moments of wellness and joy.