
The Most Heavenly Golden Oreo Blondies Recipe Ever
Dessert lovers rejoice as these golden Oreo blondies deliver pure, indulgent happiness in every single bite.
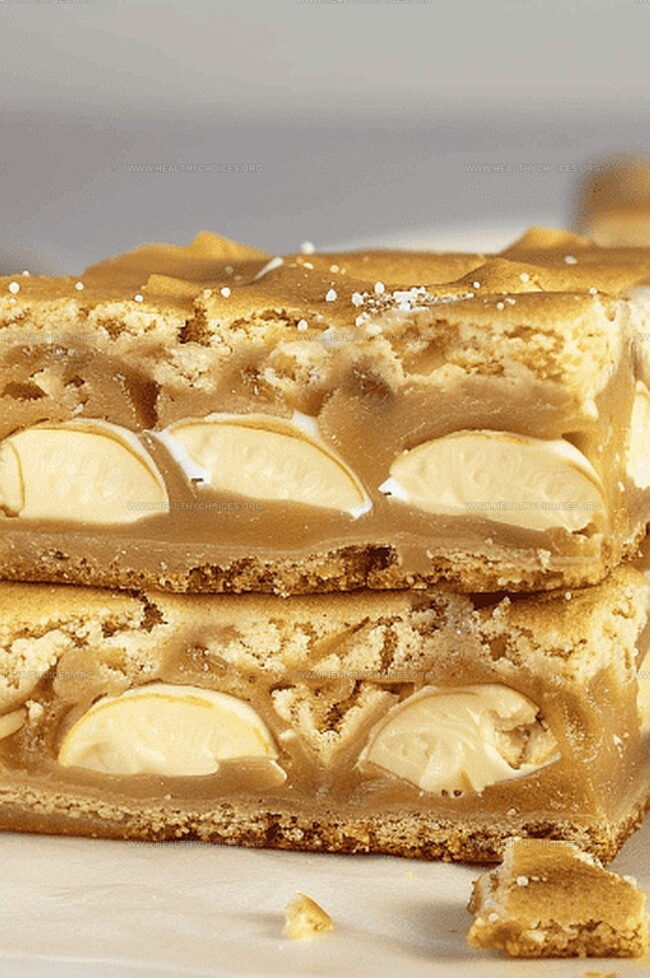
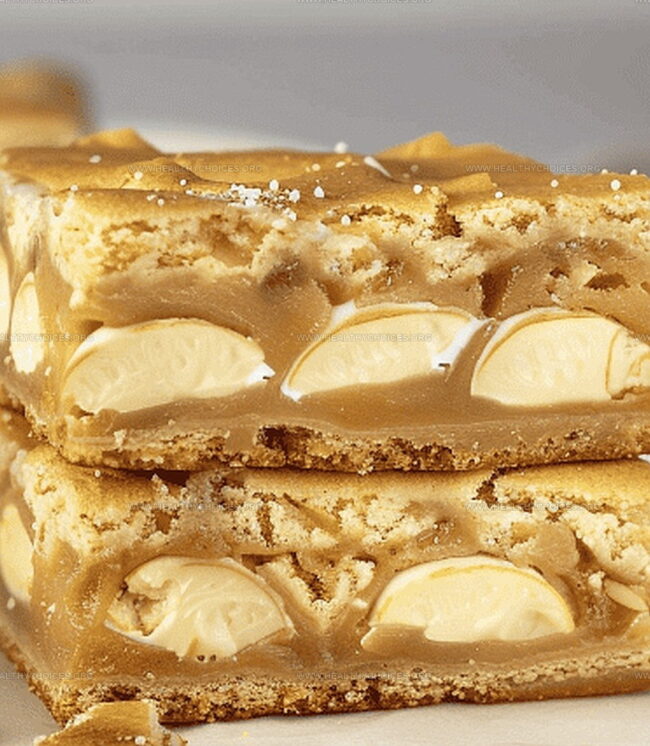
Soft, chewy, and packed with creamy Oreo goodness, this recipe promises a delightful twist on traditional blondies.
Sweet vanilla notes dance through the rich, buttery base, creating a harmonious blend of textures and flavors.
Chunks of golden oreos peek out from the golden-brown surface, tempting you with their irresistible crunch.
Each square offers a decadent treat that melts in your mouth with a perfect balance of sweetness.
The simple ingredients come together effortlessly, making this dessert accessible for bakers of all skill levels.
These blondies are sure to become your new go-to treat for satisfying those intense cookie cravings.
Quick Recipe Overview
Golden Oreo Blondie Base Ingredients
For Base and Sweetness:For Structure and Binding:For Flavor and Texture Boost:Baking Tools for Blondie Success
Instructions for Golden Oreo Blondie Perfection
Crank up the oven to a toasty 350°F. Grab a baking pan and give it a quick spray with non-stick magic. Line it with parchment paper, letting the edges hang over like a cozy blanket.
In a big mixing bowl, whisk melted butter with sugars until they’re dancing together. Crack in the egg and yolk, splash some vanilla, and mix until silky smooth. Gently fold in flour and a pinch of salt – no need to go crazy with mixing. Toss in white chocolate chips for an extra flavor punch.
Spread half the batter across the pan like a golden carpet. Nestle Golden Oreos into the mix, creating a sweet surprise layer. Cover those cookies with the remaining batter, making sure they’re completely hidden.
Slide the pan into the oven and let it work its wonder for 30-35 minutes. You’ll know it’s done when the top looks golden and a toothpick comes out mostly clean. Let the blondies chill completely in the pan.
Once cooled, lift out the blondies using the parchment paper edges. Slice into squares and watch everyone’s eyes light up with excitement.
Variations to Try with Blondies
Blondie Serving Tips for Dessert Tables
Storage Tips for Oreo Blondie Bars
Print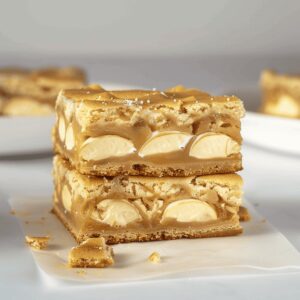
Heavenly Golden Oreo Blondies Recipe
- Total Time: 45-50 minutes
- Yield: 17 1x
Description
Indulgent golden oreo blondies showcase rich butterscotch flavors with creamy cookie chunks nestled throughout. Chocolate lovers will savor each gooey, crumbly bite of this simple dessert that comes together quickly and satisfies sweet cravings.
Ingredients
- 1 ¾ cups (219 grams) all-purpose flour
- ½ cup (105 grams) brown sugar
- ½ cup (100 grams) white sugar
- ¾ cup (168 grams) unsalted butter, melted and cooled
- 16 Golden Oreos
- ½ cup (90 grams) white chocolate chips
- 1 large egg
- 1 large egg yolk
- 2 tsps vanilla extract
- ¼ tsp salt
Instructions
- Preparation: Grease a rectangular baking pan with non-stick spray and line with parchment paper, allowing excess to hang over edges for easy extraction.
- Base Creation: Whisk melted butter with brown and white sugars until glossy and fully integrated, creating a rich, smooth foundation.
- Wet Ingredient Fusion: Blend eggs and vanilla extract into sugar mixture until achieving a uniform, silky consistency.
- Dry Ingredient Integration: Fold flour and salt into wet ingredients with gentle techniques, maintaining a light batter texture.
- Chocolate Incorporation: Distribute white chocolate chips evenly throughout the batter, ensuring balanced flavor distribution.
- Initial Layer Formation: Spread half the batter smoothly across the prepared pan, creating an even base layer.
- Cookie Placement: Arrange Golden Oreo cookies in a precise single layer atop the initial batter spread.
- Final Batter Coverage: Delicately spoon remaining batter over Oreo layer, completely concealing the cookie base.
- Baking Process: Bake in a preheated 350°F oven for 30-35 minutes, monitoring until golden and a toothpick emerges with minimal moisture.
- Cooling and Serving: Allow blondies to cool completely in the pan, then lift using parchment paper overhang and slice into uniform bars, revealing the decadent layered dessert.
Notes
- Prep Pan Perfectly: Line with parchment paper overhanging edges for easy removal and clean cutting of blondies.
- Blend Sugars Smoothly: Whisk melted butter and sugars until glossy to create a rich, uniform base that ensures perfect texture.
- Fold Gently: Use light, delicate mixing techniques when adding flour to maintain the batter’s airy consistency and prevent tough blondies.
- Bake with Precision: Watch closely during the 30-35 minute baking time, checking with a toothpick to avoid overbaking and ensure moist, soft blondies.
- Prep Time: 15 minutes
- Cook Time: 30-35 minutes
- Category: Desserts, Snacks
- Method: Baking
- Cuisine: American
Nutrition
- Serving Size: 17
- Calories: 200
- Sugar: 12 g
- Sodium: 50 mg
- Fat: 10 g
- Saturated Fat: 6 g
- Unsaturated Fat: 4 g
- Trans Fat: 0 g
- Carbohydrates: 26 g
- Fiber: 1 g
- Protein: 2 g
- Cholesterol: 30 mg
Emily Roberts
Content Creator & Kitchen Tips Specialist
Expertise
Dietary Planning, Public Health Nutrition, Nutritional Education, Content Development
Education
University of Illinois at Urbana-Champaign
Registered Dietitian Nutritionist (RDN)
Emily Roberts is our content specialist and registered dietitian at HealthyChoices.org. With her Master’s degree in Nutritional Sciences from the University of Illinois and her Registered Dietitian Nutritionist certification, Emily uses her deep nutrition knowledge to write helpful, easy-to-understand guides about healthy eating.
Her warm, practical advice empowers readers to confidently make healthier choices, turning everyday meals into simple moments of wellness and joy.