Sweet No-Bake Banana Split Pie Recipe for Summer Joy
Cool summer days call for sweet, no-bake banana split pie that melts in your mouth with creamy perfection.
Each forkful promises a delightful journey through classic dessert flavors.
Ripe bananas, velvety cream, and decadent chocolate combine in a luscious no-fuss treat.
Chilled and refreshing, this pie delivers all the nostalgic charm of a traditional banana split without turning on the oven.
Whipped layers of rich ingredients stack together like an edible masterpiece.
The dessert requires minimal effort but guarantees maximum satisfaction.
You’ll want to savor every single bite of this crowd-pleasing summer sensation.
Quick Recipe Overview
No-Bake Banana Split Pie Ingredients
For Pie Base:For Creamy Filling:For Fruity Toppings and Garnish:Tools to Build a Banana Split Pie
How to Assemble a Banana Pie That Pops
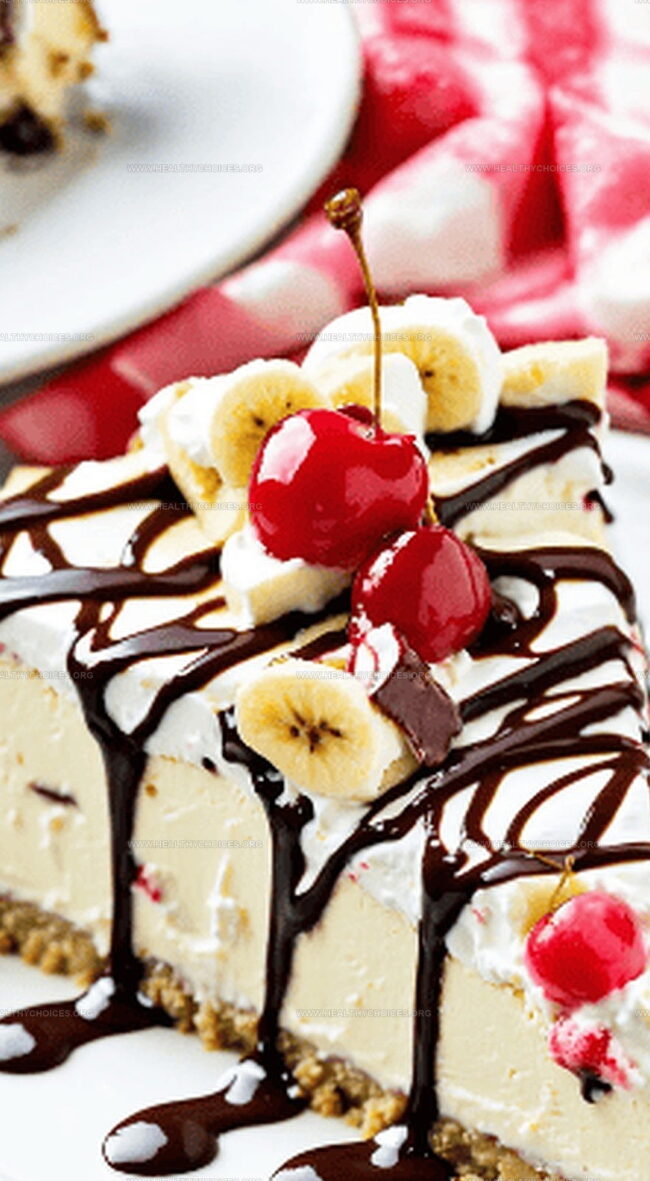
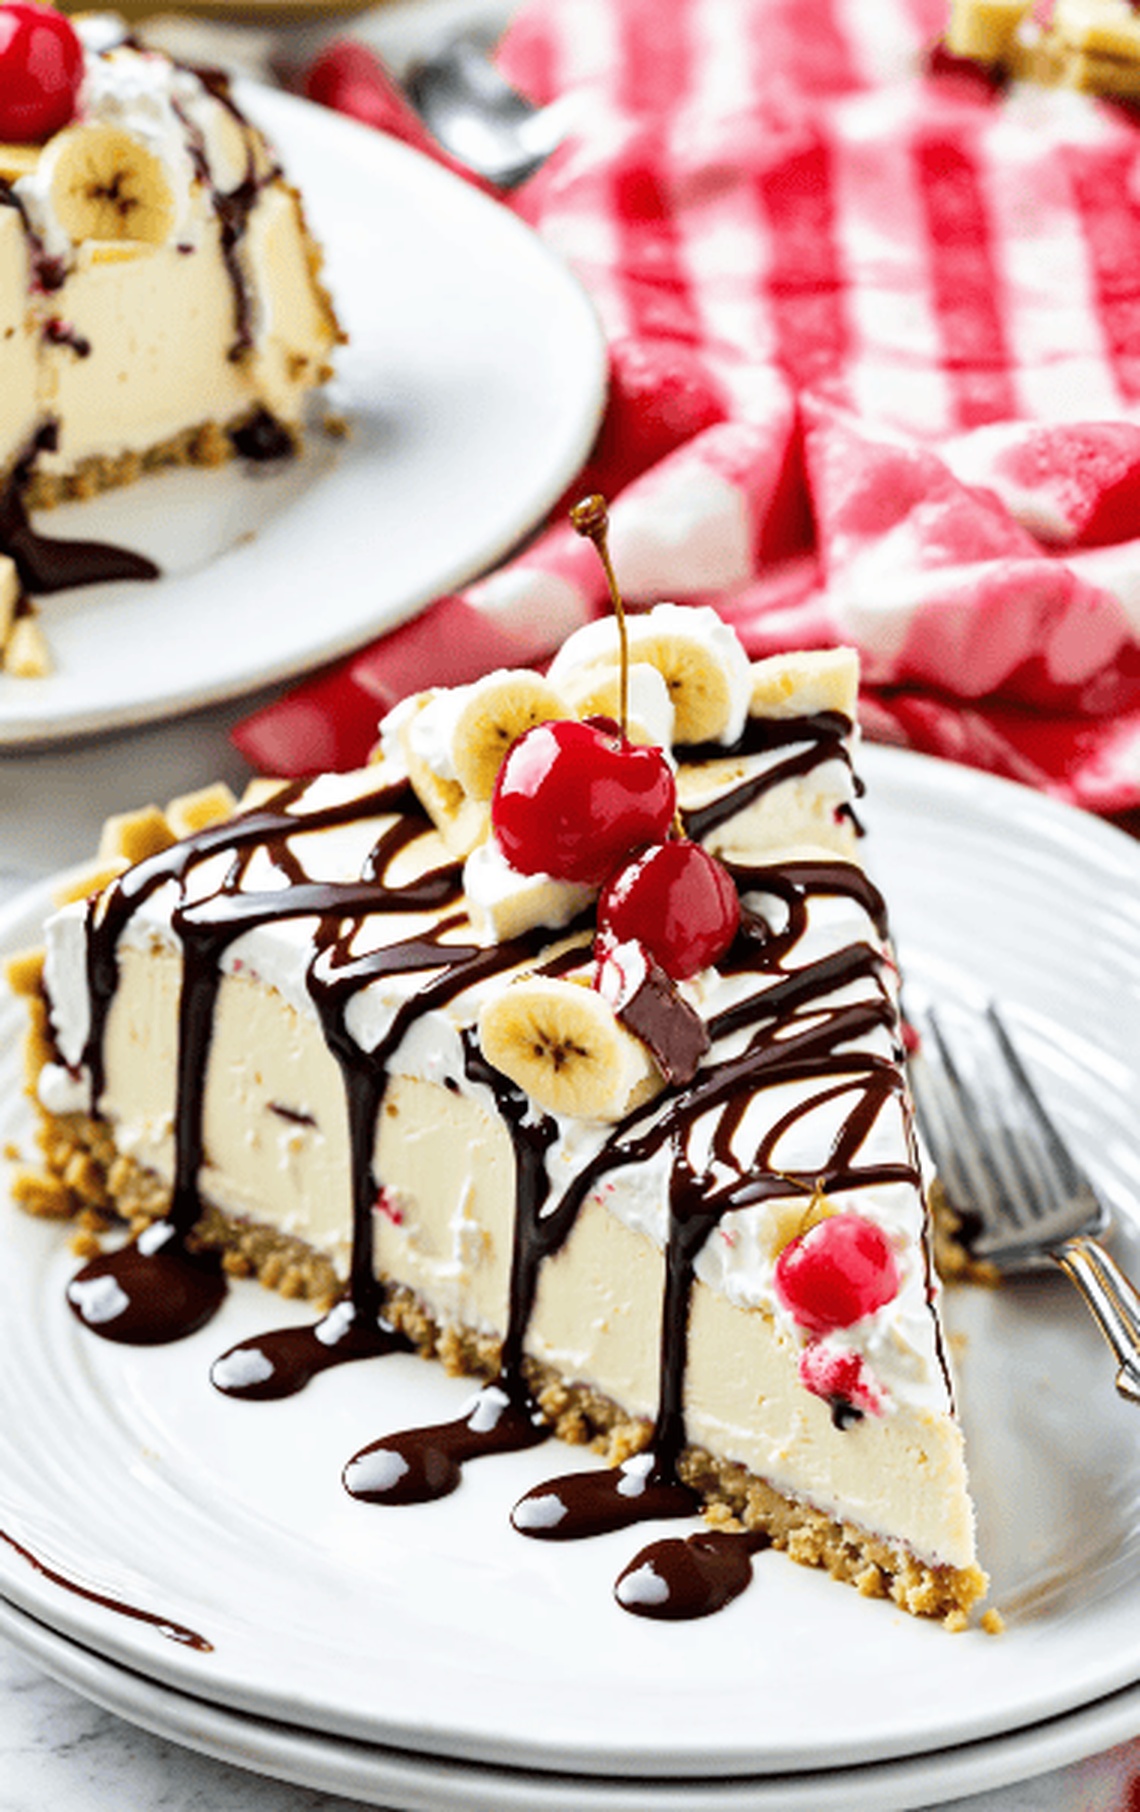
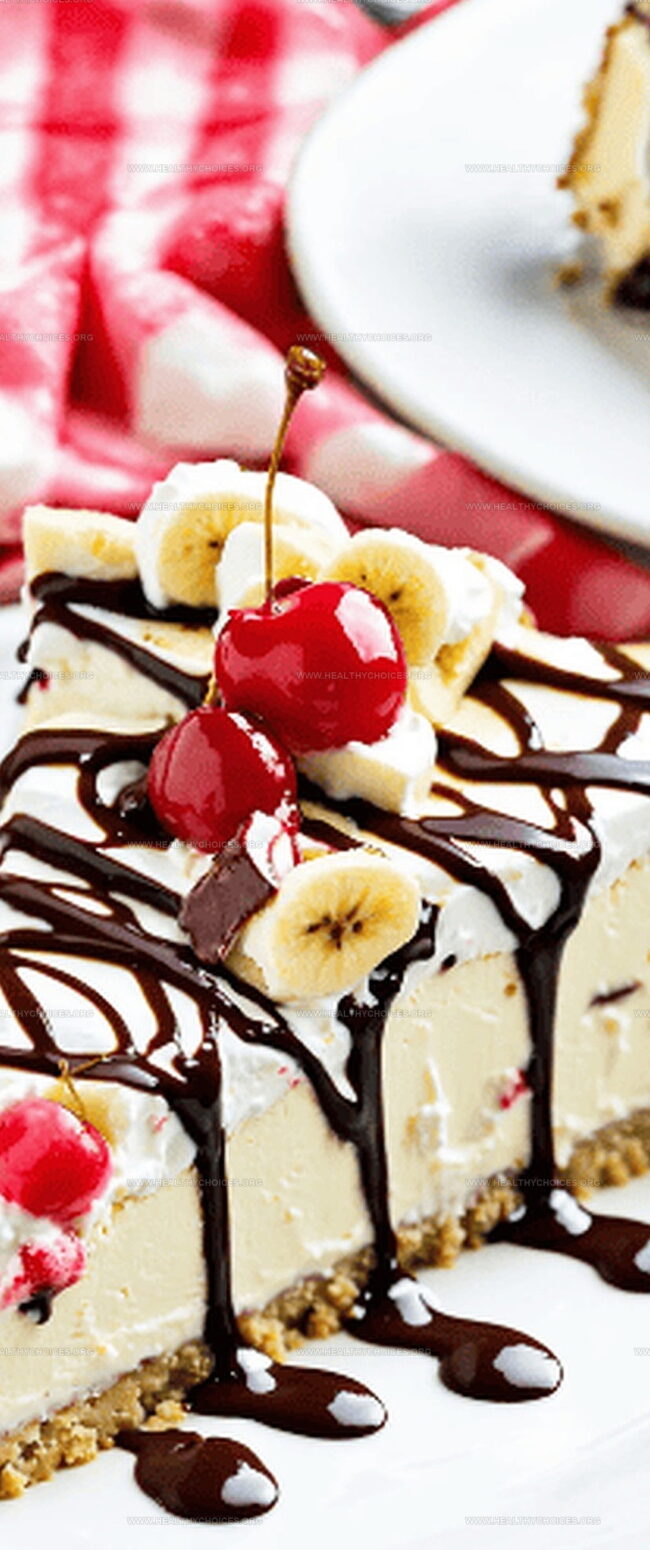
Sweet Banana Split Dream Pie
Whip up a creamy banana pudding mixture by blending milk with banana pudding mix until silky smooth. Gently swirl in fluffy whipped topping and pour into a crisp graham cracker crust. Slide into the refrigerator to set and chill.
Once the pudding layer is cool and firm, create a colorful landscape of sliced bananas and sunny pineapple chunks across the surface. These fresh fruits will add a burst of tropical brightness.
Blanket the fruit with a pillowy layer of remaining whipped topping. Sprinkle a shower of crunchy walnut pieces for a delightful textural contrast.
Unleash your inner artist by drizzling rich chocolate sauce in playful zigzag patterns. Crown the pie with vibrant maraschino cherries for that classic banana split charm.
Allow the pie to rest in the refrigerator for 1-3 hours. This magical waiting period lets all the flavors dance together and creates the perfect, refreshing dessert experience.
Fun Ideas & Tips for This Pie
Ways to Present Banana Split Pie
Storing Your No-Bake Dessert with Care
Print
Irresistible Banana Split Pie
- Total Time: 20 minutes
- Yield: 9 1x
Description
Cool banana split pie offers classic dessert flavors without baking. Creamy layers of banana, chocolate, and pineapple combine for a refreshing summer treat perfect for serving guests.
Ingredients
- 2 packages (3.4 oz/96 g) instant banana pudding mix
- 2 cups (480 ml) cold whole milk
- 2 bananas, sliced
- 1 carton (8 oz/227 g) frozen whipped topping, thawed, divided
- 1 premade graham cracker pie crust
- 1 cup (240 ml) crushed pineapple, drained
- ¼ cup (30 g) walnut pieces
- Chocolate sauce for drizzling
- Maraschino cherries for garnish
Instructions
- Pudding Preparation: Whisk cold milk with pudding mix until achieving a smooth, velvety consistency for two minutes, ensuring no lumps remain.
- Layering Foundation: Gently fold whipped topping into the pudding mixture, maintaining a light and airy texture, then carefully spread into the graham cracker crust.
- Fruit Arrangement: Delicately position fresh banana slices and pineapple chunks across the chilled pudding surface, creating an artful and appetizing display.
- Topping and Texture: Cover the fruit layer with remaining whipped topping, spreading uniformly, then generously scatter chopped walnuts for a delightful nutty crunch.
- Finishing Touches: Drizzle chocolate sauce in an elegant zigzag pattern and crown with maraschino cherries, mimicking a classic banana split presentation.
- Chilling and Serving: Refrigerate the assembled pie for 1-3 hours to allow flavors to meld and layers to set completely, then slice and serve chilled, revealing the beautiful dessert layers.
Notes
- Whisk with Precision: Mix pudding and milk thoroughly for 2 minutes to ensure a smooth, lump-free base that guarantees creamy texture.
- Fold Gently: Incorporate whipped topping delicately to maintain the light, airy consistency that makes this dessert irresistibly soft.
- Chill for Perfection: Refrigerate 1-3 hours to allow layers to set completely and flavors to develop a rich, harmonious blend.
- Garnish Strategically: Add nuts, chocolate sauce, and cherries just before serving to preserve maximum crunch and visual appeal.
- Prep Time: 20 minutes
- Cook Time: 0 minutes
- Category: Desserts, Snacks
- Method: None
- Cuisine: American
Nutrition
- Serving Size: 9
- Calories: 290
- Sugar: 18 g
- Sodium: 220 mg
- Fat: 12 g
- Saturated Fat: 5 g
- Unsaturated Fat: 7 g
- Trans Fat: 0 g
- Carbohydrates: 39 g
- Fiber: 1 g
- Protein: 3 g
- Cholesterol: 15 mg
Emily Roberts
Content Creator & Kitchen Tips Specialist
Expertise
Dietary Planning, Public Health Nutrition, Nutritional Education, Content Development
Education
University of Illinois at Urbana-Champaign
Registered Dietitian Nutritionist (RDN)
Emily Roberts is our content specialist and registered dietitian at HealthyChoices.org. With her Master’s degree in Nutritional Sciences from the University of Illinois and her Registered Dietitian Nutritionist certification, Emily uses her deep nutrition knowledge to write helpful, easy-to-understand guides about healthy eating.
Her warm, practical advice empowers readers to confidently make healthier choices, turning everyday meals into simple moments of wellness and joy.