
Heavenly Snickerdoodle Apple Pie Bars Recipe for Fall Baking
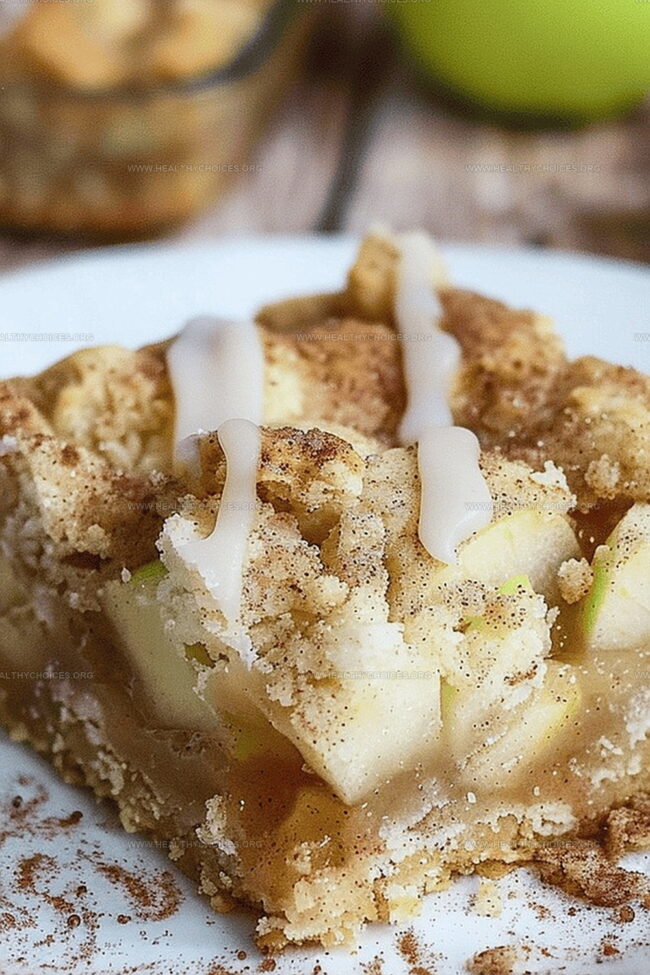
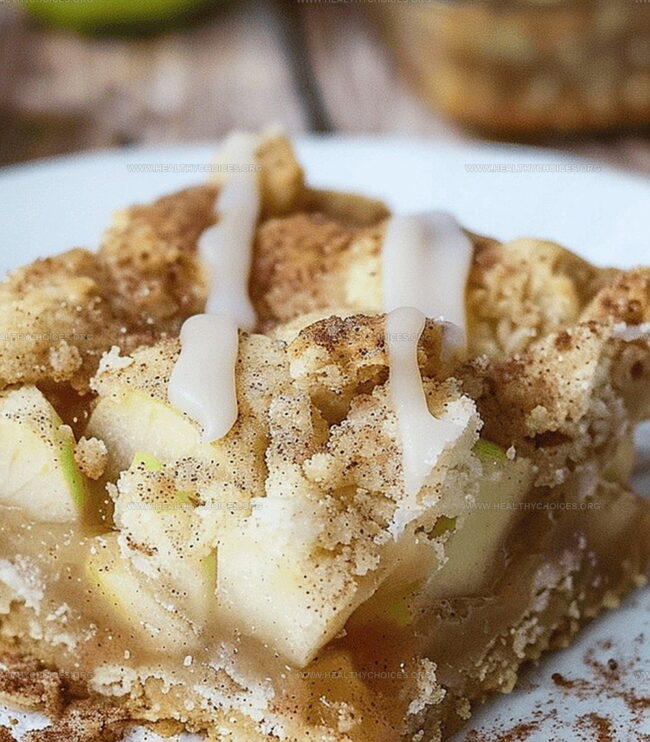
Sweet meets spice in these irresistible snickerdoodle apple pie bars that blend two beloved desserts into one mouthwatering treat.
Warm cinnamon and tender apples create a perfect harmony of flavors in every delectable bite.
The buttery, crumbly crust echoes classic snickerdoodle cookies with its sugary, cinnamon-kissed texture.
Layers of soft, caramelized apples nestle between crisp, golden edges that promise pure comfort.
Each bar delivers a delightful balance of classic apple pie warmth and the nostalgic charm of snickerdoodle cookies.
Bakers of all skill levels can easily master this crowd-pleasing dessert that transforms simple ingredients into something extraordinary.
Prepare to fall in love with a dessert that celebrates the best of fall’s sweet indulgences.
Quick Recipe Overview
Storage Guidelines for Snickerdoodle Apple Pie Bars
For Cookie Base:For Fruity Filling:For Sweet Drizzle:Tropical Hawaiian Cheesecake Salad Shopping List
Tools for Building Tropical Hawaiian Cheesecake Salad
Warm up your oven to a toasty 350°F. Grab an 8×8 baking dish and give it a quick spray so nothing sticks.
Mix the snickerdoodle cookie blend with soft butter and a beaten egg. Stir until everything hugs together into a soft dough.
Press about two-thirds of your dough into the pan, creating a delightful golden base that will cradle the apple goodness.
Spread apple pie filling across the dough landscape, making sure every corner gets a sweet apple kiss.
Break apart the remaining dough and sprinkle it playfully over the apples like a rustic blanket.
Dust the reserved cinnamon sugar over the top, creating a magical spice layer that will make your kitchen smell incredible.
Slide the pan into the oven and let it bake for 50-55 minutes until the top turns a gorgeous golden brown.
Once cooled, drizzle a silky glaze made from powdered sugar and milk. Slice into nine dreamy squares and enjoy your creation.
Stepwise Method for Tropical Hawaiian Cheesecake Salad
Hawaiian Cheesecake Salad Tips You’ll Love
Serving Style for Tropical Hawaiian Cheesecake Salad
Print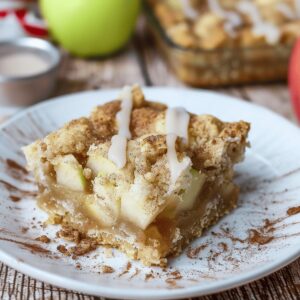
Irresistible Snickerdoodle Apple Pie Bars
- Total Time: 1 hour 10 minutes
- Yield: 13 1x
Description
Homemade snickerdoodle apple pie bars combine classic cinnamon-sugar flavors with rich apple filling. Bakers can enjoy this delightful dessert that brings warmth and comfort to any gathering.
Ingredients
- 17.5 oz (496 g) Krusteaz Snickerdoodle cookie mix
- 21 oz (595 g) canned apple pie filling
- ½ cup (113 g) butter, room temperature
- 1 egg, beaten
- ½ cup (60 g) powdered sugar
- 1–2 tbsps (15–30 mL) milk
Instructions
- Preparation: Warm the oven to 350°F and thoroughly coat an 8×8-inch baking dish with cooking spray to prevent adhesion.
- Dough Creation: Thoroughly combine Snickerdoodle cookie mix, egg, and butter until a cohesive dough forms, ensuring no dry ingredients remain.
- Base Layer: Evenly press two-thirds of the cookie dough into the prepared dish, creating a solid, uniform foundation for the bars.
- Filling Distribution: Spread apple pie filling across the dough base, ensuring an even, consistent layer that covers the entire surface.
- Topping Assembly: Delicately crumble the remaining cookie dough over the apple filling, creating a rustic, textured top layer that adds visual and flavor complexity.
- Cinnamon Sugar Finish: Liberally sprinkle the reserved cinnamon sugar mixture across the surface to enhance sweetness and create a caramelized exterior.
- Baking Process: Bake in the preheated oven for 50-55 minutes, monitoring until the crust turns golden-brown and develops a slight crispness.
- Cooling and Glaze Preparation: Allow bars to cool completely in the pan, then craft a smooth glaze by gradually mixing milk into powdered sugar until reaching a silky, pourable consistency.
- Final Touches: Elegantly drizzle the glaze over the cooled bars, creating a sophisticated finish that adds a final layer of sweetness and visual appeal.
Notes
- Prepare Pan Carefully: Use cooking spray generously and evenly to prevent sticking and ensure easy bar removal.
- Dough Consistency Matters: Mix cookie dough thoroughly until smooth and uniform to create a perfect texture and even baking.
- Watch Baking Time Closely: Monitor bars between 50-55 minutes, looking for golden-brown edges and slightly crisp exterior as doneness indicators.
- Cooling is Crucial: Allow bars to cool completely in the pan to help them set properly and develop a stable, clean-cutting structure.
- Prep Time: 15 minutes
- Cook Time: 55 minutes
- Category: Desserts, Snacks
- Method: Baking
- Cuisine: American
Nutrition
- Serving Size: 13
- Calories: 230
- Sugar: 12g
- Sodium: 160mg
- Fat: 10g
- Saturated Fat: 6g
- Unsaturated Fat: 4g
- Trans Fat: 0g
- Carbohydrates: 34g
- Fiber: 1g
- Protein: 2g
- Cholesterol: 40mg
Emily Roberts
Content Creator & Kitchen Tips Specialist
Expertise
Dietary Planning, Public Health Nutrition, Nutritional Education, Content Development
Education
University of Illinois at Urbana-Champaign
Registered Dietitian Nutritionist (RDN)
Emily Roberts is our content specialist and registered dietitian at HealthyChoices.org. With her Master’s degree in Nutritional Sciences from the University of Illinois and her Registered Dietitian Nutritionist certification, Emily uses her deep nutrition knowledge to write helpful, easy-to-understand guides about healthy eating.
Her warm, practical advice empowers readers to confidently make healthier choices, turning everyday meals into simple moments of wellness and joy.