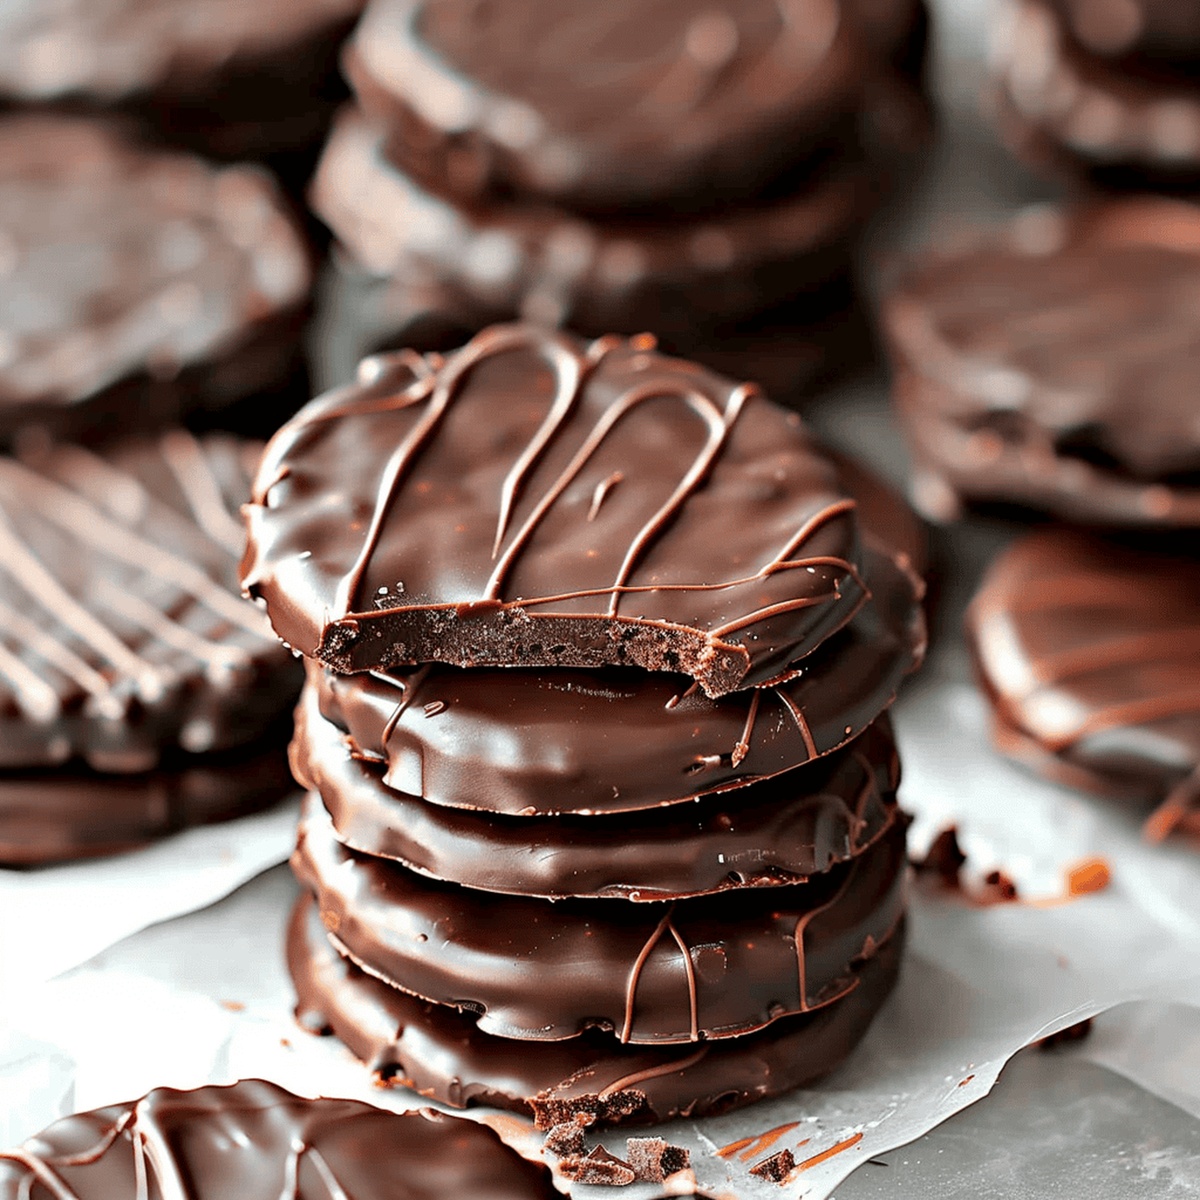
Irresistible No-Bake Thin Mints Recipe: Quick Chocolate Bliss
Cool mint chocolate treats just got a serious upgrade with this no bake fifteen minute thin mints recipe that promises pure deliciousness in less time than most desserts take to prepare.
These crisp, refreshing cookies pack an intense chocolate-mint punch without requiring any oven time.
Everyone loves a shortcut when it comes to satisfying sweet tooths, especially when minimal effort yields maximum flavor.
The thin, delicate wafers melt smoothly on your tongue, delivering a perfect balance of rich chocolate and cool mint.
Each bite brings a delightful crunch that feels surprisingly luxurious for such a quick dessert.
no complicated techniques or fancy equipment stand between you and these addictive little treats.
With just a few simple ingredients and minimal steps, these thin mints will become your new go-to quick dessert that looks and tastes way more complicated than it actually is.
Quick Recipe Overview
Key Ingredients for Thin Mint Perfection
For Base and Structure:For Coating and Flavor:Tools You’ll Need for No-Bake Mint Treats
Fast Instructions for Making Thin Mints at Home
Minty Chocolate Cookie Delight
Carefully split the Oreo cookies, removing the cream center. Save the chocolate wafers for your delicious treat.
Gently melt chocolate using microwave or stovetop method. Stir carefully to create a smooth, glossy texture that’s perfect for coating.
Infuse the melted chocolate with refreshing mint flavor. Stir thoroughly to ensure an even, zesty taste throughout.
Submerge each chocolate wafer into the minty chocolate mixture. Use a fork to lift and allow excess chocolate to drip off, creating a smooth, even coating.
Place chocolate-covered wafers on a parchment-lined tray. Chill in the refrigerator until the chocolate hardens, transforming your cookies into a cool, crisp snack.
Ways to Customize Your Thin Mint Recipe
Serving Ideas for These Cool Mint Cookies
How to Keep Your Mints Fresh and Crisp
Print
Irresistible Thin Mints
- Total Time: 15 minutes
- Yield: 9 1x
Description
Cool chocolate thin mints from scratch deliver minty refreshment without baking. Crisp cookie bases drizzled with dark chocolate create delightful homemade treats you’ll savor quickly and eagerly.
Ingredients
- 20 Oreo cookies
- 12 oz (340 g) semisweet chocolate
- 2–3 drops crème de menthe oil flavoring or peppermint oil flavoring
Instructions
- Cookie Deconstruction: Skillfully separate Oreo chocolate wafers from cream filling, preserving wafers for the recipe and cream for potential future indulgences.
- Chocolate Transformation: Melt semisweet chocolate using microwave at 50% power or double boiler, stirring consistently to achieve a smooth, glossy texture without burning.
- Mint Infusion: Incorporate mint extract into melted chocolate, whisking thoroughly to create a uniform, vibrant minty flavor that permeates the entire mixture.
- Chocolate Dipping: Use a fork to completely submerge each wafer in mint-chocolate, allowing excess to drip off by gently tapping the fork’s edge against the bowl for an elegant, even coating.
- Setting and Chilling: Place chocolate-coated wafers on parchment-lined baking sheet, ensuring minimal contact between cookies. Transfer to refrigerator and chill for 10-15 minutes until chocolate solidifies into a crisp, glossy shell.
- Serving: Remove thin mints from refrigerator and serve immediately, enjoying the refreshing mint-chocolate combination that transforms simple Oreo wafers into a delectable treat.
Notes
- Precision Cookie Separation: Carefully separate Oreo wafers from cream to ensure clean, intact chocolate bases for your thin mints.
- Chocolate Melting Mastery: Use 50% microwave power or double boiler method to prevent chocolate burning and maintain a smooth, glossy texture.
- Mint Flavor Balance: Whisk mint extract thoroughly to create an even, vibrant mint flavor that doesn’t overpower the chocolate.
- Dipping Pro Technique: Use a fork for smooth, even chocolate coating, gently tapping off excess to achieve a professional-looking thin mint finish.
- Prep Time: 5 minutes
- Cook Time: 10 minutes
- Category: Desserts, Snacks
- Method: Blending
- Cuisine: American
Nutrition
- Serving Size: 9
- Calories: 200
- Sugar: 18 g
- Sodium: 150 mg
- Fat: 10 g
- Saturated Fat: 5 g
- Unsaturated Fat: 5 g
- Trans Fat: 0 g
- Carbohydrates: 27 g
- Fiber: 1 g
- Protein: 2 g
- Cholesterol: 0 mg


Emily Roberts
Content Creator & Kitchen Tips Specialist
Expertise
Dietary Planning, Public Health Nutrition, Nutritional Education, Content Development
Education
University of Illinois at Urbana-Champaign
Registered Dietitian Nutritionist (RDN)
Emily Roberts is our content specialist and registered dietitian at HealthyChoices.org. With her Master’s degree in Nutritional Sciences from the University of Illinois and her Registered Dietitian Nutritionist certification, Emily uses her deep nutrition knowledge to write helpful, easy-to-understand guides about healthy eating.
Her warm, practical advice empowers readers to confidently make healthier choices, turning everyday meals into simple moments of wellness and joy.