
Try These Fudgy No-Bake Brownies Recipe for Chocolatey Bliss
Indulgent no-bake brownies offer a delightful twist on traditional chocolate desserts without the hassle of heating up your kitchen.
Craving something rich and decadent that comes together in minutes?
These sweet squares promise intense flavor and satisfying texture through clever ingredient combinations.
Compact and convenient, this recipe eliminates complicated baking steps while delivering maximum chocolate satisfaction.
Chocolate lovers will appreciate the smooth, fudgy consistency that emerges from simple mixing techniques.
Smart home cooks know these treats can be whipped up faster than brewing a cup of coffee.
The magic happens when quality ingredients blend seamlessly, creating a dessert that feels both nostalgic and modern.
No-Bake Brownies That Bring the Fudge Without the Oven
Pantry Staples That Power No-Bake Brownies
Base Ingredients:Topping Ingredients:Optional Ingredient:Quick Instructions for No-Bake Brownies with Big Impact
Step 1: Prepare Cashew Base
Gather raw cashews and soak them in cool water for 8-12 hours. Drain and rinse thoroughly. This softens the cashews for smooth blending.
Step 2: Create Creamy Cashew Mixture
Place soaked cashews in a high-speed blender. Add:Blend until ultra-smooth and creamy, creating a silky paste.
Step 3: Mix Dry Ingredients
Combine in a mixing bowl:Fold into the cashew mixture until a thick, rich dough forms.
Step 4: Shape Brownie Layer
Line a rectangular baking dish with parchment paper. Press the dough evenly into the pan, creating a smooth surface. Use the back of a spoon to flatten.
Step 5: Whip Up Chocolate Drizzle
In a separate bowl, whisk together:Stir until glossy and completely combined.
Step 6: Add Chocolate Topping
Pour the chocolate mixture over the cashew base. Gently tilt the pan to ensure even coverage. Tap the pan to remove any air bubbles.
Step 7: Chill and Set
Refrigerate for 1-2 hours until firm. The squares should be solid but not rock-hard.
Step 8: Slice and Serve
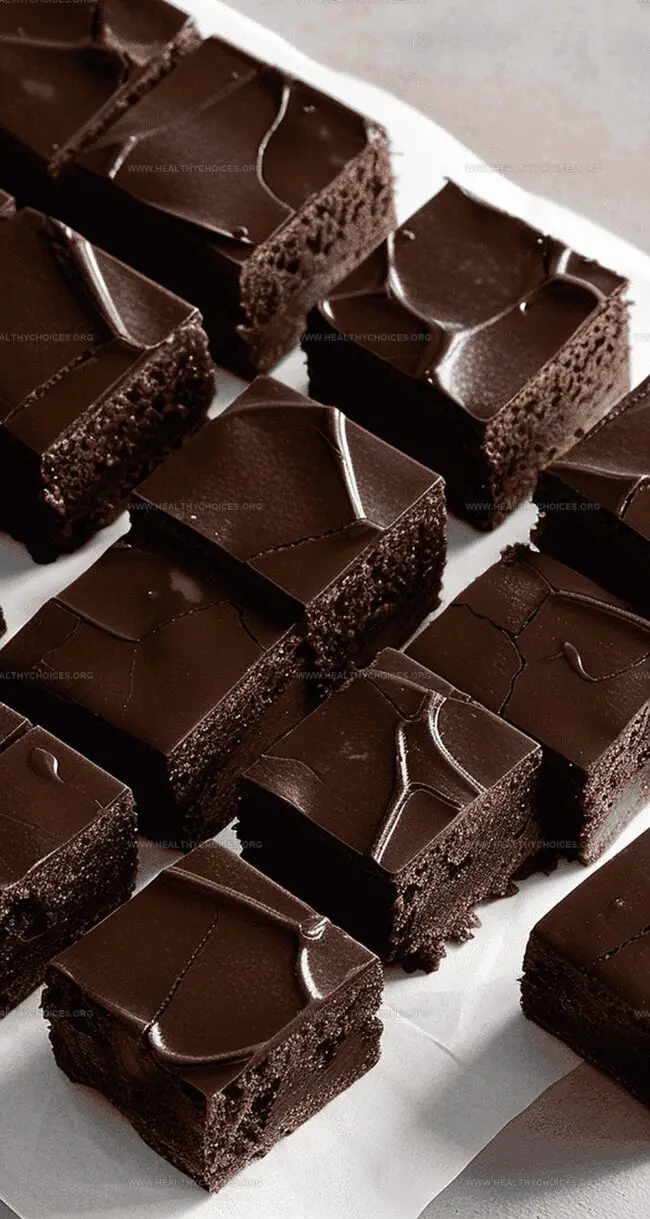
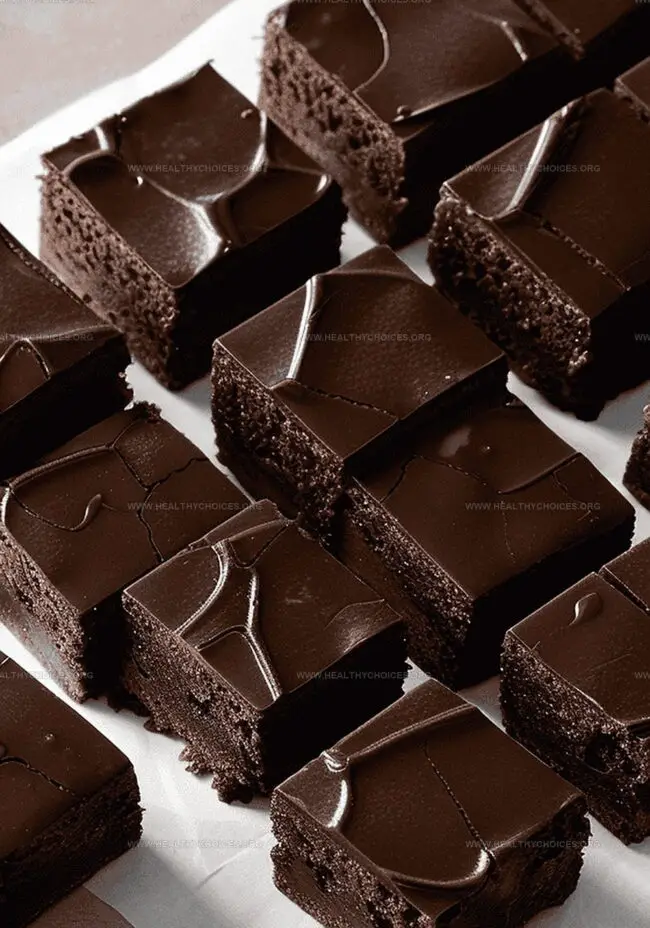
Remove from refrigerator. Lift out the entire block using parchment paper. Cut into square pieces using a sharp knife warmed under hot water.
Step 9: Store Delicious Treats
Keep in an airtight container in the refrigerator for up to 2 weeks. For longer storage, freeze up to 3 months. Thaw in refrigerator before serving.
Tips for Rich, Dense, and Satisfying No-Bake Brownies
Store No-Bake Brownies Without Melting or Drying Out
Cold Sips and Sweet Sides for No-Bake Brownies
Nutty, Crunchy, or Fruity No-Bake Brownie Variations to Try
Print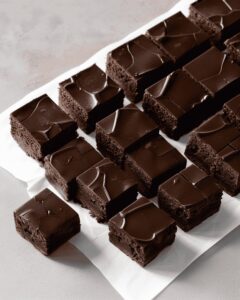
No-Bake Brownies Recipe
- Total Time: 20 minutes
- Yield: 12 1x
Description
Indulgent no-bake brownies promise rich chocolate bliss without turning on the oven. Creamy layers of nutty goodness and velvety chocolate create a quick dessert that satisfies sweet cravings with minimal effort.
Ingredients
Main Ingredients:
- 1 ½ cups (142.5 g / 5 oz) almond flour, finely ground
- 1 ½ cups (205.5 g / 7.2 oz) cashews
- ½ cup (54 g / 2 oz) cocoa powder
- ½ cup (120 ml / 4 fl oz) maple syrup
- ½ cup (120 ml / 4 fl oz) coconut oil, melted
Flavor Enhancers:
- 1 pinch sea salt
- ¼ cup (60 ml / 2 fl oz) maple syrup
- ½ cup (54 g / 2 oz) cocoa powder
Instructions
- Submerge raw cashews in water overnight, adding a pinch of salt to enhance softening and neutralize enzyme inhibitors. Drain and rinse thoroughly after soaking.
- Transform softened cashews into a silky, creamy base by blending with maple syrup until achieving a smooth, thick consistency. Consider using cashew butter as an alternative if blending equipment is unavailable.
- Incorporate almond flour and cocoa powder into the cashew mixture, gently folding or processing until a dense, uniform dough forms. Ensure complete integration of dry ingredients for consistent texture.
- Line a compact baking dish with parchment paper, then carefully spread the brownie mixture into a uniform, compact layer. Use gentle pressure to create an even surface.
- Craft a glossy chocolate topping by whisking melted coconut oil, cocoa powder, and maple syrup until achieving a seamless, glossy finish.
- Cascade the chocolate mixture over the prepared base, employing smooth, deliberate movements to distribute evenly. Gently tap the dish to eliminate potential air pockets.
- Refrigerate the assembled dessert for approximately one hour, allowing the brownies to set and solidify completely.
- Once firm, extract the brownies using parchment paper edges. Slice into precise squares using a knife heated under hot water for clean, smooth cuts.
- Preserve remaining brownies in a sealed container within the refrigerator for up to two weeks. For extended storage, freeze up to three months, allowing gradual thawing in the refrigerator before serving.
Notes
- Soak cashews overnight to create a creamy, smooth base that blends perfectly and breaks down hard-to-digest enzyme inhibitors.
- Choose high-quality cocoa powder for rich, intense chocolate flavor that elevates these no-bake brownies beyond ordinary desserts.
- Use parchment paper for easy removal and clean cutting, ensuring picture-perfect brownie squares every single time.
- Warm knife technique prevents crumbling and creates professional-looking slices with smooth chocolate coating.
- Refrigeration is crucial for setting the texture and developing deeper flavor profiles, transforming liquid ingredients into decadent dessert squares.
- Freezing extends shelf life up to 3 months, making these brownies an excellent make-ahead treat for unexpected sweet cravings.
- Prep Time: 20 minutes
- Cook Time: 0 minutes
- Category: Desserts, Snacks
- Method: Blending
- Cuisine: American
Nutrition
- Serving Size: 12
- Calories: 288
- Sugar: 10 g
- Sodium: 1 mg
- Fat: 24 g
- Saturated Fat: 19 g
- Unsaturated Fat: 5 g
- Trans Fat: 0 g
- Carbohydrates: 17 g
- Fiber: 3 g
- Protein: 6 g
- Cholesterol: 0 mg
David Bennett
Founder & Head Recipe Developer
Expertise
Culinary Nutrition, Recipe Development, Nutritional Counseling, Food Science
Education
Johnson & Wales University
Certified Nutrition Specialist® (CNS®)
David Bennett is the lead recipe creator and nutrition expert at HealthyChoices.org, your friendly space for tasty meals that nourish body and mind.
With a Culinary Nutrition degree from Johnson & Wales University and a Certified Nutrition Specialist® credential, David pairs practical nutrition with delicious cooking, creating recipes you’ll crave daily.
At Healthy Choices, David shares easy, nutritious dishes and smart cooking tips to make healthy eating something everyone can enjoy, with no complicated diets needed.