
No-Bake Cherry Cheesecake Jars Recipe for Sweet Bliss
No-bake cherry cheesecake jars offer a delightful twist on classic dessert presentations that promise pure indulgence.
Sweet, creamy layers meld together in a perfectly balanced symphony of flavors and textures.
These charming individual desserts capture the essence of comfort and elegance without requiring complex baking skills.
Silky smooth cream cheese mingles with fresh, vibrant cherries in a delectable dance of culinary creativity.
Portable and impressive, these jars revamp ordinary ingredients into an extraordinary treat that feels both rustic and sophisticated.
Each spoonful delivers a rich, decadent experience that tingles your taste buds and sparks joy.
Guests will be enchanted by the visual appeal and irresistible combination of cool, tangy cheesecake with bright, luscious fruit.
What’s to Love About No-Bake Cherry Cheesecake Jars
No-Bake Cherry Cheesecake Jar Ingredients
Fruit Topping:Cheesecake Filling Base:Crust Component:Putting Together Your Cheesecake Jars
Step 1: Prepare Cherry Topping
Combine all ingredients in a saucepan over medium heat. Gently stir and cook for 5-10 minutes until the mixture transforms into a luscious, thick sauce. Optional: Lightly crush cherries for extra texture. Once thickened, remove from heat and let cool completely.
Step 2: Create Creamy Cheesecake Filling
Grab a mixing bowl and blend all ingredients using an electric mixer. Whip on high speed for 2-3 minutes until silky smooth. Pop the mixture into the refrigerator while preparing the next layer.
Step 3: Craft Graham Cracker Crust
Mix crumbs and melted butter in a bowl until perfectly combined. The mixture should hold together when pressed.
Step 4: Assemble Delightful Jars
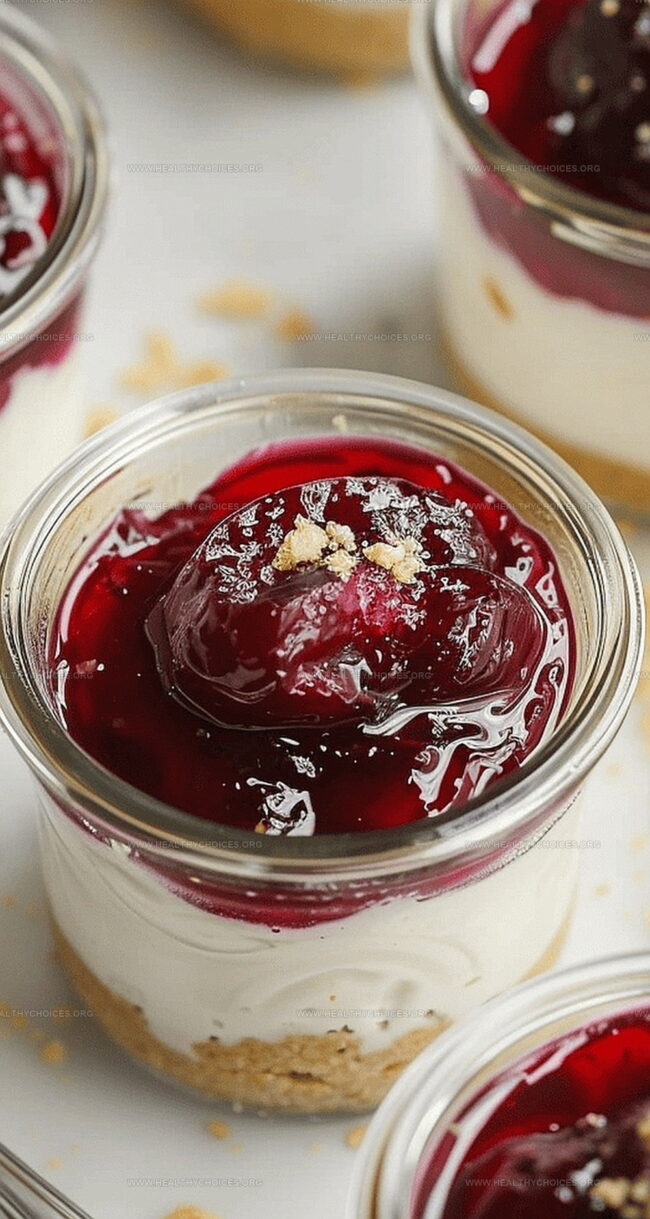
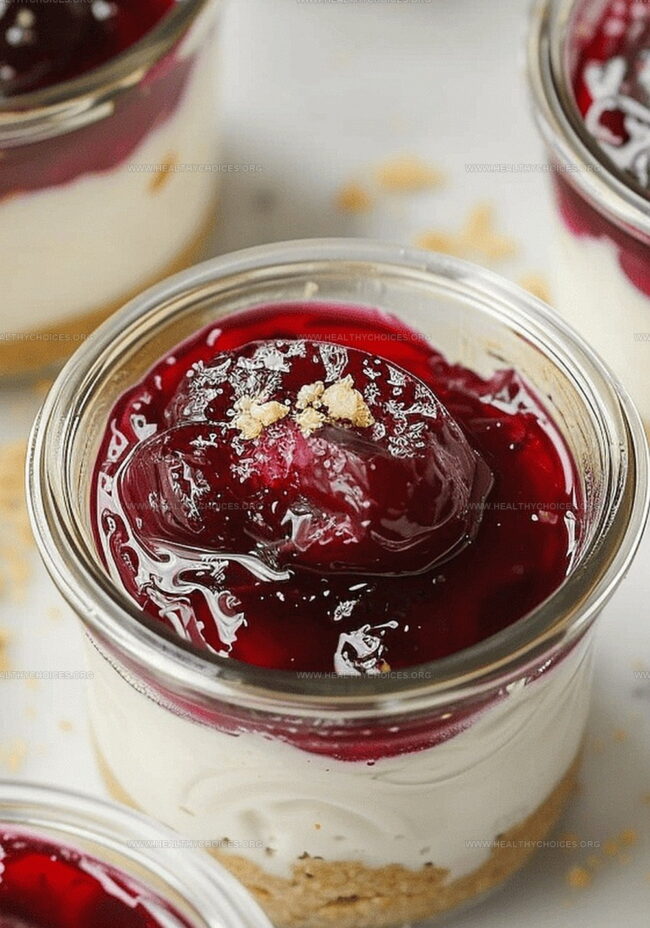
Divide graham cracker crust evenly among six mason jars. Gently press down to create a firm base. Carefully spoon cheesecake filling over the crust. Tap jars on the counter to eliminate air bubbles. Crown each jar with cooled cherry topping. Serve immediately or chill for one hour to achieve a firmer texture.
Serving Suggestion: Best enjoyed chilled and perfect for summer gatherings or quick dessert cravings.
Cherry Cheesecake Jar Tips and Hacks
How to Chill and Reheat Cheesecake Jars Correctly
Snacks and Drinks to Serve with Cherry Cheesecake Jars
No-Bake Cheesecake Jar Flavor Tweaks
Print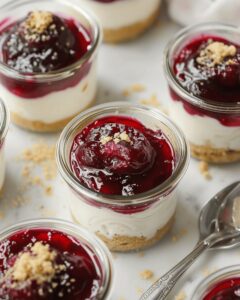
No-Bake Cherry Cheesecake Jars Recipe
- Total Time: 25 minutes
- Yield: 4 1x
Description
Delightful no-bake cherry cheesecake jars offer a perfect blend of creamy cheesecake and sweet cherry goodness. Layers of graham cracker crust, silky cream cheese filling, and fresh cherry topping create an irresistible dessert that brings joy to any table.
Ingredients
Main Ingredients:
- 1 cup pitted cherries, halved
- 4 ounces (113 grams) cream cheese, softened
- ⅔ cup plain full-fat Greek yogurt
- ½ cup graham cracker crumbs
- 2–3 tablespoons (30–45 milliliters) butter, melted
Sweeteners and Flavor Enhancers:
- 3 tablespoons (45 milliliters) pure maple syrup
- 2 tablespoons (30 milliliters) fresh lemon juice
Thickening and Binding Agents:
- 1 teaspoon (5 milliliters) water
- 1 teaspoon (5 grams) cornstarch
Instructions
- Create a luscious cherry sauce by simmering cherries with maple syrup, lemon juice, water, and cornstarch in a saucepan over medium heat, stirring gently until the mixture transforms into a thick, glossy compote.
- Allow the cherry sauce to cool completely, giving it time to set and develop a rich, concentrated flavor.
- Whip softened cream cheese, Greek yogurt, maple syrup, and lemon juice in a mixing bowl using an electric mixer, blending until the mixture reaches a silky, smooth consistency.
- Chill the cheesecake filling in the refrigerator to help it firm up and enhance its creamy texture.
- Prepare the graham cracker base by thoroughly combining melted butter with finely ground graham cracker crumbs until the mixture resembles wet sand.
- Distribute the graham cracker mixture evenly across six mason jars, gently pressing down to create a compact, uniform base.
- Layer the chilled cheesecake filling atop the graham cracker crust, carefully spreading it to ensure a smooth, even surface.
- Tap the jars gently on the countertop to eliminate any air pockets and settle the cheesecake layer.
- Crown each jar with the cooled cherry sauce, creating an inviting and vibrant topping.
- Refrigerate the jars for at least an hour to allow the flavors to meld and the texture to set, or serve immediately for a more relaxed dessert experience.
Notes
- Prep ahead by cooling cherry topping completely to prevent runny layers and ensure a beautiful presentation.
- Mason jars create charming individual desserts perfect for summer gatherings or potluck parties.
- Chilling the cheesecake filling helps stabilize the texture and enhances the creamy consistency.
- Use fresh or frozen cherries depending on seasonal availability and personal preference.
- Electric mixer ensures smooth, lump-free cheesecake filling with consistent texture.
- Refrigerating for at least one hour allows flavors to meld and creates a firmer, more satisfying dessert.
- Prep Time: 15 minutes
- Cook Time: 10 minutes
- Category: Desserts, Snacks
- Method: Simmering
- Cuisine: American
Nutrition
- Serving Size: 4
- Calories: 263
- Sugar: 12 g
- Sodium: 180 mg
- Fat: 15 g
- Saturated Fat: 9 g
- Unsaturated Fat: 4 g
- Trans Fat: 0 g
- Carbohydrates: 30 g
- Fiber: 1 g
- Protein: 5 g
- Cholesterol: 40 mg
David Bennett
Founder & Head Recipe Developer
Expertise
Culinary Nutrition, Recipe Development, Nutritional Counseling, Food Science
Education
Johnson & Wales University
Certified Nutrition Specialist® (CNS®)
David Bennett is the lead recipe creator and nutrition expert at HealthyChoices.org, your friendly space for tasty meals that nourish body and mind.
With a Culinary Nutrition degree from Johnson & Wales University and a Certified Nutrition Specialist® credential, David pairs practical nutrition with delicious cooking, creating recipes you’ll crave daily.
At Healthy Choices, David shares easy, nutritious dishes and smart cooking tips to make healthy eating something everyone can enjoy, with no complicated diets needed.