Russian honey cake weaves a rich tapestry of sweet memories and cultural tradition that transcends ordinary dessert experiences.
Generations have cherished this delectable confection, passing down recipes like precious family heirlooms.
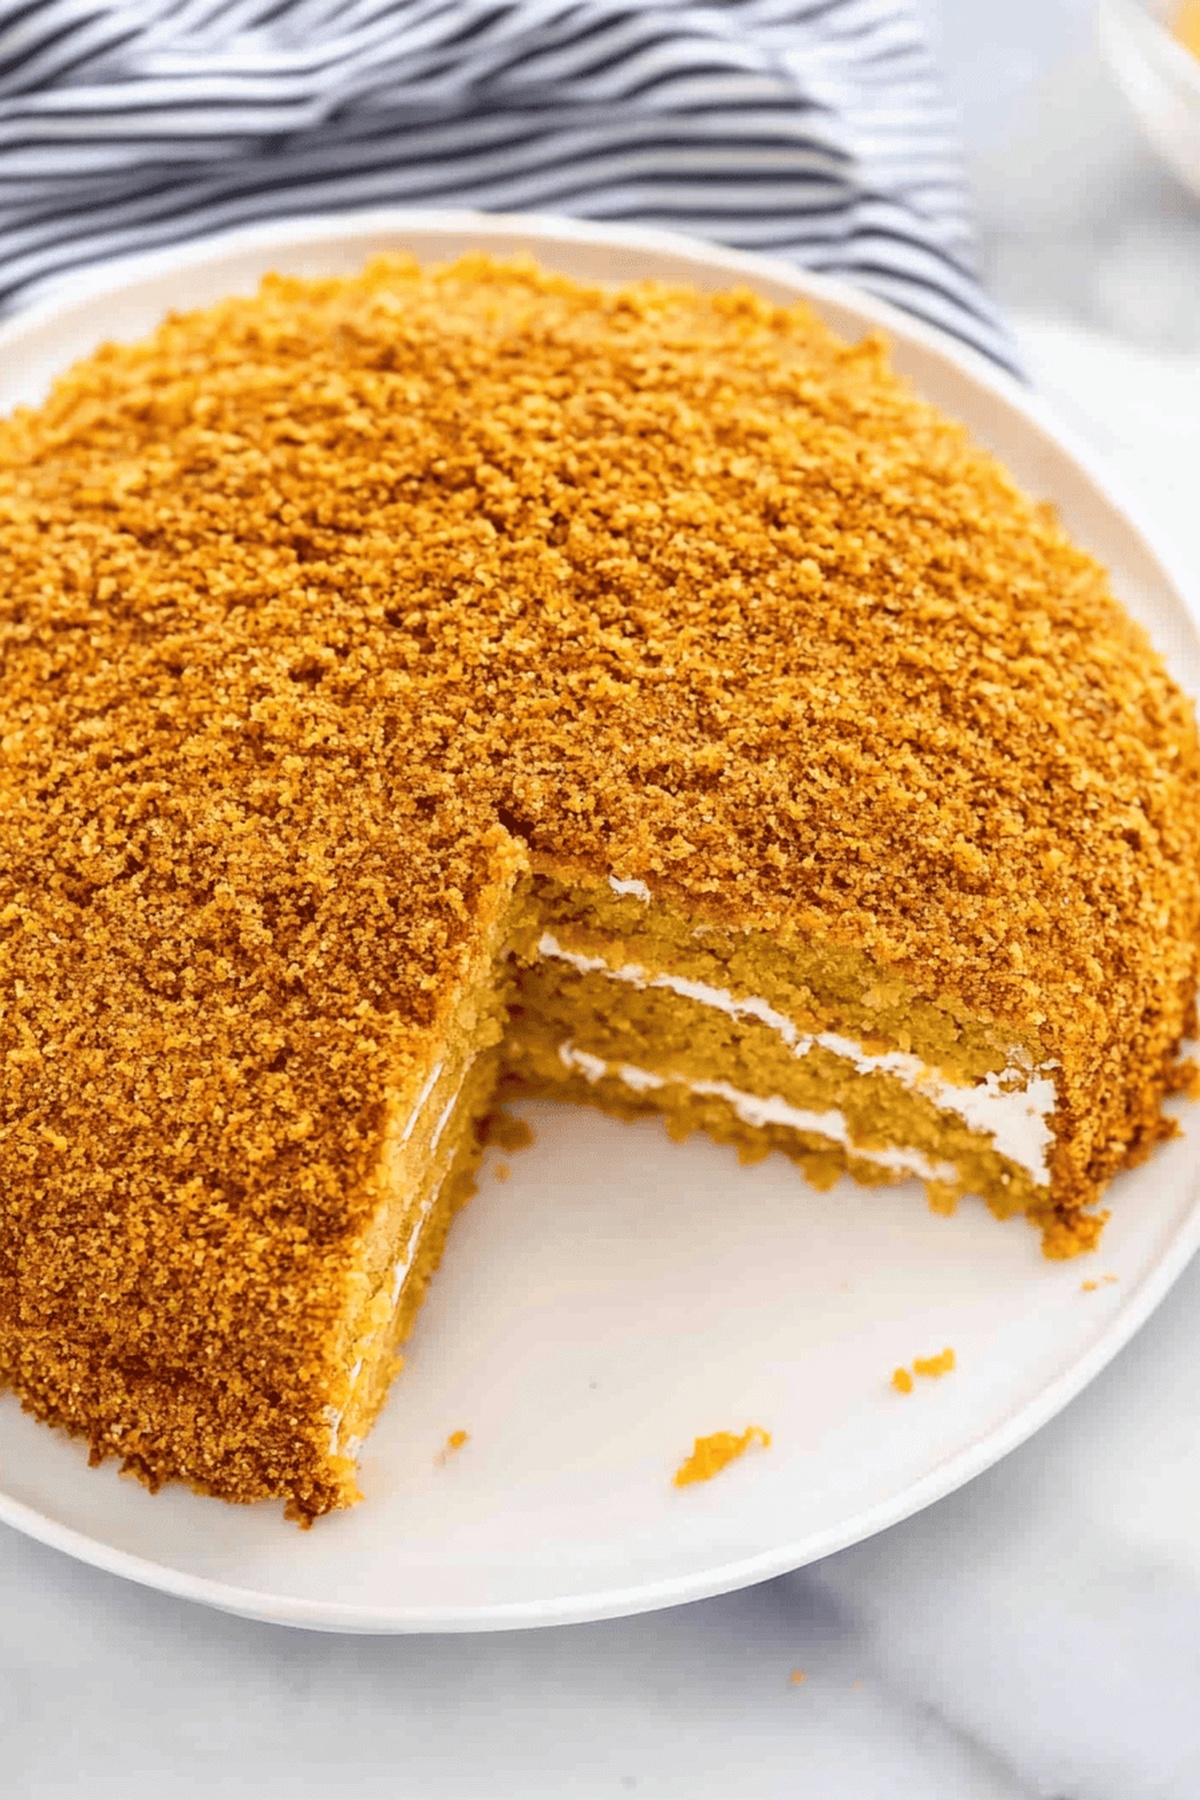
Layers of delicate, golden-brown cake tell stories of warm kitchens and festive gatherings across eastern European landscapes.
Intricate and time-honored, this beloved treat requires patience and precision to craft its signature texture and depth of flavor.
honey reimagines ordinary ingredients into something extraordinary, creating a symphony of caramelized sweetness that dances across your palate.
Crafting this cake becomes an intimate culinary journey that connects you to centuries of baking wisdom.
The magic lies in understanding each careful step and honoring the traditional techniques.
Russian Honey Cake: What Makes It Special
Craft Delicate Layers: Create ultra-thin, golden cake layers that are expertly baked in just 7 minutes, delivering a unique texture unlike traditional thick cakes.
Unlock Sweet Complexity: Combine honey and eggs for a naturally sweet base that develops rich, nuanced flavors when rested overnight, transforming simple ingredients into an elegant dessert.
Master Easy Technique: Learn a straightforward baking method that allows home cooks to produce a professional-looking Russian dessert without advanced pastry skills, using basic kitchen tools and minimal ingredients.
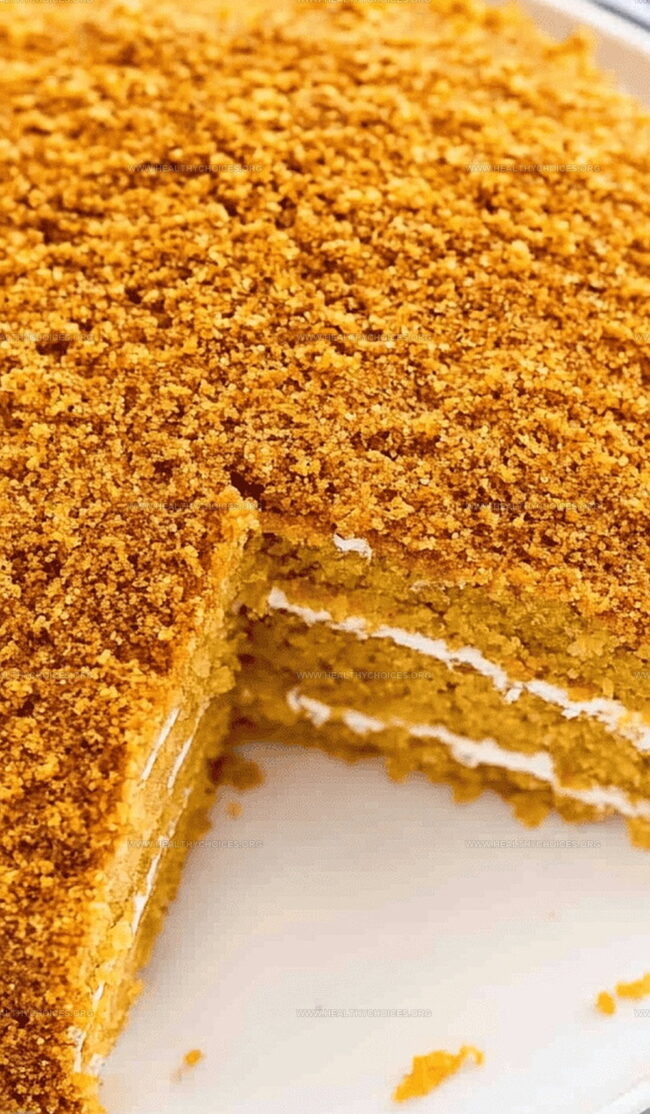
Enjoy Make-Ahead Magic: Refrigerate the cake for several hours or overnight, which allows the creamy frosting to soften the crisp layers, creating a melt-in-your-mouth texture that improves with time.
Ingredients for Russian Honey Cake
Cake Layers:
Eggs, Honey: Rich base that provides structure and natural sweetness, fresh eggs are key for optimal texture.
Flour: Provides structure and body to the cake layers, all-purpose flour works best.
Baking Soda, White Distilled Vinegar: Leavening agents that help create light and airy cake texture.
Frosting Components:
Cool Whip, Sour Cream: Creamy, tangy frosting that balances the cake’s sweetness, use full-fat versions for best flavor.
Decoration:
Reserved Cake Scraps: Textural element for garnishing the cake’s exterior, adds rustic homemade appearance.
Instructions for Classic Medovik Cake
Step 1: Prepare Baking Setup
Preheat oven to 350°F
Cut 4 pieces of parchment paper
Place paper over an inverted 18″ by 13″ baking sheet
Step 2: Create Cake Batter
Grab a large mixing bowl
Whisk together
Eggs
Honey
Beat mixture for 2 minutes until smooth and creamy
Dissolve baking soda in white distilled vinegar
Add baking soda mixture to egg mixture
Incorporate flour
Blend until silky and uniform
Step 3: Bake Delicate Layers
Spread 1/2 cup batter onto prepared parchment paper
Spread ultra-thin across entire baking sheet
Aim for even, translucent layer reaching all corners
Bake each layer for 7 minutes
Create 4 total layers
Allow layers to cool completely
Step 4: Shape Cake Layers
Carefully remove parchment paper
Use 7-8″ plate as template
Cut 2 circles from each cake layer
Reserve cake scraps for decoration
Step 5: Prepare Creamy Frosting
Combine in mixing bowl
Cool Whip
Sour cream
Mix until smooth and spreadable
Step 6: Assemble Magnificent Cake
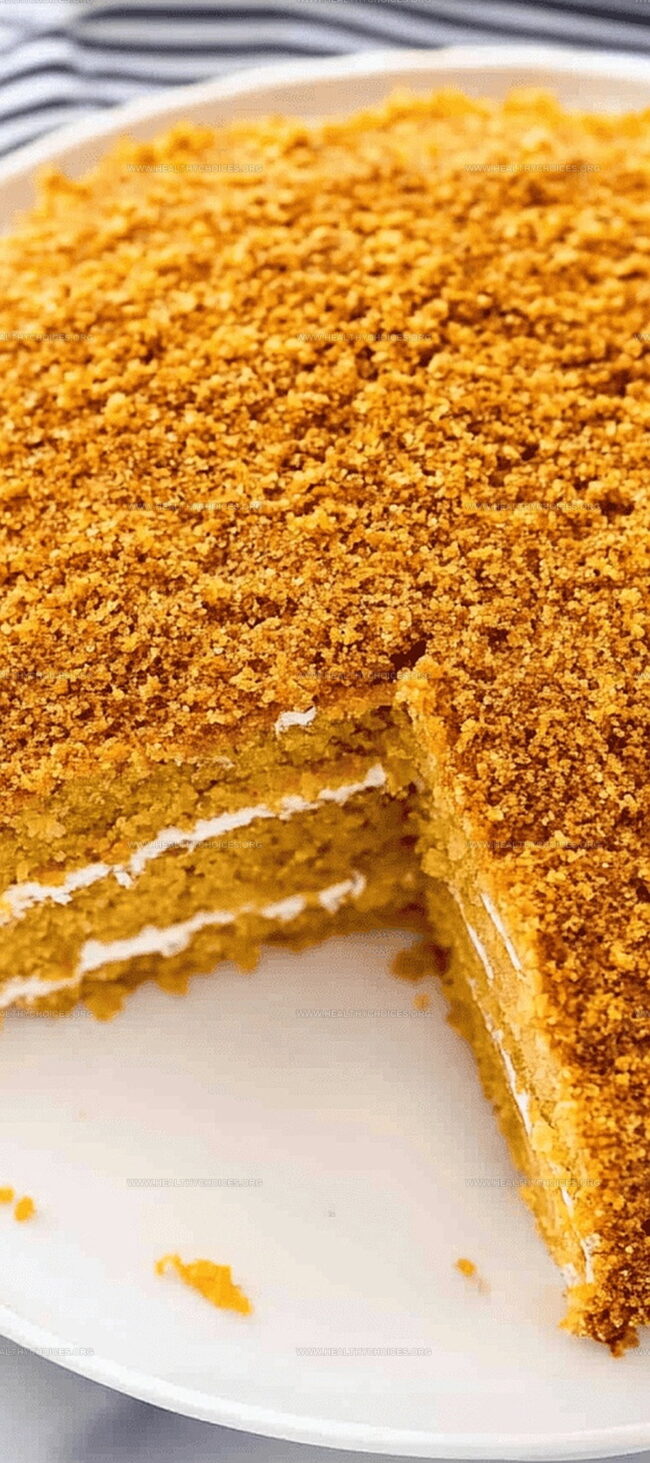
Generously spread frosting between each layer
Stack layers carefully
Frost entire cake sides and top
Crush reserved cake scraps
Sprinkle crumbs over cake exterior
Step 7: Chill and Enhance Flavors
Refrigerate cake for minimum 1 hour
Overnight chilling recommended
Allows flavors to develop and merge
Serving Suggestion: Slice and enjoy this heavenly Russian delicacy!
Secrets to a Light and Moist Honey Cake
Master Thin Layer Technique: Spread batter extremely thinly on parchment paper, using an offset spatula to ensure even, delicate layers that create the cake’s signature texture.
Vinegar Magic Trick: Dissolve baking soda in vinegar precisely to activate the leavening process and achieve perfectly light, airy cake layers.
Cooling Crucial Step: Allow each baked layer to cool completely before removing parchment paper to prevent tearing and maintain delicate structure.
Frosting Smoothness Secret: Gently fold Cool Whip and sour cream until just combined to create a silky, light frosting that won’t weigh down the delicate layers.
Chilling for Flavor Fusion: Refrigerate the assembled cake for at least an hour, preferably overnight, to let the flavors meld and soften the layers into a luxurious, moist dessert.
Reheating and Storing Russian Honey Cake
Refrigerate: Cover the honey cake loosely with plastic wrap or place in an airtight container. Store in the refrigerator for up to 4-5 days to maintain freshness and prevent drying out.
Prevent Moisture: Place a paper towel inside the container to absorb excess moisture and keep the cake’s texture consistent.
Serve Cold: This cake tastes best when served chilled directly from the refrigerator. Let it sit at room temperature for 10-15 minutes before serving to soften the frosting slightly.
Pairings for This Eastern European Dessert
Pair with Sweet Dessert Wine: Complement the honey cake’s delicate sweetness with a chilled glass of Moscato d’Asti or a late-harvest Riesling, enhancing the cake’s rich honey notes and creamy texture.
Match with Spiced Tea: Serve alongside a warm cup of cinnamon or cardamom-infused black tea, which will beautifully highlight the cake’s subtle spice undertones and provide a comforting contrast.
Enjoy with Vanilla Affogato: Create a delightful dessert experience by serving a small scoop of vanilla gelato “drowned” in espresso next to a slice of the honey cake, offering a harmonious blend of creamy, sweet, and slightly bitter flavors.
Accompany with Fresh Berries: Add a small side of fresh raspberries or strawberries to cut through the cake’s richness and provide a bright, tangy counterpoint to its smooth frosting and honey-based layers.
Russian Honey Cake Variations
Chocolate Honey Layer Cake: Add 2 tablespoons of cocoa powder to the batter for a rich chocolate undertone, creating a decadent variation that complements the honey’s sweetness.
Nutty Honey Cake: Incorporate 1/2 cup of finely chopped walnuts or almonds into the frosting and sprinkle some on top for a crunchy texture and nutty flavor profile.
Spiced Honey Cake: Mix 1 teaspoon of ground cinnamon and 1/2 teaspoon of ground ginger into the batter to give the cake a warm, aromatic twist that enhances the honey’s natural complexity.
Citrus Honey Cake: Zest one orange or lemon into the frosting and batter to introduce a bright, fresh note that cuts through the cake’s sweetness and adds a vibrant dimension.
Russian honey cake celebrates layers of delicate, golden cake brushed with sweet honey syrup. Medovik’s rich, caramelized flavor and delicate texture invite you to savor a classic Russian dessert that tells a story of culinary tradition.
Ingredients
Scale
Main Ingredients:
2 cups all-purpose flour
3 eggs
1 cup clover honey
Leavening and Acid Agents:
2 teaspoons baking soda
1 tablespoon white distilled vinegar
Frosting Ingredients:
8 ounces (226 grams) Cool Whip (thawed)
1 cup sour cream (Daisy brand)
Instructions
Prepare your workspace by preheating the oven to 350°F (175°C) and lining an inverted baking sheet with parchment paper.
Whisk eggs and honey together vigorously until the mixture becomes light and fluffy, creating a smooth base for the cake layers.
Activate the baking soda by mixing it with white distilled vinegar, then fold into the egg-honey mixture along with flour until a uniform batter forms.
Carefully spread a thin, even layer of batter across the prepared parchment paper, ensuring complete coverage to the sheet’s edges.
Bake each delicate layer for approximately 7 minutes, repeating until you have 4 golden, paper-thin cake sheets.
Allow the layers to cool completely, then gently remove from parchment paper.
Using a plate as a guide, meticulously cut 2 perfect circles from each baked layer, reserving the remaining scraps for later decoration.
Create a luscious frosting by blending Cool Whip and sour cream until smooth and creamy.
Assemble the cake by spreading generous amounts of frosting between each circular layer, building a tall, elegant stack.
Completely enrobe the entire cake with the remaining frosting, covering sides and top in a uniform layer.
Crumble the reserved cake scraps and delicately sprinkle them over the cake’s exterior for a rustic, textured finish.
Chill the assembled cake in the refrigerator for a minimum of one hour, allowing the flavors to meld and the frosting to set perfectly.
Notes
Precision matters when spreading batter thinly to create delicate, uniform layers that define this classic Russian dessert.
Parchment paper is crucial for easy layer removal and preventing sticking during the baking process.
Letting the cake rest in the refrigerator allows the honey and cream to soften the crisp layers, creating a melt-in-your-mouth texture.
Keep cake scraps for a rustic, homemade decoration that adds texture and visual appeal to the final presentation.
The vinegar and baking soda combination helps create a light, airy texture in the honey-infused cake layers.
Gentle, even frosting ensures a smooth, professional-looking finish that highlights the cake’s delicate structure.
Focus: Blending culinary arts with nutritional science to create health-focused cuisine.
Certified Nutrition Specialist® (CNS®)
Credential: Advanced certification in personalized nutrition therapy.
David Bennett is the lead recipe creator and nutrition expert at HealthyChoices.org, your friendly space for tasty meals that nourish body and mind.
With a Culinary Nutrition degree from Johnson & Wales University and a Certified Nutrition Specialist® credential, David pairs practical nutrition with delicious cooking, creating recipes you’ll crave daily.
At Healthy Choices, David shares easy, nutritious dishes and smart cooking tips to make healthy eating something everyone can enjoy, with no complicated diets needed.
David Bennett
Founder & Head Recipe Developer
Expertise
Culinary Nutrition, Recipe Development, Nutritional Counseling, Food Science
Education
Johnson & Wales University
Certified Nutrition Specialist® (CNS®)
David Bennett is the lead recipe creator and nutrition expert at HealthyChoices.org, your friendly space for tasty meals that nourish body and mind.
With a Culinary Nutrition degree from Johnson & Wales University and a Certified Nutrition Specialist® credential, David pairs practical nutrition with delicious cooking, creating recipes you’ll crave daily.
At Healthy Choices, David shares easy, nutritious dishes and smart cooking tips to make healthy eating something everyone can enjoy, with no complicated diets needed.