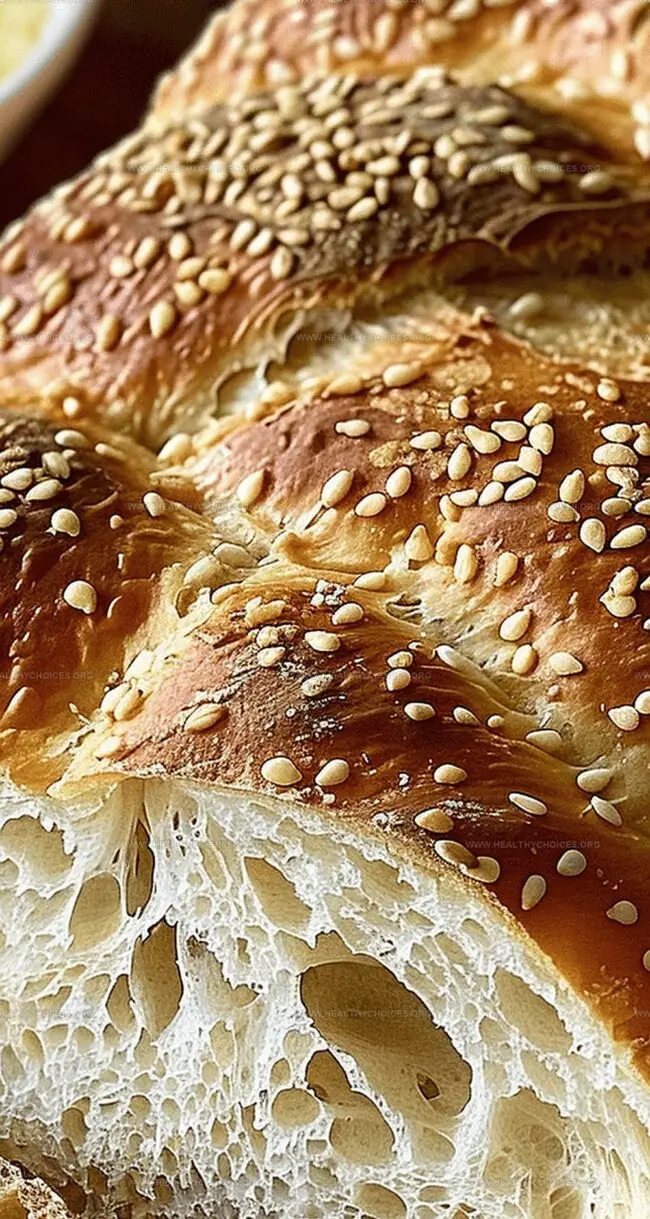
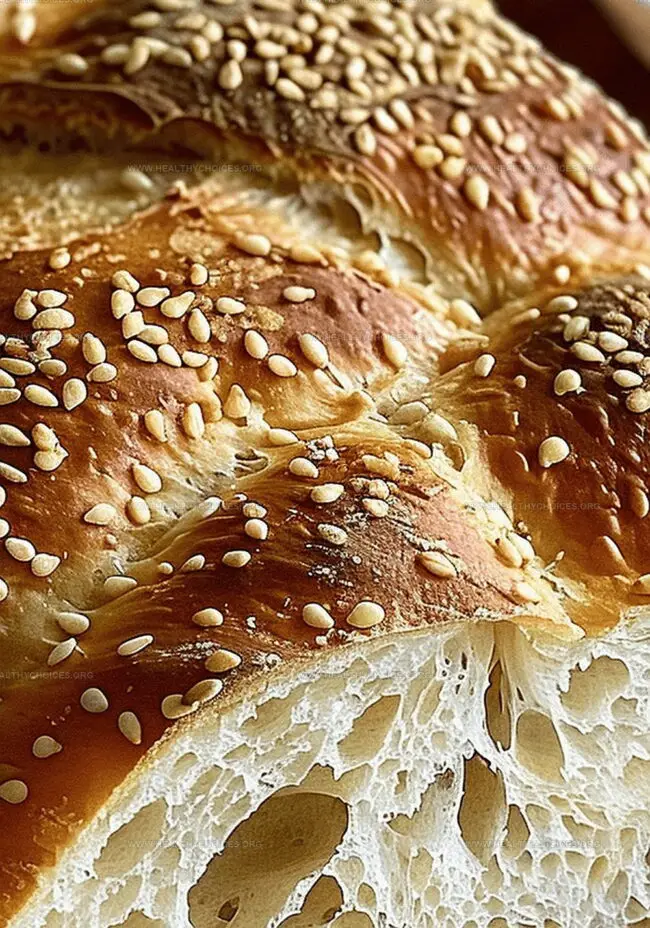
Sesame Seeds: Optional topping that adds nutty crunch and visual appeal to bread’s golden surface.
Essential Bread-Making Tools to Keep Handy
Stand Mixer: Crucial for mixing and kneading the dough efficiently with its dough hook attachment.
Large Mixing Bowl: Needed for mixing ingredients and first dough rise.
Small Saucepan: Perfect for warming milk gently.
Baking Sheets: Two large rimmed sheets for shaping and baking bread loaves.
Parchment Paper: Essential for preventing bread from sticking to baking sheets.
Serrated Knife or Lame: Used for scoring bread before baking to create beautiful patterns.
Clean Dish Towel: Covers loaves during final rise to prevent drying.
Measuring Cups and Spoons: Precise measurements are key for perfect bread.
Microwave or Measuring Cup: Helpful for heating water and milk to correct temperature.
Learn to Shape and Bake Italian Bread
Warm Milk Activation
Gently heat milk until it feels warm. This wakes up the yeast and starts the bread magic.
Yeast Preparation
Pour warm milk into a mixing bowl. Sprinkle yeast and let it get foamy and alive. This is where the bread begins to breathe.
Dough Creation
Mix hot water, olive oil, sugar, and salt together. Add flour gradually until a soft, sticky dough forms. Knead until the texture feels smooth and elastic.
First Rise
Place dough in an oiled bowl and let it rest. During this time, the dough will grow and develop delicious flavor. Cover and keep in a cozy spot.
Shaping Adventure
Gently stretch the dough onto a floured surface. Divide into two sections. Create long oval or round shapes by rolling and folding. Each loaf tells its own story.
Final Rise and Baking
Let loaves rest and expand. Slash diagonal lines across the top for beautiful design. Bake in a hot oven until golden brown and crusty. The bread will sing when tapped, signaling it’s perfectly done.
Cooling and Enjoyment
Allow bread to cool slightly. Slice and savor the warm, fragrant result of your baking journey.
Alternate Techniques for Italian Bread Success
Bread Baker’s Secret Weapons: Insider Tips
Yeast Activation Magic: Ensure your milk is precisely warm (110℉) to wake up yeast perfectly without killing it. Lukewarm liquid helps yeast bloom and create a fluffy texture.
Dough Consistency Trick: When mixing, watch for a soft, slightly sticky dough. Add flour gradually to prevent a dry, tough bread. The right moisture creates tender, pillowy Italian bread.
Proofing Power Spot: Choose a draft-free, warm area like a turned-off oven or microwave for rising. Consistent warmth helps dough rise evenly and develop rich flavor.
Shape Creativity Corner: Experiment with different bread shapes – traditional long oval, rustic round boule, or braided style. Each shape impacts crust crispness and interior texture.
Storage Wisdom: Wrap cooled bread in a clean kitchen towel or store in a paper bag to maintain crispness. Avoid plastic, which can make the crust soggy and soft.
Creative Serving Tips for Italian Bread
Rustic Sandwich Delight: Slice the warm Italian bread and create mouthwatering sandwiches filled with prosciutto, fresh mozzarella, and basil leaves for a classic Italian-inspired lunch.
Dip and Savor: Serve alongside olive oil and balsamic vinegar for a traditional appetizer experience, perfect for breaking bread with friends and family during gatherings.
Breakfast Bruschetta Bliss: Toast thin slices and top with fresh ricotta, honey, and chopped nuts for a delightful morning treat that transforms your homemade bread into a gourmet breakfast experience.
Soup’s Best Friend: Cut the bread into chunky cubes and use as croutons for hearty soups or tear pieces to soak up rich, flavorful broths, adding texture and warmth to your favorite comfort dishes.
Storing Italian Bread Without Drying It Out
Smart Storage Solutions
Wrap freshly cooled bread in clean kitchen towels to maintain softness and prevent quick drying. Keep at room temperature for optimal taste and texture during the first 2-3 days.
Quick Refrigeration Strategy
Store sliced Italian bread in airtight containers or sealed plastic bags inside the refrigerator. Consume within 5-7 days for best quality, ensuring minimal moisture and preventing staleness.
Freezing Master Plan
Slice bread before freezing for convenient portioning. Wrap individual portions in plastic wrap, then place inside freezer-safe bags. Frozen bread stays delicious up to 3 months when properly sealed.
Reviving Stale Bread Technique
Sprinkle slightly stale bread with water and warm in oven at 300℉ for 3-5 minutes. This method restores moisture and brings back near-fresh texture, making day-old bread taste almost freshly baked.
Dietary Planning, Public Health Nutrition, Nutritional Education, Content Development
Education
University of Illinois at Urbana-Champaign
Degree: Master of Science in Nutritional Sciences
Focus: Research on dietary patterns and their impact on chronic diseases.
Registered Dietitian Nutritionist (RDN)
Credential: Expertise in translating nutrition science into practical advice.
Emily Roberts is our content specialist and registered dietitian at HealthyChoices.org. With her Master’s degree in Nutritional Sciences from the University of Illinois and her Registered Dietitian Nutritionist certification, Emily uses her deep nutrition knowledge to write helpful, easy-to-understand guides about healthy eating.
Her warm, practical advice empowers readers to confidently make healthier choices, turning everyday meals into simple moments of wellness and joy.

Emily Roberts
Content Creator & Kitchen Tips Specialist
Expertise
Dietary Planning, Public Health Nutrition, Nutritional Education, Content Development
Education
University of Illinois at Urbana-Champaign
Registered Dietitian Nutritionist (RDN)
Emily Roberts is our content specialist and registered dietitian at HealthyChoices.org. With her Master’s degree in Nutritional Sciences from the University of Illinois and her Registered Dietitian Nutritionist certification, Emily uses her deep nutrition knowledge to write helpful, easy-to-understand guides about healthy eating.
Her warm, practical advice empowers readers to confidently make healthier choices, turning everyday meals into simple moments of wellness and joy.