
Sweet & Salty: The Irresistible Salted Caramel Chocolate Pillows Recipe
Salted caramel chocolate pillows represent pure indulgence for sweet-craving souls seeking decadent dessert experiences.
These delightful treats blend contrasting flavor profiles that dance across your palate with remarkable complexity.
Silky chocolate and rich caramel create an irresistible combination that reinvents ordinary moments into extraordinary culinary adventures.
Delicate layers melt seamlessly, offering a harmonious balance between sweet and salty sensations that captivate discerning taste buds.
Intricate textures play between crisp exterior and luxurious inner filling, promising a sensory journey unlike any traditional confection.
Luxurious ingredients elevate this dessert from simple snack to gourmet experience, inviting passionate food lovers to embrace culinary creativity.
Crafting these pillows requires precision, passion, and a willingness to experiment with flavor dynamics.
Salted Caramel Chocolate Pillows Filled with Soft, Sweet Contrast
Ingredients to Craft Salted Caramel Chocolate Pillows
Pastry Base:Filling and Flavor Enhancers:Binding and Finishing:Baking Salted Caramel Chocolate Pillows from Start to Finish
Step 1: Warm Up The Oven
Preheat the oven to 350°F. Line a baking sheet with parchment paper or lightly spray with non-stick cooking spray.
Step 2: Prepare The Dough
Sprinkle a clean surface with flour. Gently roll out the thawed pie crust until smooth.
Step 3: Create Dough Circles
Use a knife, biscuit cutter, or drinking glass to cut 2 1/2-inch circles from the dough.
Step 4: Add Chocolate Centers
Place a Hershey Kiss in the middle of each dough circle.
Step 5: Fold And Seal
Carefully fold one side of the dough over the chocolate, then fold the other side to create a crisscross shape. Pinch the edges firmly to seal the chocolate inside.
Step 6: Reuse Dough Scraps
Gather the remaining dough and re-roll to create additional pillows.
Step 7: Prepare For Baking
Brush each pillow with egg wash and sprinkle with:Step 8: Bake To Golden Perfection
Bake for 15-20 minutes until the pillows turn a beautiful golden brown color.
Step 9: Cool And Rest
Remove from the oven and let the pillows cool for 5 minutes on the baking sheet.
Step 10: Transfer And Garnish
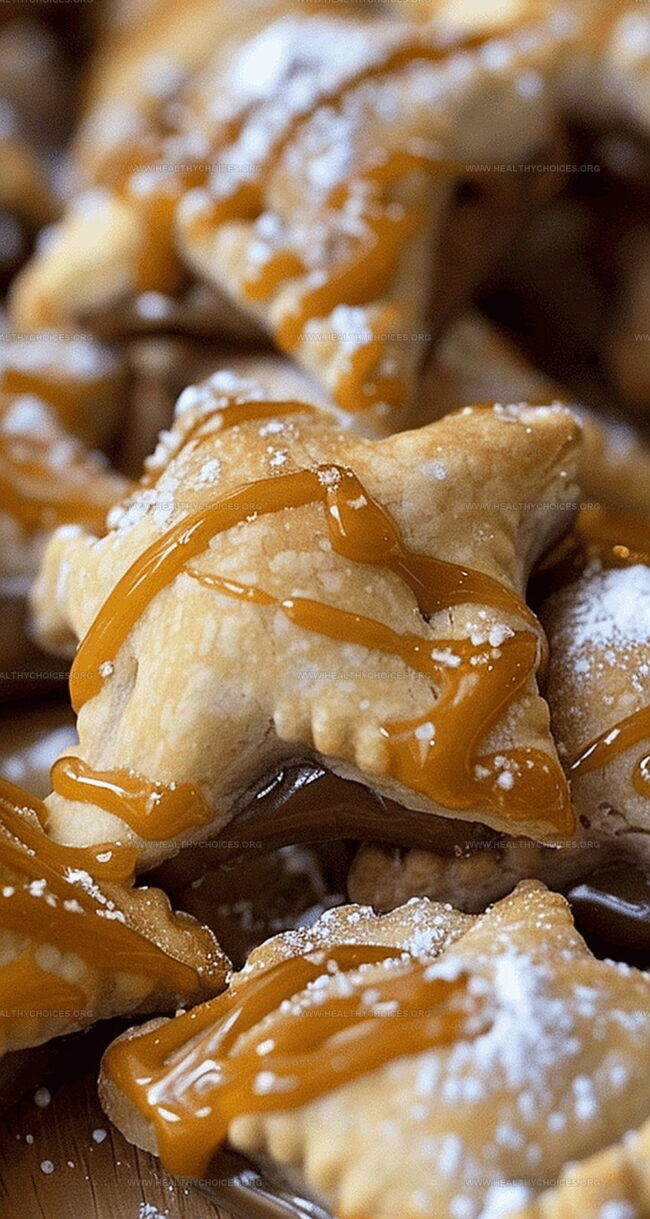
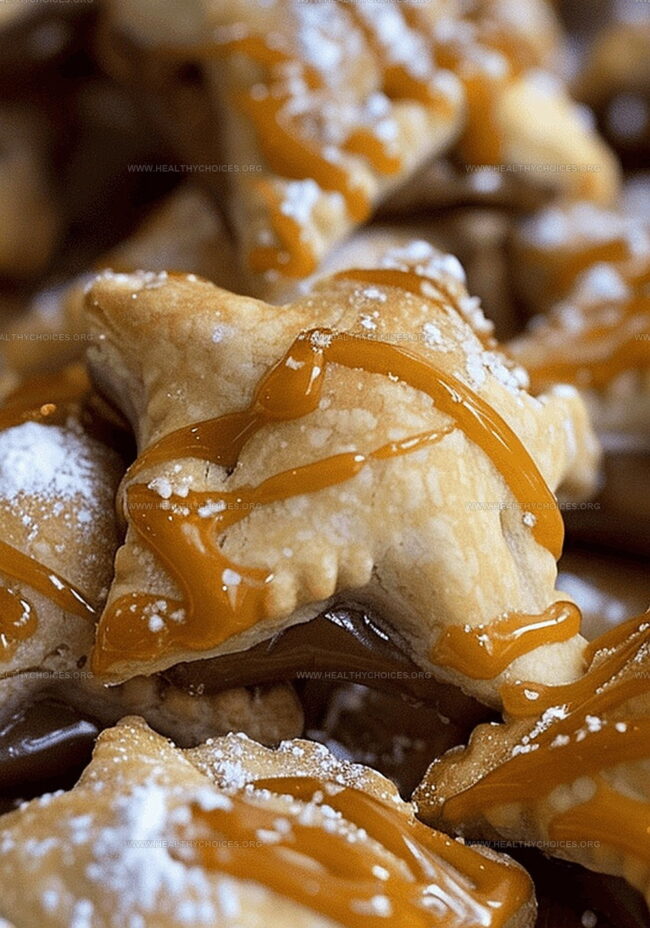
Move pillows to a cooling rack. Drizzle with caramel topping and sprinkle with extra sea salt.
Step 11: Serve And Enjoy
Present these delightful chocolate pillows to your eager guests and savor the moment!
Tips to Keep the Center Gooey and the Outside Delicate
Proper Storage and Reheating for Salted Caramel Chocolate Treats
Drinks and Extras to Enjoy with Chocolate Caramel Pillows
Flavor Spins to Try on Salted Caramel Chocolate Pillows
Print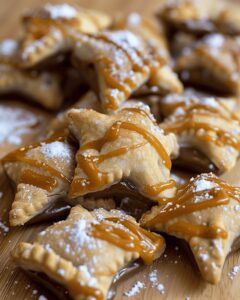
Salted Caramel Chocolate Pillows Recipe
- Total Time: 35 minutes
- Yield: 12 1x
Description
Salted caramel chocolate pillows deliver a luxurious dessert experience that blends rich chocolate with silky caramel. Gooey centers and crisp edges create a perfect balance, inviting you to savor each indulgent bite.
Ingredients
Main Ingredients:
- 1 refrigerated pie crust, thawed
- 14 Hershey Kisses (any flavor)
Binding and Wash Ingredients:
- 1 egg white
- 1 tablespoon water
Toppings and Finishing Ingredients:
- 1 small jar Mrs. Richardson’s Caramel Topping
- Mediterranean sea salt
- 1 cup chocolate chips, melted
- ½ cup nuts, finely chopped
- Powdered sugar for dusting
- Granulated sugar for sprinkling
Instructions
- Warm the oven to a cozy 350°F (175°C), creating the perfect environment for baking these delectable morsels.
- Create a non-stick surface by lining a baking sheet with parchment paper or lightly coating with cooking spray.
- Gently unfurl the thawed pie crust onto a lightly dusted work surface, preparing for delicate shaping.
- Craft circular dough pieces measuring 2 1/2 inches using a sharp knife, precisely shaped biscuit cutter, or a clean drinking glass.
- Position a single Hershey Kiss precisely in the center of each dough circle, setting the stage for a sweet surprise.
- Elegantly fold one side of the dough over the chocolate kiss, then gracefully layer the opposite side, creating an artistic crisscross pattern.
- Meticulously seal the edges by pressing firmly, ensuring the chocolate remains securely nestled within its delicate pastry cocoon.
- Collect and re-roll any remaining dough scraps, transforming every bit into additional pillowy delights.
- Gently coat each pillow with a silky egg wash, then dust with either sparkling granulated sugar or a delicate sprinkle of Mediterranean Sea Salt.
- Slide the baking sheet into the preheated oven, allowing the pillows to transform into golden-brown treasures over 15-20 minutes.
- Carefully extract the baked treats, permitting them a brief 5-minute rest before transferring to a cooling rack.
- Finish with an artistic drizzle of Mrs. Richardson’s Caramel Topping and a final whisper of Mediterranean Sea Salt.
- Present these luxurious morsels and savor the moment of culinary creation.
Notes
- Store these delightful pillows in an airtight container at room temperature for up to 3 days to maintain their crispy texture and rich flavor.
- Select high-quality Hershey Kisses for the best melting experience and chocolate intensity inside each pillow.
- Ensure pie crust is completely thawed but still cold for easier handling and cleaner cutting of dough circles.
- Experiment with different chocolate varieties like dark, milk, or caramel-filled Kisses to create unique flavor combinations.
- Use a fork to create decorative edges when sealing the dough, which helps prevent the filling from leaking during baking.
- Mediterranean Sea Salt adds a sophisticated gourmet touch, balancing the sweetness of caramel and chocolate perfectly.
- Prep Time: 15 minutes
- Cook Time: 20 minutes
- Category: Desserts, Snacks
- Method: Baking
- Cuisine: American
Nutrition
- Serving Size: 12
- Calories: 210
- Sugar: 12g
- Sodium: 150mg
- Fat: 10g
- Saturated Fat: 4g
- Unsaturated Fat: 5g
- Trans Fat: 0g
- Carbohydrates: 29g
- Fiber: 1g
- Protein: 2g
- Cholesterol: 0mg
David Bennett
Founder & Head Recipe Developer
Expertise
Culinary Nutrition, Recipe Development, Nutritional Counseling, Food Science
Education
Johnson & Wales University
Certified Nutrition Specialist® (CNS®)
David Bennett is the lead recipe creator and nutrition expert at HealthyChoices.org, your friendly space for tasty meals that nourish body and mind.
With a Culinary Nutrition degree from Johnson & Wales University and a Certified Nutrition Specialist® credential, David pairs practical nutrition with delicious cooking, creating recipes you’ll crave daily.
At Healthy Choices, David shares easy, nutritious dishes and smart cooking tips to make healthy eating something everyone can enjoy, with no complicated diets needed.