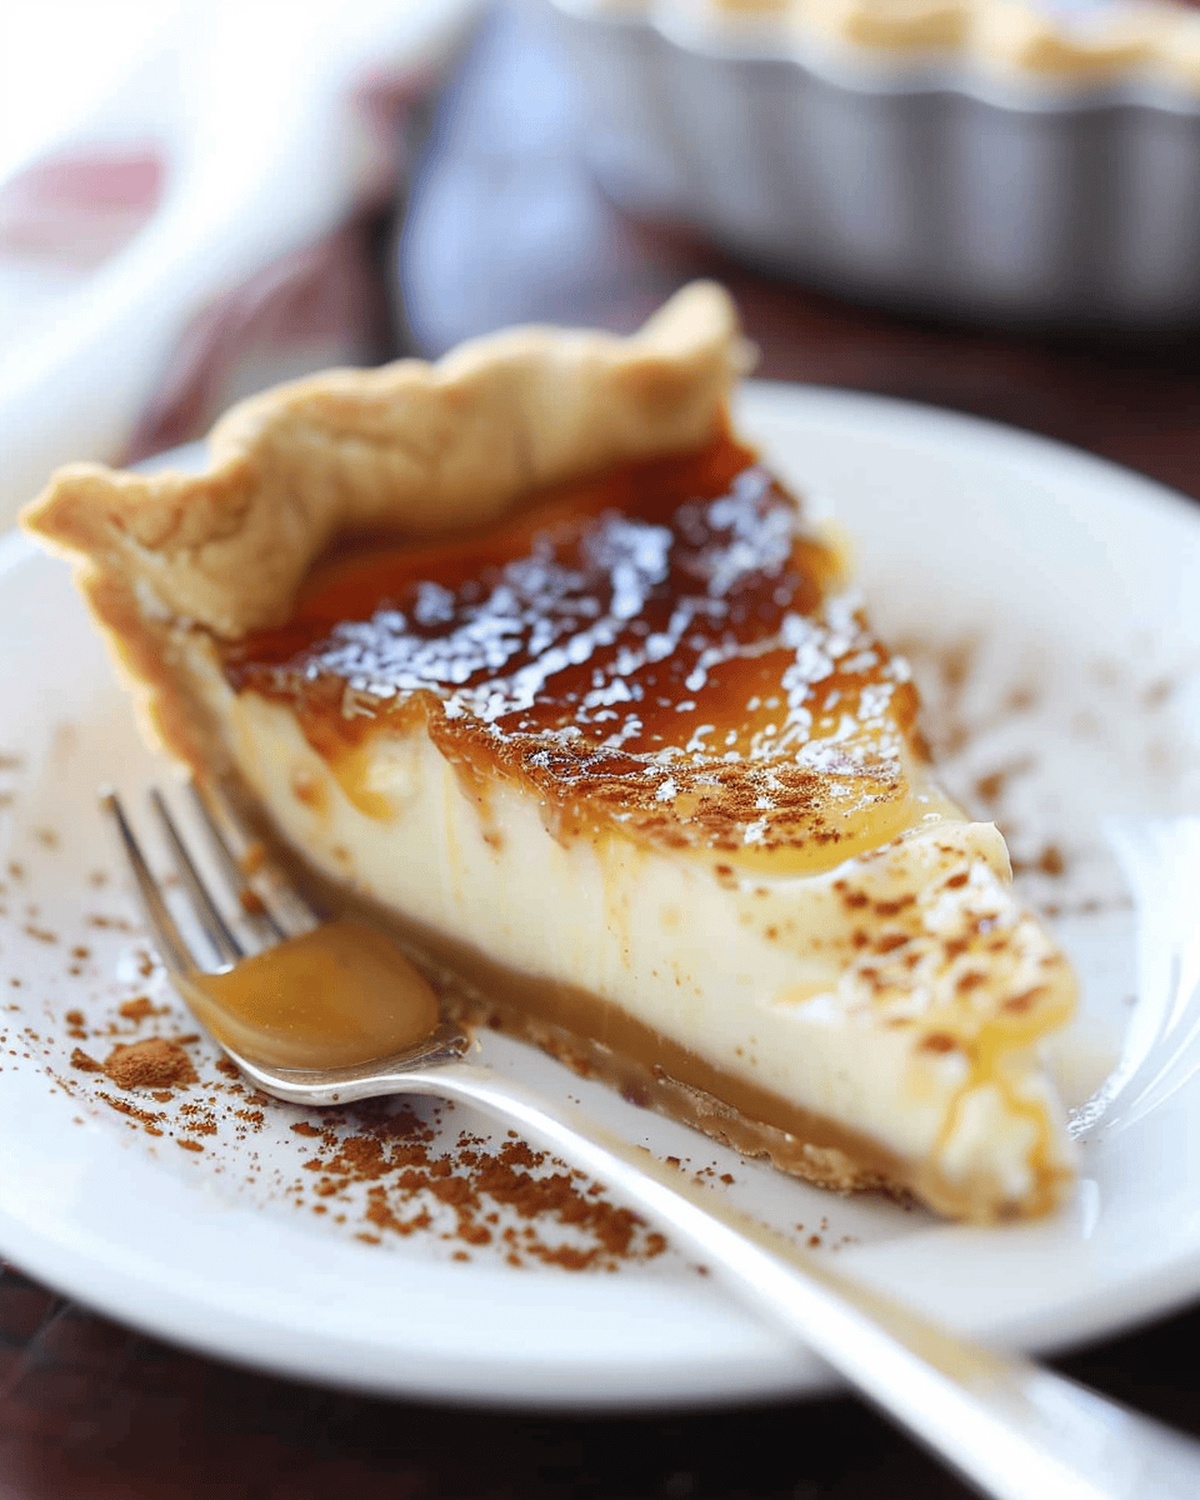
Heavenly Caramel Crème Brûlée Pie Recipe for Sweet Dreams
Sweet, silky, and utterly decadent, this caramel crème brûlée pie redefines dessert elegance with its luxurious layers of creamy goodness.
Rich custard nestles between a buttery graham cracker crust, creating a dessert that whispers sophistication.
Each spoonful promises a dance of smooth caramel and delicate brûlée notes that melt effortlessly on your tongue.
The golden caramel top shatters with a gentle tap, revealing a velvety interior that speaks of culinary craft.
Delicate yet indulgent, this pie turns an ordinary evening into a gourmet experience.
Sophisticated bakers and dessert lovers will find pure magic in every single bite.
Get ready to become the star of any gathering with this show-stopping pie that’s impossible to resist.
Quick Recipe Overview
Gather These for Caramel Crème Brûlée Pie
For The Crust Base:For The Custard Core:For The Caramelized Topping:Tools to Bake a Caramel Crème Brûlée Pie
Instructions to Make Caramel Crème Brûlée Pie
Spread a smooth layer of caramel across the golden baked pie shell, creating a luscious base for the creamy creation.
Combine cream and cornstarch in a heavy pan, whisking until completely smooth, then blend in sweet milk and luxurious egg yolks over gentle heat.
Stir the mixture constantly as it thickens, watching for bubbles and a rich, velvety texture. Remove from heat and fold in butter and vanilla for an extra layer of decadence.
Pour the dreamy custard into the caramel-lined crust, creating a perfectly smooth surface. Refrigerate overnight to let flavors meld and texture set.
Just before serving, sprinkle a delicate layer of sugar across the top. Use a kitchen torch to create a crackling golden crust, transforming the pie into a show-stopping dessert. For an elegant touch, torch individual slices to give each guest a moment of culinary drama.
Flavor Variations for Caramel Crème Brûlée Pie
Presenting Caramel Crème Brûlée Pie Beautifully
Storage Tips for Caramel Crème Brûlée Pie
Print
Silky Caramel Crème Brûlée Pie
- Total Time: 8+ hours
- Yield: 9 1x
Description
Rich caramel crème brûlée pie delivers classic French dessert elegance in pie form. Crisp pastry shell cradles silky custard with caramelized sugar crust, inviting sweet exploration with each delectable slice.
Ingredients
- 3 egg yolks
- 1 ⅔ cups (400 ml) heavy cream
- 14 oz (397 g) sweetened condensed milk
- 1 cup (240 ml) dulce de leche
- 1 9-inch pie crust (baked and cooled)
- 3 tbsps unsalted butter
- 1 tbsp vanilla extract
- 3 tbsps cornstarch
- ⅓ cup (67 g) granulated sugar
Instructions
- Prep Foundation: Layer dulce de leche smoothly across the pre-baked pie shell, establishing a creamy base.
- Create Custard Base: Whisk cornstarch into heavy cream in a saucepan, integrating egg yolks and sweetened condensed milk until uniformly blended.
- Cook Custard: Heat mixture over medium temperature, stirring continuously to prevent scorching and achieve a dense, velvety consistency that bubbles gently.
- Enhance Flavor: Remove from heat and incorporate butter and vanilla extract, stirring until completely melded and smooth.
- Fill and Chill: Pour custard into prepared pie crust, spreading evenly with a spatula, then refrigerate overnight to solidify and develop rich flavors.
- Caramelize Topping: Before serving, cover crust edges with foil, dust surface with granulated sugar, and use a kitchen torch or broiler to create a golden, crackling glaze.
- Serve with Flair: Slice and individually torch each serving for a dramatic, personalized dessert presentation that highlights the caramelized sugar crust.
Notes
- Prevent Lumps: Whisk cornstarch into cream thoroughly and gradually to ensure a smooth, lump-free custard base.
- Monitor Heat Carefully: Stir continuously over medium heat to avoid scorching and achieve a perfect, velvety custard texture.
- Chill Completely: Refrigerate overnight to allow custard to set properly and develop deep, rich flavor profiles.
- Torch with Precision: Use a kitchen torch or broiler at close range, moving constantly to create an even, golden caramel crust without burning.
- Prep Time: 15 minutes
- Cook Time: 10 minutes
- Category: Desserts
- Method: Simmering
- Cuisine: French
Nutrition
- Serving Size: 9
- Calories: 420
- Sugar: 36 g
- Sodium: 150 mg
- Fat: 28 g
- Saturated Fat: 17 g
- Unsaturated Fat: 9 g
- Trans Fat: 0 g
- Carbohydrates: 42 g
- Fiber: 1 g
- Protein: 6 g
- Cholesterol: 150 mg
Emily Roberts
Content Creator & Kitchen Tips Specialist
Expertise
Dietary Planning, Public Health Nutrition, Nutritional Education, Content Development
Education
University of Illinois at Urbana-Champaign
Registered Dietitian Nutritionist (RDN)
Emily Roberts is our content specialist and registered dietitian at HealthyChoices.org. With her Master’s degree in Nutritional Sciences from the University of Illinois and her Registered Dietitian Nutritionist certification, Emily uses her deep nutrition knowledge to write helpful, easy-to-understand guides about healthy eating.
Her warm, practical advice empowers readers to confidently make healthier choices, turning everyday meals into simple moments of wellness and joy.