Magical Pumpkin Gooey Bars Recipe for Sweet Fall Moments
Sweet autumn days call for delectable pumpkin gooey bars that melt in your mouth with rich, creamy goodness.
These decadent treats blend classic fall flavors into an irresistible dessert that screams comfort.
Layers of buttery graham cracker crust merge seamlessly with a silky pumpkin filling that promises pure indulgence.
Warm spices like cinnamon and nutmeg dance through each bite, creating a sensational experience.
The gooey texture makes these bars stand out from traditional pumpkin desserts, offering a luxurious twist on a seasonal favorite.
Simple ingredients and easy preparation mean you can whip up this crowd-pleasing recipe in no time.
Dive into a slice of autumn bliss that will have everyone asking for seconds.
Quick Recipe Overview

Ingredients for Pumpkin Gooey Bars
For Base Layer:For Pumpkin Creamy Layer:For Finishing Touches:Gear Needed for Pumpkin Gooey Bars
How to Bake Pumpkin Gooey Bars

Grab your baking equipment and line a square pan with parchment paper. Warm up your oven to create the perfect baking environment.
Mix flour with warming spices and create a soft, buttery foundation. Gently press the delicate batter into every corner of the pan, ensuring a smooth surface.
Whip cream cheese into a silky smooth mixture. Fold in rich pumpkin and aromatic spices, creating a luscious layer that will melt in your mouth.
Carefully pour the pumpkin mixture over the spice cake base. Slide the pan into the oven and let the magic happen, watching the edges set while the center remains slightly soft.
Allow the bars to cool slowly, first at room temperature, then in the refrigerator. This waiting game ensures the perfect texture and flavor development.
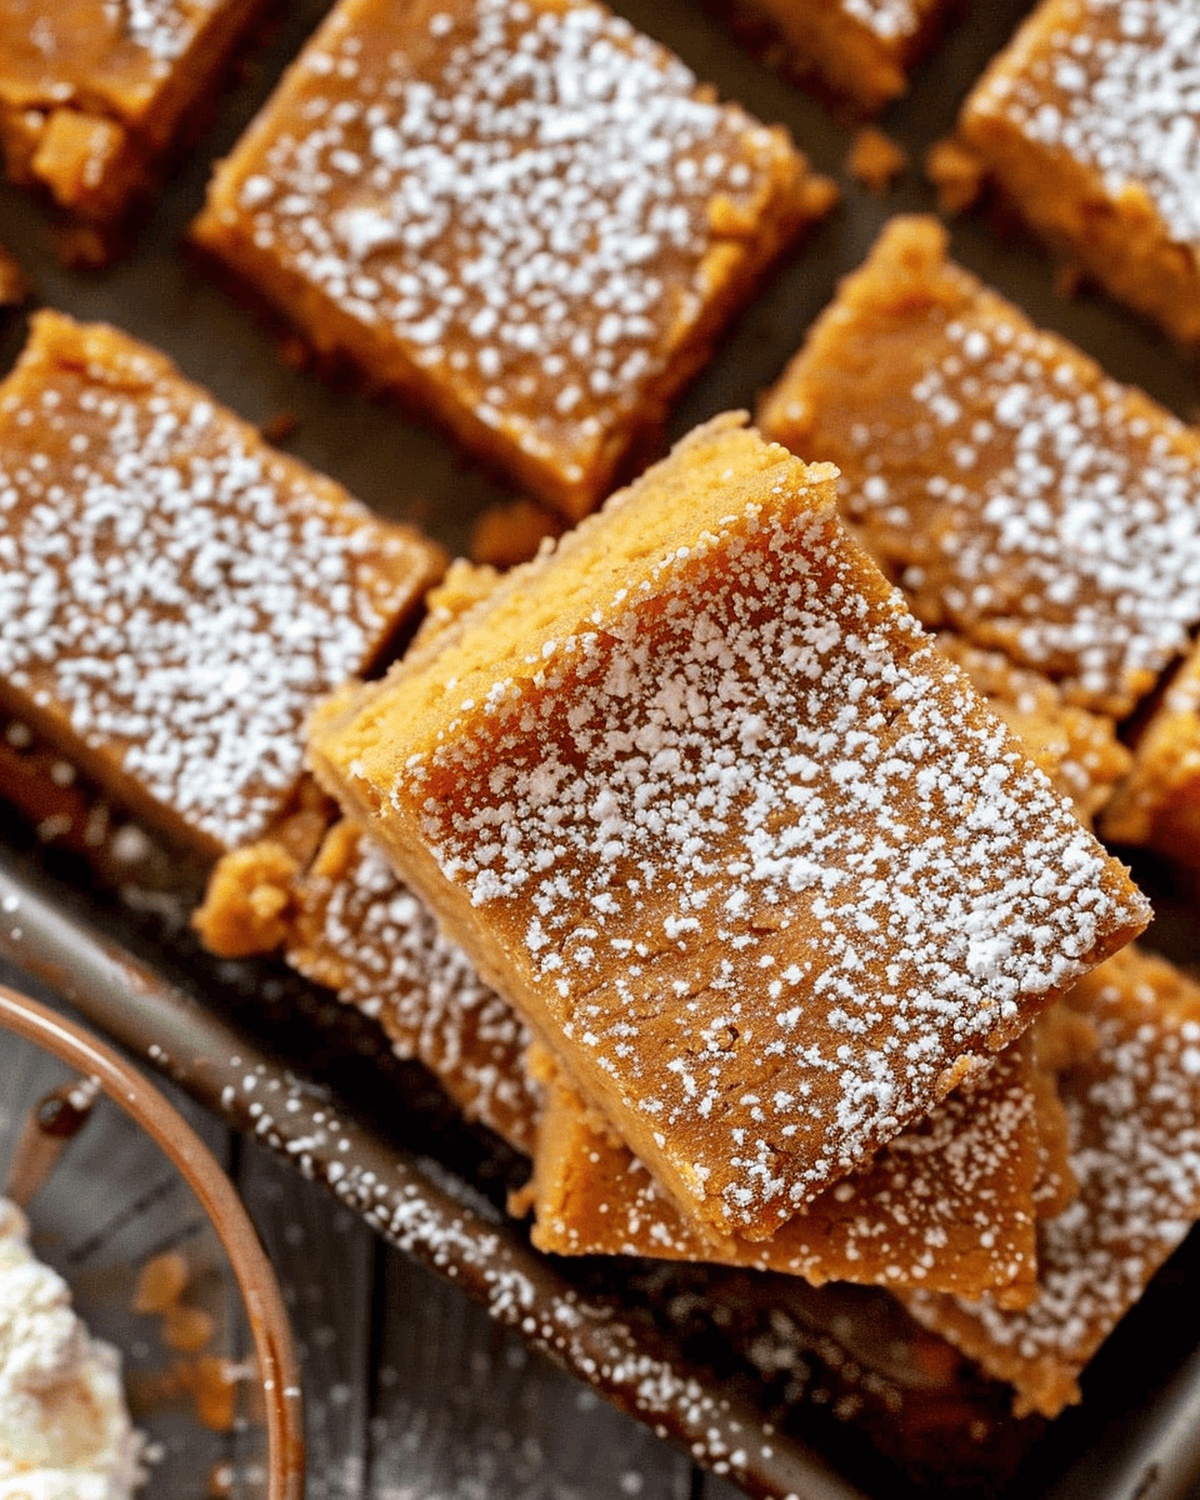
Slice the bars with a clean knife, creating picture-perfect squares. A light dusting of powdered sugar adds a final touch of sweetness and elegance.
Expert Tips for Pumpkin Gooey Bars
Serving Pumpkin Gooey Bars Warm or Chilled
Store Pumpkin Gooey Bars for Later
Print
Sinful Pumpkin Gooey Bars
- Total Time: 5 hours
- Yield: 13 1x
Description
Scrumptious pumpkin gooey bars deliver classic autumn comfort with layered graham cracker crust and silky cream cheese filling. Rich spices and sweet pumpkin create irresistible dessert bars you cannot stop eating.
Ingredients
- 1½ cups (160g) all-purpose flour
- ¾ cup (150g) granulated sugar
- ½ cup (113g) unsalted butter, melted
- 6 oz full-fat cream cheese, room temperature
- ½ cup (114g) pure pumpkin puree
- 1½ cups (180g) powdered sugar
- 1¼ tsps baking powder
- 1 tsp ground cinnamon
- 1 tsp pumpkin pie spice
- ½ tsp kosher salt
- 1 large egg
- 1 large egg yolk
- 1 tsp vanilla paste or extract
Instructions
- Preparation: Line an 8×8-inch pan with parchment paper and preheat oven to 350°F (180°C).
- Cake Base: Blend sugar, egg yolk, and melted butter until smooth. Incorporate flour mixture, folding gently to create a uniform batter. Press evenly into prepared pan, ensuring complete coverage.
- Pumpkin Cream Layer: Whip cream cheese and powdered sugar using an electric mixer. Gradually add egg, pumpkin puree, vanilla, and pumpkin pie spice. Mix until achieving a silky, homogeneous texture.
- Assembly and Baking: Pour pumpkin mixture over cake base, spreading evenly with a spatula. Bake in oven center for 25-30 minutes, watching for set edges and slight central wobble.
- Cooling and Setting: Remove from oven and cool on wire rack for one hour. Refrigerate uncovered for 3-4 hours to ensure complete setting.
- Finishing: Slice into precise squares with a clean knife, wiping blade between cuts. Optionally dust with powdered sugar before serving for an elegant presentation.
Notes
- Prep Like a Pro: Line your baking pan meticulously with parchment paper, ensuring complete coverage for effortless removal and clean slicing.
- Temperature Matters: Keep oven precisely at 350°F to guarantee even baking and prevent over-browning of delicate layers.
- Texture Tip: Mix cake batter gently to avoid tough texture; fold ingredients until just combined for a tender, light base.
- Chilling is Crucial: Refrigerate bars for minimum 3-4 hours to allow complete setting and develop rich, decadent flavor profile.
- Prep Time: 20 minutes
- Cook Time: 30 minutes
- Category: Desserts, Snacks
- Method: Baking
- Cuisine: American
Nutrition
- Serving Size: 13
- Calories: 250
- Sugar: 23g
- Sodium: 140mg
- Fat: 12g
- Saturated Fat: 7g
- Unsaturated Fat: 4g
- Trans Fat: 0g
- Carbohydrates: 34g
- Fiber: 1g
- Protein: 3g
- Cholesterol: 45mg
Emily Roberts
Content Creator & Kitchen Tips Specialist
Expertise
Dietary Planning, Public Health Nutrition, Nutritional Education, Content Development
Education
University of Illinois at Urbana-Champaign
Registered Dietitian Nutritionist (RDN)
Emily Roberts is our content specialist and registered dietitian at HealthyChoices.org. With her Master’s degree in Nutritional Sciences from the University of Illinois and her Registered Dietitian Nutritionist certification, Emily uses her deep nutrition knowledge to write helpful, easy-to-understand guides about healthy eating.
Her warm, practical advice empowers readers to confidently make healthier choices, turning everyday meals into simple moments of wellness and joy.