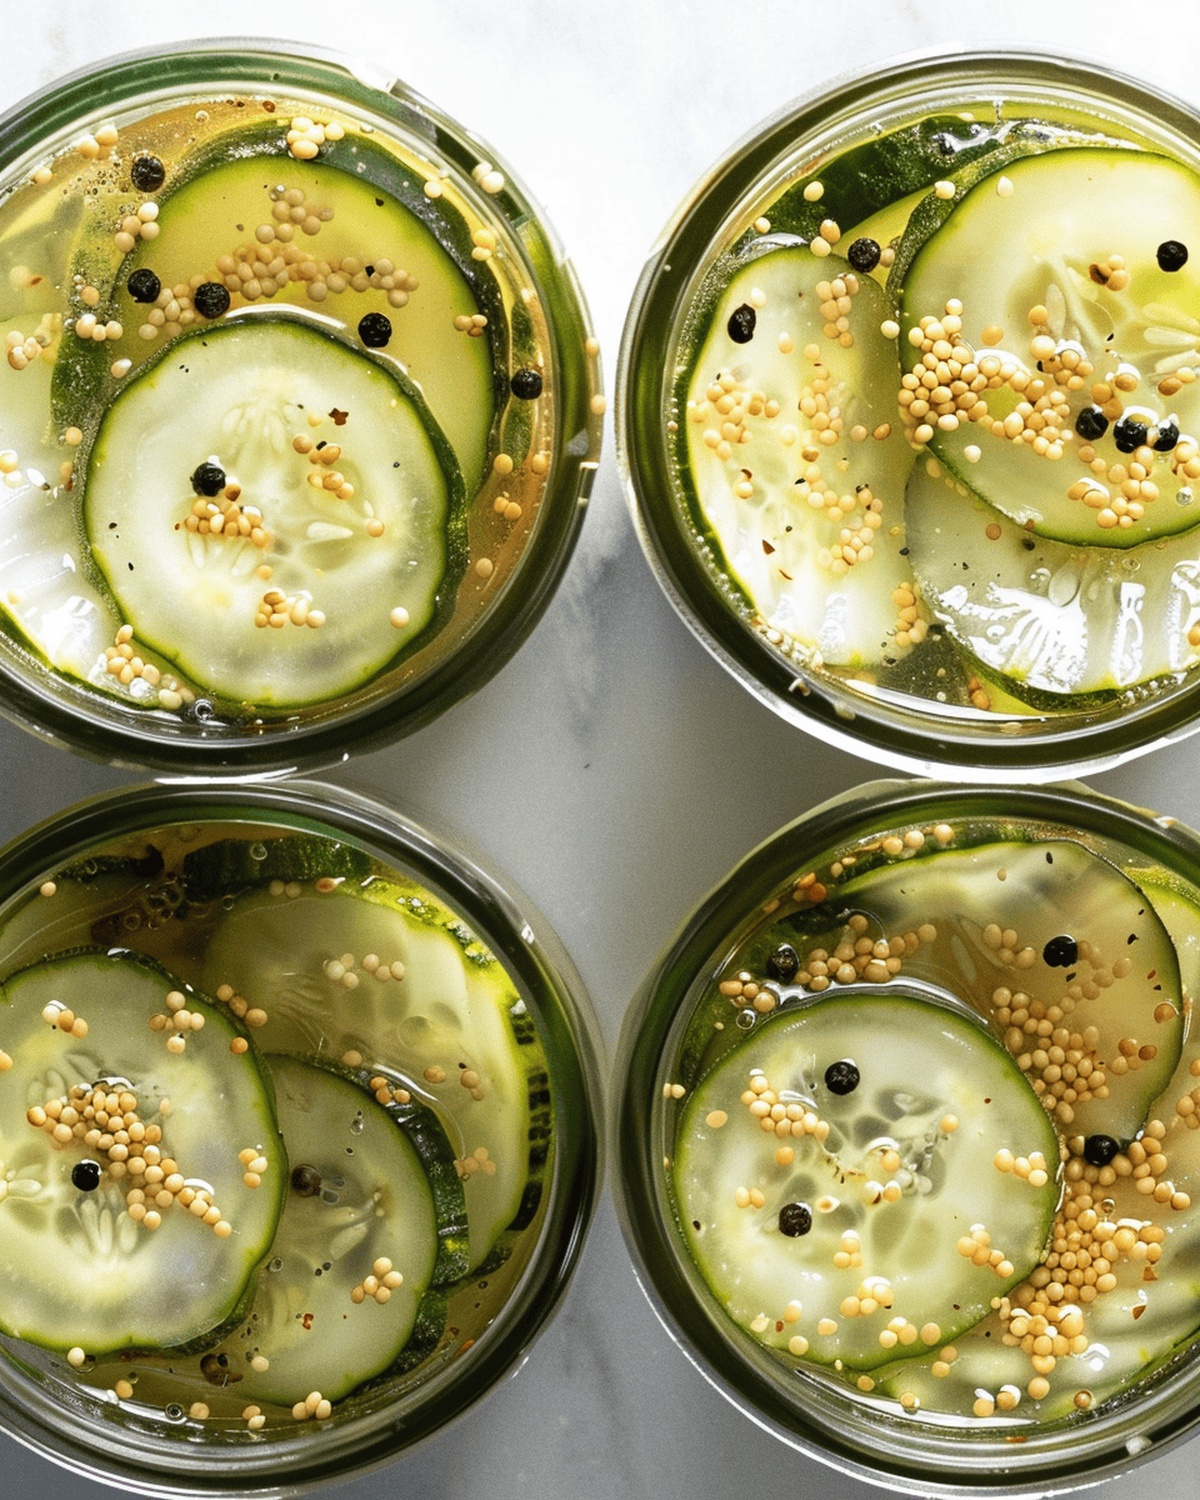
Crisp summer gardens burst with cucumbers, and these tangy bread & butter refrigerator pickles bring seasonal abundance to life.
Vibrant slices swimming in a zesty brine capture the essence of homemade goodness.
Sweet and sour notes dance across your palate with each crunchy bite.
No complicated canning process stands between you and these quick pickles.
Salt, vinegar, and simple spices work culinary magic in just minutes.
The refrigerator becomes your pickling playground, churning out jar after jar of delectable cucumber treats.
These pickles promise to become your new favorite condiment, adding bright flavor to sandwiches, burgers, and charcuterie boards.
Quick Recipe Overview
Prep Time: 30 minutes
Cook Time: 10 minutes
Total Time: 24-48 hours
Calories: 54 kcal
Servings: 9
Ingredients for Bread & Butter Refrigerator Pickles
For Vegetables:
Kirby Cucumbers: Select firm, fresh cucumbers with bumpy skin for the perfect crisp texture and traditional pickle crunch.
Onion: Adds a sweet, sharp flavor that complements the pickle’s tangy profile and provides extra depth to the brine.
For Pickling Liquid:
White Vinegar, Cider Vinegar: Sharp, acidic base that preserves and gives pickles their signature zesty punch.
Filtered Water: Helps balance the vinegar’s intensity and ensures a smooth, balanced brine.
Granulated Sugar: Balances the vinegar’s acidity, creating a classic bread and butter pickle sweetness.
Fine Sea Salt: Essential for drawing out moisture and creating the perfect pickle preservation.
For Spices and Seasonings:
Yellow Mustard Seeds, Black Peppercorns: Add warm, spicy undertones and create complexity in the pickle’s flavor profile.
Celery Seed: Introduces a subtle, herbaceous note that enhances the overall pickle experience.
Tools to Make Quick Refrigerator Pickles
Large Pot or Saucepan: Essential for creating the pickling brine and dissolving sugar and salt.
Cutting Board: Perfect for slicing cucumbers and onions with precision.
Sharp Knife: Crucial for cutting cucumbers into spears or thin slices.
Glass Jars with Lids: Key for storing and marinating your pickles.
Measuring Cups and Spoons: Helpful for accurately measuring ingredients.
Tongs or Spoon: Great for packing cucumbers and onions into jars.
Instructions for Sweet Pickles at Home
Pickle Paradise
Jar Prep Clean and sterilize glass containers to ensure a safe pickling environment.
Cucumber Magic Slice cucumbers into delightful spears or thin rounds, letting your creativity guide the way.
Flavor Layer Start building your pickle masterpiece by nestling cucumber pieces and onion slices into the jars, creating a colorful pickle landscape.
Spice Shower Sprinkle a magical blend of peppercorns, mustard seeds, and celery seed over your veggie layers, infusing them with zesty personality.
Brine Alchemy Craft a tangy liquid by simmering vinegar, water, salt, and sugar until they dance together in perfect harmony.
Liquid Love Pour the warm vinegar mixture over your cucumber creation, making sure every piece gets a flavorful bath.
Chill and Wait Seal the jars and tuck them into the refrigerator, allowing the pickles to develop their incredible taste over 24-48 hours.
Pickle Celebration Your homemade pickles are ready to delight taste buds and add a crisp, tangy punch to any meal.
Pickling Tips & Add-In Options
Cool Cucumber Cuts: Slice cucumbers uniformly for consistent pickling and a professional look. Experiment with different thicknesses like crinkle-cut or thin rounds for varied textures.
Spice Symphony: Enhance the pickle flavor by adding fresh dill sprigs, garlic cloves, or red pepper flakes for a personalized kick. Play with spice combinations to create your signature pickle profile.
Crisp Crunch Secret: Use fresh, firm cucumbers from local farmers markets or your garden for the best texture. Avoid soft or overripe cucumbers that can turn mushy during pickling.
Flavor Infusion Trick: Let pickles rest in the refrigerator for at least 48 hours to allow spices and brine to fully penetrate the cucumbers. The longer they sit, the more intense and complex the flavor becomes.
Quick Preservation Hack: Store pickles in clean, airtight glass jars to maintain freshness. These refrigerator pickles will stay crisp and delicious for up to two weeks, making them a perfect homemade snack or condiment.
Serving Sweet Pickles with Meals
Pickle Party Platter: Create a stunning appetizer board with your homemade pickles, surrounding them with creamy cheeses, crusty bread, and charcuterie meats for a delightful flavor explosion.
Sandwich Superstar: Slice these tangy pickles and layer them into classic sandwiches like turkey clubs, burgers, or grilled cheese to add a zesty crunch and bright acidity.
Salad Sensation: Chop the pickles into small pieces and sprinkle over green salads or potato salads for an unexpected burst of flavor and texture that will wake up any ordinary dish.
Snack Time Winner: Enjoy these pickles straight from the jar as a quick, low-calorie snack that provides a satisfying crunch and tangy kick perfect for afternoon munchies.
Storing Homemade Refrigerator Pickles
Quick Chilling Method: Refrigerate jars immediately after filling to kickstart the flavor infusion process. Cold temperatures help ingredients meld together faster, creating a more robust taste profile.
Flavor Intensification Technique: Let pickles rest for 48 hours before initial tasting. This waiting period allows spices and vinegar to deeply penetrate cucumber slices, resulting in a more complex and satisfying pickle experience.
Smart Storage Strategy: Keep pickles in tightly sealed glass containers at the back of your refrigerator. Consistent cool temperatures help maintain crunchiness and prevent potential bacterial growth while extending shelf life.
Leftover Magic: Use remaining pickle liquid as a tangy marinade for salads, coleslaw, or as a zesty splash in potato salad. Repurposing the brine maximizes your recipe’s potential and reduces kitchen waste.
Homemade bread & butter refrigerator pickles deliver a tangy, sweet crunch that elevates summer sandwiches and snacks. Quick cucumber preservation without complex canning techniques lets home cooks enjoy crisp, zesty pickles you can savor within days.
Ingredients
Scale
1 pound (452 g) kirby or other pickling cucumbers
0.5 large onion, thinly sliced
0.75 cup (150 g) granulated sugar
1 cup (240 g) white vinegar
0.5 cup (119.5 g) cider vinegar
0.5 cup (120 g) filtered water
2 tablespoons (36 g) fine sea salt or pickling salt
1 tablespoon (11 g) whole yellow mustard seeds
1 tablespoon (10 g) whole black peppercorns
1 teaspoon celery seed
Instructions
Sanitization: Thoroughly cleanse glass jars with boiling water to eliminate bacterial risks, creating a sterile environment for pickle preparation.
Cucumber Preparation: Slice cucumbers into uniform spears or rounds with precision, maintaining consistent thickness for optimal texture and pickling.
Layering Foundation: Arrange cucumber segments and delicate onion slices within sanitized jars, creating a strategic flavor-building base for the pickling process.
Spice Integration: Distribute peppercorns, mustard seeds, and celery seed evenly throughout the vegetable layers, ensuring balanced aromatic infusion.
Brine Creation: Combine vinegar, water, salt, and sugar in a saucepan, heating gently until all ingredients dissolve into a smooth, transparent liquid that will preserve and flavor the pickles.
Pickling Immersion: Pour the hot brine over the prepared vegetables, completely covering them and minimizing air pockets to facilitate thorough flavor absorption and preservation.
Preservation Process: Seal jars tightly and refrigerate, allowing the pickles to develop their signature tangy profile over 24-48 hours, during which the ingredients will meld and intensify their flavor characteristics.
Notes
Sterilize Smartly: Wash glass jars with boiling water to prevent bacterial growth and ensure pickle safety.
Cut with Precision: Slice cucumbers into uniform spears or rounds for consistent texture and aesthetic appeal.
Layer Strategically: Arrange cucumber segments and onion slices carefully to maximize flavor distribution and visual attractiveness.
Spice Generously: Sprinkle peppercorns, mustard seeds, and celery seed evenly to create a robust, aromatic pickle experience.
Dietary Planning, Public Health Nutrition, Nutritional Education, Content Development
Education
University of Illinois at Urbana-Champaign
Degree: Master of Science in Nutritional Sciences
Focus: Research on dietary patterns and their impact on chronic diseases.
Registered Dietitian Nutritionist (RDN)
Credential: Expertise in translating nutrition science into practical advice.
Emily Roberts is our content specialist and registered dietitian at HealthyChoices.org. With her Master’s degree in Nutritional Sciences from the University of Illinois and her Registered Dietitian Nutritionist certification, Emily uses her deep nutrition knowledge to write helpful, easy-to-understand guides about healthy eating.
Her warm, practical advice empowers readers to confidently make healthier choices, turning everyday meals into simple moments of wellness and joy.

Emily Roberts
Content Creator & Kitchen Tips Specialist
Expertise
Dietary Planning, Public Health Nutrition, Nutritional Education, Content Development
Education
University of Illinois at Urbana-Champaign
Registered Dietitian Nutritionist (RDN)
Emily Roberts is our content specialist and registered dietitian at HealthyChoices.org. With her Master’s degree in Nutritional Sciences from the University of Illinois and her Registered Dietitian Nutritionist certification, Emily uses her deep nutrition knowledge to write helpful, easy-to-understand guides about healthy eating.
Her warm, practical advice empowers readers to confidently make healthier choices, turning everyday meals into simple moments of wellness and joy.