
Dreamy Vegan Protein Chocolate Mousse Recipe
Vegan protein chocolate mousse reimagines humble ingredients into a decadent dessert that defies traditional expectations.
Creamy and indulgent, this plant-based treat breaks through dietary limitations with surprising elegance.
Nutritional powerhouses blend seamlessly to create a silky smooth experience that tantalizes taste buds.
Rich chocolate notes dance with subtle protein undertones, offering a guilt-free indulgence for health-conscious sweet lovers.
Sophisticated yet approachable, this recipe demonstrates how dietary choices can be both delicious and nourishing.
Delicate textures and complex flavors merge in a dessert that challenges conventional thinking about healthy eating.
Nutrient-dense ingredients come together in a magical culinary alchemy that will revolutionize your dessert perspective.
What Makes Vegan Protein Chocolate Mousse Feel Fancy
Protein-Packed Ingredients in Vegan Chocolate Mousse
Main Ingredients:
Dark Chocolate: High-quality dark chocolate provides rich flavor and creamy texture, with higher cocoa percentage for deeper taste.
White Beans: Protein-packed beans create smooth base and add nutritional value without affecting chocolate flavor.
Aquafaba: Magical liquid from canned beans that acts as egg white substitute, creating light and airy texture.
Topping Ingredients:
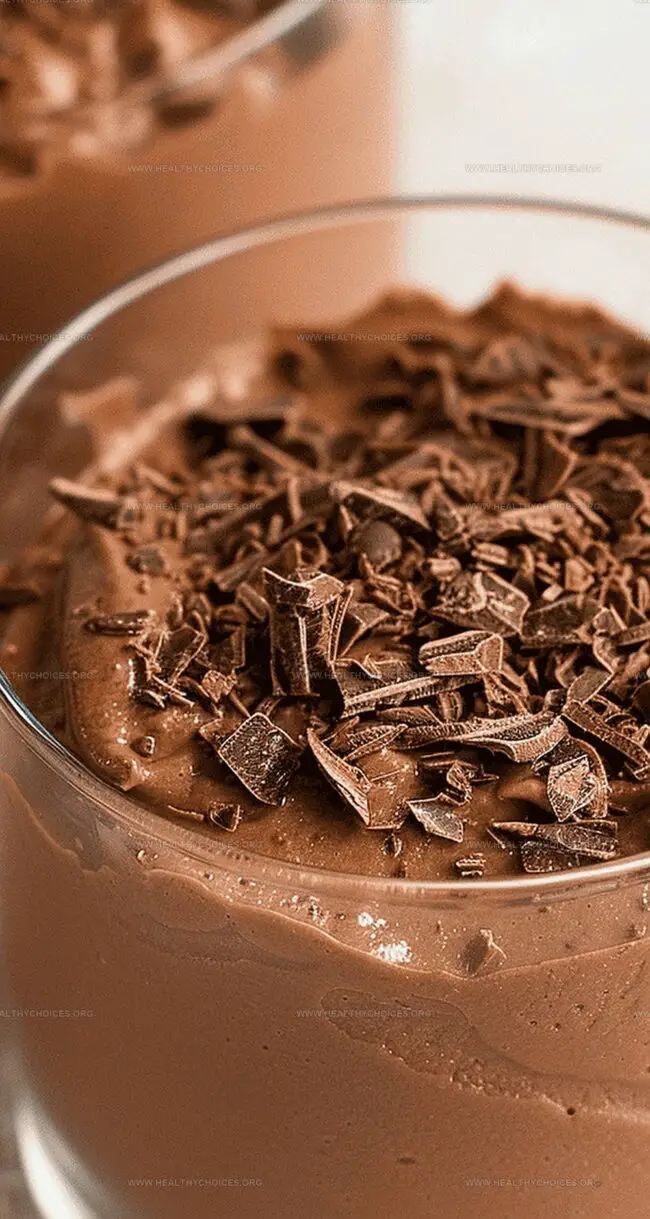
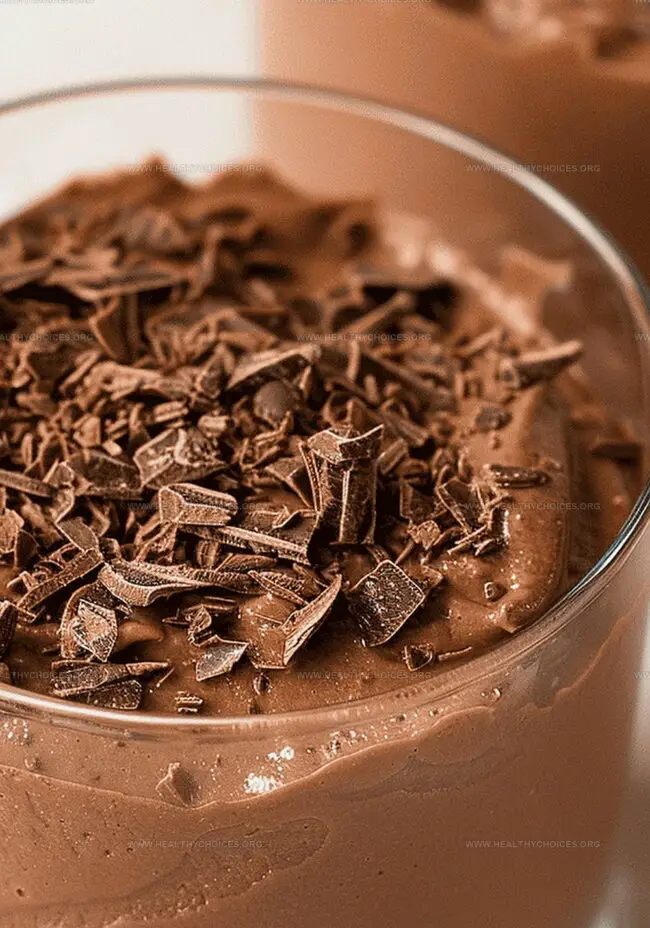
Grated Chocolate: Decorative element that adds extra chocolate crunch and visual appeal to the mousse.
Optional Flavor Enhancers:
Optional Protein Powder: Boosts protein content and can enhance overall nutritional profile.
Optional Vanilla Extract: Subtle flavor enhancer that complements chocolate’s richness.
How to Blend the Perfect Vegan Chocolate Mousse
Step 1: Prepare Chocolate Bath
Warm up the dark chocolate by placing it in a heat-safe bowl over steaming water. Let it gently melt, creating a smooth chocolatey pool. Set aside a small piece for sprinkling later.
Step 2: Capture The Bean Liquid Gold
Pour white beans into a sieve, catching the magical liquid called aquafaba in a bowl underneath. This secret ingredient will create incredible fluffiness.
Step 3: Whip Up The Aquafaba Clouds
Grab your electric whisk and transform the bean liquid into fluffy clouds. Whisk continuously for 8-10 minutes until peaks stand tall and proud.
Step 4: Blend Chocolate And Beans
Combine melted chocolate and drained beans in a blender. Pulse and scrape sides until creating a silky smooth mixture.
Step 5: Create Dreamy Mousse
Gently fold the chocolate-bean blend into whipped aquafaba. Mix with care to maintain the airy texture.
Step 6: Chill And Set
Pour mousse into serving dishes and refrigerate for one hour until perfectly set.
Step 7: Finish With Chocolate Sprinkle
Before serving, shower mousse with grated chocolate shavings.
Step 8: Store And Enjoy
Keep mousse refrigerated and devour within 3 days for maximum deliciousness.
Tips for Rich and Smooth Vegan Chocolate Mousse
How to Store Vegan Chocolate Mousse for the Week
Pairings That Work with Vegan Chocolate Mousse
Variations to Amp Up Your Vegan Chocolate Mousse
Print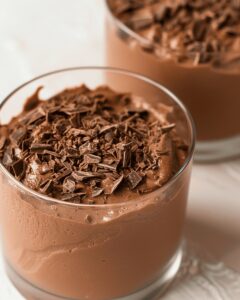
Vegan Protein Chocolate Mousse Recipe
- Total Time: 1 hour 15 minutes
- Yield: 2 1x
Description
Rich chocolate mousse delivers pure plant-powered indulgence without dairy or eggs. Silky smooth Mexican chocolate blends with creamy avocado and rich cocoa, creating a luxurious dessert you’ll savor to the last spoonful.
Ingredients
Main Ingredients:
- 5.3 ounces / 150 grams dark chocolate
- 1 can (14 ounces / 400 milliliters) white beans/cannellini
Sweeteners and Enhancers:
- 2 tablespoons maple syrup
- 1 teaspoon vanilla extract
Garnish and Optional Additions:
- Fresh berries
- Chopped nuts (optional)
Instructions
- Create a double boiler by placing a heat-safe bowl over a pot of simmering water, carefully melting most of the dark chocolate while setting aside a small portion for garnishing.
- Drain the white beans through a fine-mesh strainer, capturing the cloudy liquid (aquafaba) in a separate clean bowl.
- Using an electric mixer, vigorously whip the aquafaba until it transforms into a cloud-like, glossy foam with stiff, sturdy peaks that maintain their shape when the bowl is inverted.
- Combine the drained white beans with the melted chocolate in a high-powered blender or food processor, pulsing and scraping the sides to create a smooth, uniform mixture.
- Delicately incorporate the chocolate-bean blend into the whipped aquafaba, using a gentle folding technique to preserve the airy texture and prevent deflation.
- Distribute the velvety mousse evenly among four elegant serving vessels, ensuring a consistent presentation.
- Refrigerate the mousse for approximately one hour to allow it to set and develop a rich, creamy consistency.
- Just before serving, elegantly garnish the chilled mousse with fine chocolate shavings, adding a decorative and flavorful touch.
- Store the protein-packed dessert in the refrigerator and consume within three days for optimal taste and texture.
Notes
- Aquafaba magic transforms white bean liquid into a fluffy, protein-packed dessert base that mimics traditional mousse texture.
- Whipping aquafaba requires patience and consistent electric whisking until stiff peaks form, which takes about 8-10 minutes.
- Dark chocolate provides rich flavor and nutritional benefits, melting smoothly over hot water for perfect incorporation.
- Blending chocolate with drained white beans creates a creamy, protein-enhanced mousse foundation.
- Gentle folding technique prevents deflating the whipped aquafaba, maintaining its airy, light consistency.
- Refrigeration helps the mousse set and develop deeper flavors, with a recommended storage time of 3 days for optimal freshness.
- Prep Time: 15 minutes
- Cook Time: 1 hour
- Category: Desserts, Snacks
- Method: Blending
- Cuisine: American
Nutrition
- Serving Size: 2
- Calories: 295
- Sugar: 0g
- Sodium: 1mg
- Fat: 9g
- Saturated Fat: 3g
- Unsaturated Fat: 6g
- Trans Fat: 0g
- Carbohydrates: 41g
- Fiber: 12g
- Protein: 13g
- Cholesterol: 0mg
David Bennett
Founder & Head Recipe Developer
Expertise
Culinary Nutrition, Recipe Development, Nutritional Counseling, Food Science
Education
Johnson & Wales University
Certified Nutrition Specialist® (CNS®)
David Bennett is the lead recipe creator and nutrition expert at HealthyChoices.org, your friendly space for tasty meals that nourish body and mind.
With a Culinary Nutrition degree from Johnson & Wales University and a Certified Nutrition Specialist® credential, David pairs practical nutrition with delicious cooking, creating recipes you’ll crave daily.
At Healthy Choices, David shares easy, nutritious dishes and smart cooking tips to make healthy eating something everyone can enjoy, with no complicated diets needed.