Zippy Mexican Burrito Roll Ups Recipe: Fun Finger Food Fiesta
Unwrapping culinary magic starts with these mouthwatering Mexican burrito roll ups recipe that promise a taste explosion in every bite.
Packed with zesty flavors and vibrant ingredients, these roll-ups deliver a quick and satisfying meal option.
Tender tortillas embrace a delectable blend of seasoned meats, fresh vegetables, and creamy cheeses.
Each roll combines traditional Mexican spices with modern convenience, making them perfect for busy weeknights or casual gatherings.
The recipe brings restaurant-style excitement directly to your kitchen with minimal prep time.
Layers of bold textures and rich flavors ensure these roll-ups will become an instant favorite at your dining table.
You’ll want to roll up your sleeves and start cooking right away!
Quick Recipe Overview
Ingredients List for Mexican Burrito Roll Ups
For Base Layer:For Flavor Boosters:For Serving Accompaniment:Tools to Roll Up Mexican Burritos
How to Assemble Mexican Burrito Roll Ups
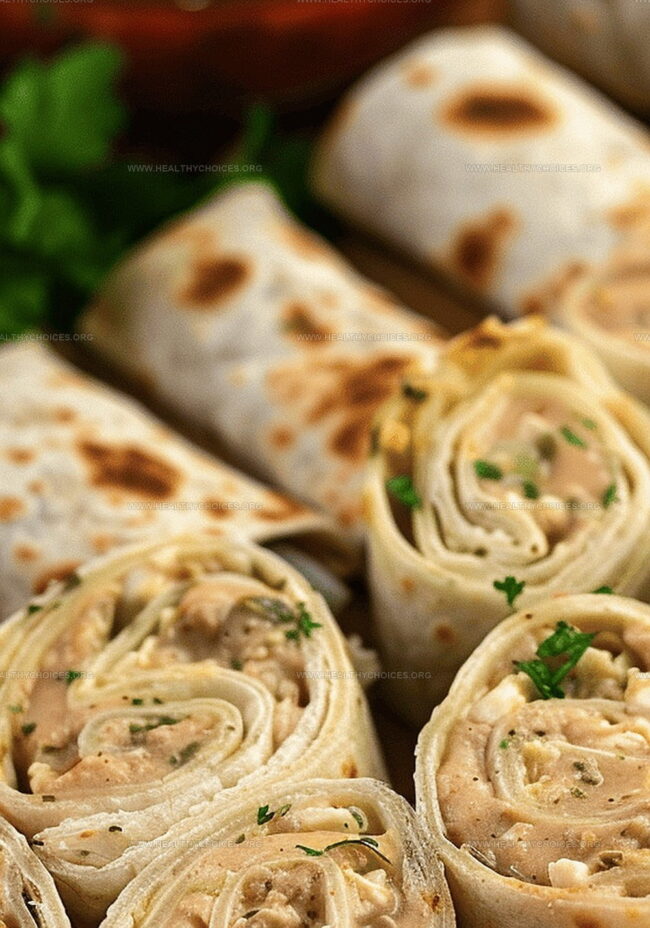
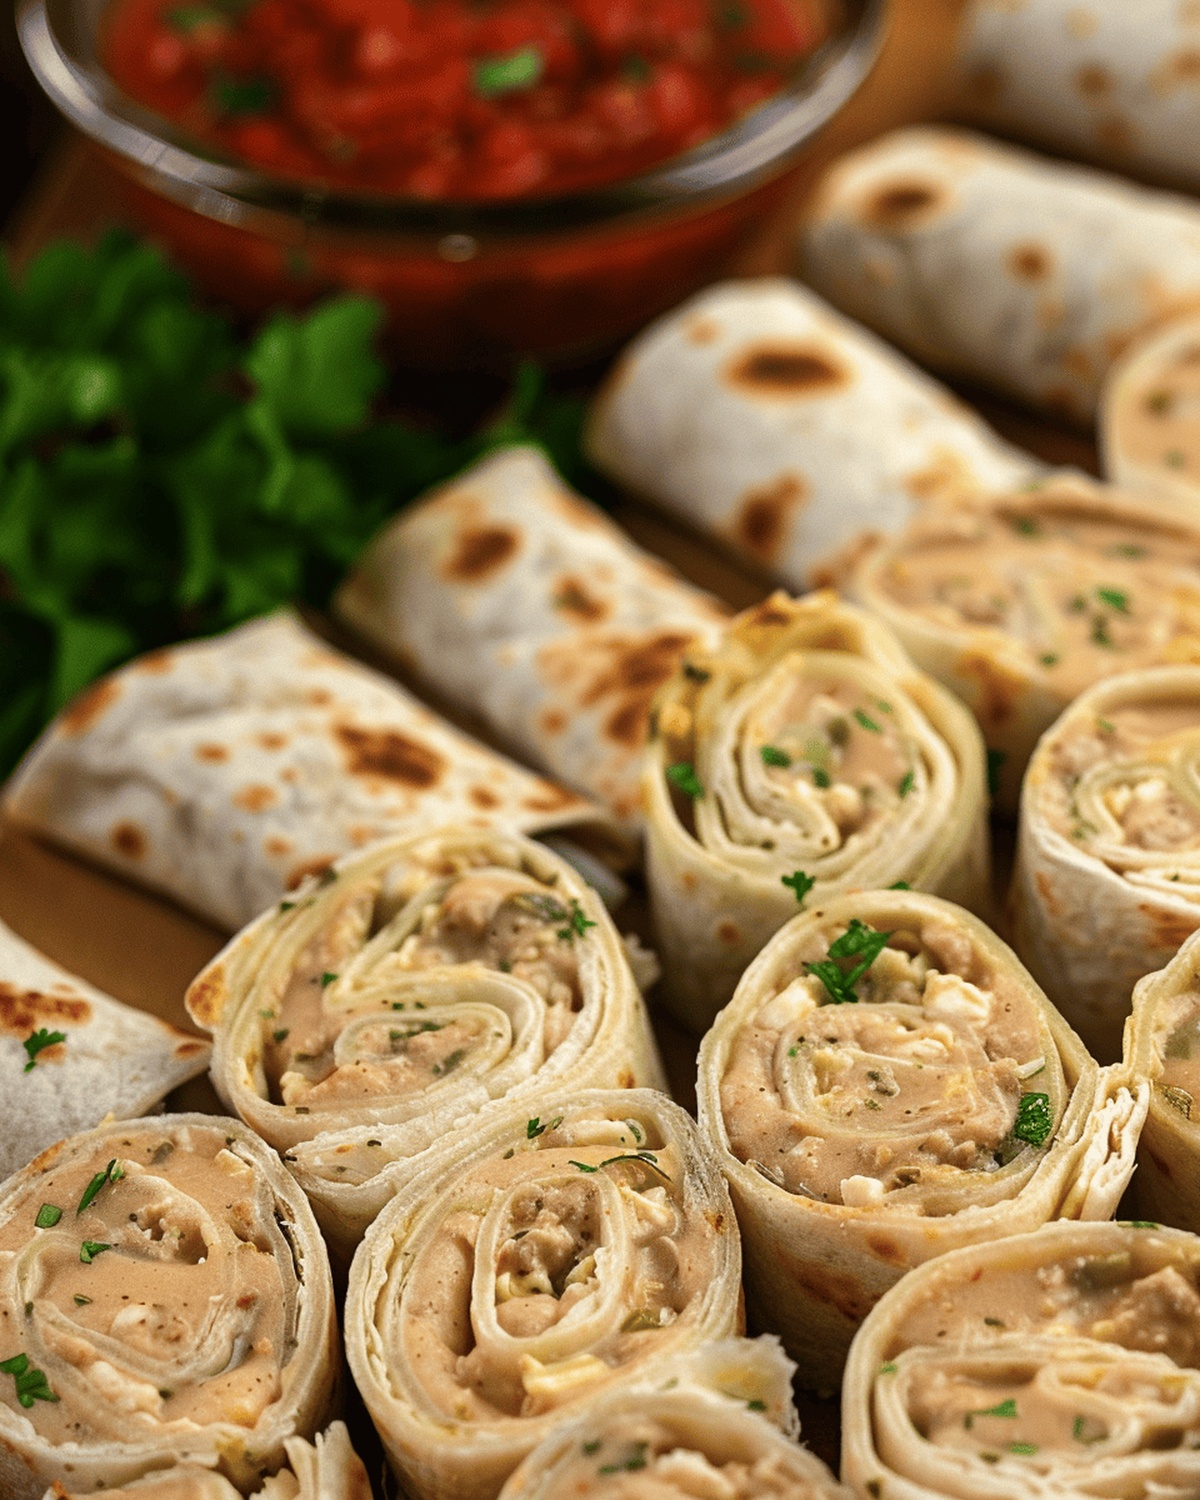
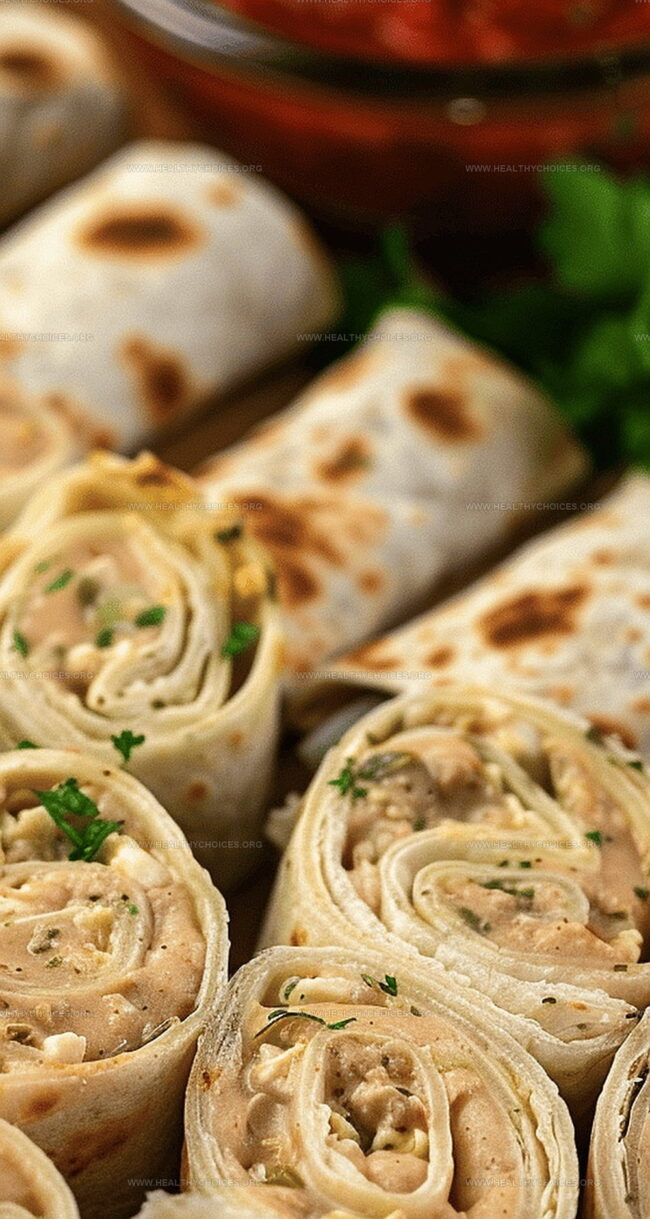
Combine creamy refried beans with zesty green chiles and smooth cream cheese in a mixing bowl, blending until the mixture becomes a silky, uniform spread.
Gently spread the flavorful mixture across each soft tortilla, ensuring an even coating from edge to edge.
Carefully roll each tortilla into a tight cylinder, similar to a delicate jelly roll, positioning them seam-side down on a serving tray.
Allow the rolled tortillas to rest in the refrigerator for at least half an hour, giving the ingredients time to mingle and develop a rich, harmonious taste.
Right before presenting, slice the rolled tortillas into bite-sized pieces, creating elegant round sections perfect for easy nibbling and dipping into fresh salsa.
Variation Tips for Mexican Burrito Roll Ups
Serving Mexican Burrito Roll Ups for Parties
How to Store Mexican Burrito Roll Ups
Print
Cheesy Mexican Burrito Roll Ups Recipe
- Total Time: 40 minutes
- Yield: 9 1x
Description
Savory Mexican burrito roll ups blend zesty ingredients for a quick party appetizer or light meal. Fresh tortillas wrapped with spicy fillings promise delicious bites that satisfy hungry guests with minimal kitchen effort.
Ingredients
- 8 ounces (227 grams) cream cheese, softened
- 16 ounces (454 grams) refried beans
- 1 package burrito-size tortillas
- 4 ounces (113 grams) diced green chiles
- salsa, for serving
Instructions
- Filling Creation: Blend refried beans, green chiles, and cream cheese in a medium bowl until achieving a smooth, unified consistency that promises rich flavor and creamy texture.
- Tortilla Assembly: Spread the bean mixture evenly across each tortilla, extending from edge to edge to guarantee a complete flavor profile in every bite.
- Rolling Technique: Craft compact cylindrical rolls using a gentle yet firm rolling motion, positioning each tortilla seam-side down to secure the filling and maintain structural integrity.
- Chilling Process: Refrigerate the prepared rolls for 30 minutes, allowing flavors to meld and the mixture to slightly solidify, enhancing both taste and slicing precision.
- Serving Preparation: Slice the chilled rolls into half-inch sections with a sharp knife, creating elegant, bite-sized appetizers that showcase the vibrant Mexican-inspired filling.
- Plating Design: Arrange the cut sections on a decorative platter, accompanied by salsa, creating an inviting and colorful presentation that promises a delightful culinary experience.
Notes
- Chill for Perfect Texture: Refrigerate rolls for at least 30 minutes to help ingredients meld and firm up, creating a more stable and flavorful appetizer.
- Spread Evenly: Ensure bean mixture covers entire tortilla from edge to edge for consistent taste and smooth rolling technique.
- Slice with Precision: Cut rolls into uniform half-inch sections for elegant, bite-sized portions that look professional and are easy to eat.
- Dipping Recommendation: Serve with fresh salsa to add a zesty, bright flavor contrast to the creamy, rich bean filling.
- Prep Time: 10 minutes
- Cook Time: 0 minutes
- Category: Lunch, Snacks
- Method: Blending
- Cuisine: Mexican
Nutrition
- Serving Size: 9
- Calories: 250
- Sugar: 2 g
- Sodium: 600 mg
- Fat: 12 g
- Saturated Fat: 6 g
- Unsaturated Fat: 4 g
- Trans Fat: 0 g
- Carbohydrates: 30 g
- Fiber: 5 g
- Protein: 10 g
- Cholesterol: 25 mg
Emily Roberts
Content Creator & Kitchen Tips Specialist
Expertise
Dietary Planning, Public Health Nutrition, Nutritional Education, Content Development
Education
University of Illinois at Urbana-Champaign
Registered Dietitian Nutritionist (RDN)
Emily Roberts is our content specialist and registered dietitian at HealthyChoices.org. With her Master’s degree in Nutritional Sciences from the University of Illinois and her Registered Dietitian Nutritionist certification, Emily uses her deep nutrition knowledge to write helpful, easy-to-understand guides about healthy eating.
Her warm, practical advice empowers readers to confidently make healthier choices, turning everyday meals into simple moments of wellness and joy.